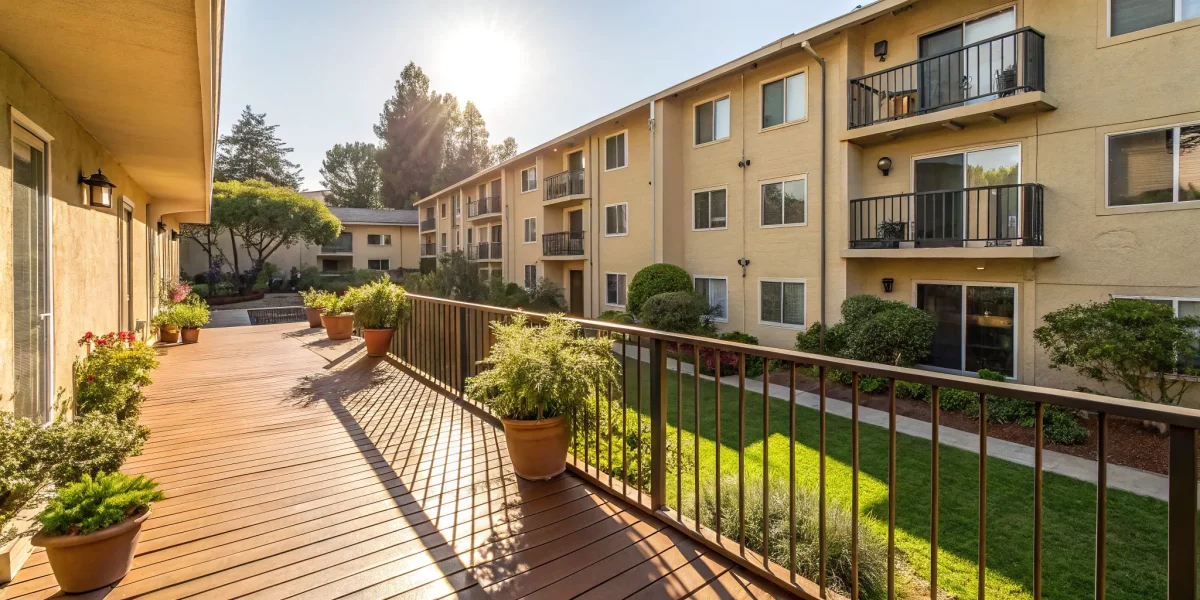
Selling your home in a competitive market means highlighting every feature that adds value and gives buyers confidence. While fresh paint and updated kitchens get a lot of attention, one of the most powerful selling points is overhead. A transferable roof warranty signals that your home has been well-maintained with quality materials, removing a major point of hesitation for potential buyers. For those looking to maximize their property’s appeal, understanding how a transferable roof warranty for new homeowners works is essential. It’s not just a piece of paper; it’s a tangible asset that can help you close the deal faster and for a better price.
Key Takeaways
- A transferable warranty adds real value: For sellers, it’s a key selling point that signals a well-maintained home, while for buyers, it provides a crucial financial safety net against future defects and expensive repairs.
- The transfer process requires immediate action: A warranty doesn’t transfer automatically. You must formally request the transfer from the provider and submit all required documents before a strict deadline, which is often within 60 days of closing.
- Your coverage depends on proper care: To keep your warranty valid, you must maintain detailed records, perform regular maintenance, and only hire certified professionals for repairs. If a warranty isn’t transferable, a new inspection is the best first step toward securing your own protection.
What Is a Transferable Roof Warranty?
Think of a warranty as a promise. The company that made your roofing materials is promising that their product is well-made and will perform as expected. If a shingle is defective, for example, they agree to fix or replace it. This promise typically covers manufacturing flaws, not issues from normal wear and tear or storm damage.
A “transferable” warranty means this promise can be passed from one homeowner to the next. When you sell your house, the new owner inherits the remaining warranty coverage. This is a huge benefit, especially since a roof is one of the most critical and expensive parts of a home. Most manufacturer warranties on materials are transferable, but the terms can differ from one company to another. Having this continued protection is a major source of confidence for a new buyer, much like the assurance that comes with a LeakFREE® roof certification.
How Does a Transferable Warranty Work?
Transferring a roof warranty isn’t automatic—it requires you to take specific action. Most manufacturers have a formal process you must follow, usually right after the home sale closes. This typically involves notifying the company in writing about the change in ownership within a strict timeframe, like 30 or 60 days. You may also need to pay a small administrative fee. It’s also common for warranties to be transferable only once, from the original owner to the second. To ensure the coverage remains intact, it’s essential to follow the required steps and meet all deadlines.
Why This Matters When Buying or Selling a Home
For anyone selling a home, a transferable roof warranty is a powerful marketing tool. It signals to potential buyers that you invested in quality materials and that the roof is a durable, protected asset, not a looming expense. This can make your property more attractive and add to its overall value. For buyers, it provides immediate peace of mind. You can move in knowing that the roof is covered against defects, which is one less thing to worry about. Since many homeowners sell before their roof warranty expires, this feature benefits all property stakeholders, from the family moving in to the real estate agents facilitating the sale.
What Kinds of Roof Warranties Are Transferable?
When you’re looking at a home, the roof warranty might not be the first thing on your mind, but it should definitely be on the list. A transferable warranty can save you thousands in unexpected repairs down the road. The good news is that many types of roof warranties can be passed from one homeowner to the next. However, they aren’t all the same. The protection you get depends entirely on the type of warranty attached to the roof.
Understanding the differences is key. Some warranties cover only the shingles, while others cover the labor involved in the installation. Then there are specialized certifications that offer a different kind of protection altogether. Knowing which type of coverage a home has helps you assess the true value and long-term security of your investment. Let’s break down the three main types of roof warranties you’re likely to encounter and what makes each one transferable.
Manufacturer Warranties
A manufacturer warranty comes directly from the company that made the roofing materials, like the shingles or tiles. This type of warranty covers defects in the materials themselves. If the shingles start to fail prematurely because of a manufacturing flaw, this is the warranty that kicks in. Most manufacturer warranties are designed to be transferable to a new homeowner, which is a huge plus. They typically last a long time—anywhere from 25 to 50 years, with some even marketed as “lifetime” warranties. This provides lasting assurance that the materials on your roof were built to stand the test of time.
Workmanship (or Installer) Warranties
While a manufacturer warranty covers the what (the materials), a workmanship warranty covers the how (the installation). This warranty is provided by the roofing contractor who installed the roof and protects you from issues caused by improper installation, like misplaced nails or incorrectly sealed flashing. These are often the source of frustrating leaks. Workmanship warranties can also be transferable, especially if the contractor ties the warranty to the property address instead of the original owner. They usually last for a shorter period, typically between two and 10 years, but they cover some of the most common roofing problems new homeowners face.
NRCIA’s LeakFREE® Roof Certification
Beyond traditional warranties, there’s another powerful form of protection: a certification. The NRCIA’s LeakFREE® Roof Certification is a unique warranty that specifically guarantees a roof will not leak for a set period, typically two to five years. This isn’t about defective materials or faulty installation—it’s a straightforward promise of performance. For a homebuyer, this certification provides incredible peace of mind. It confirms the roof has passed a rigorous inspection by a certified professional and is backed by a warranty that directly addresses the biggest fear of any homeowner: water damage from a leaky roof.
What Does a Transferable Roof Warranty Actually Cover?
So, you’ve confirmed the roof warranty is transferable. That’s great news! But what exactly are you inheriting? It’s easy to think of a warranty as a magic shield that protects you from any and all roof problems, but the reality is a bit more specific. Think of it less like an all-inclusive insurance policy and more like a guarantee on specific parts of your roof system.
Most transferable warranties are designed to cover two main areas: the physical materials used on your roof and the quality of the installation work. Understanding what falls under each category—and more importantly, what doesn’t—is the key to making the most of this valuable asset. A comprehensive warranty, like the kind that comes with a LeakFREE® roof certification, provides clear terms so you know exactly what protection you have. Let’s break down the typical coverage you can expect.
Material Defects
This is the most straightforward part of the warranty. Coverage for material defects protects you if the roofing products themselves fail before their time. This comes directly from the manufacturer—the company that made the shingles, underlayment, or other components. For example, if your shingles start cracking, curling, or losing their protective granules way sooner than they should, this part of the warranty would kick in. It’s the manufacturer’s promise that their products will stand up to the elements as advertised. It won’t cover damage from a fallen tree, but it will cover a batch of shingles that simply wasn’t made right.
Workmanship Issues
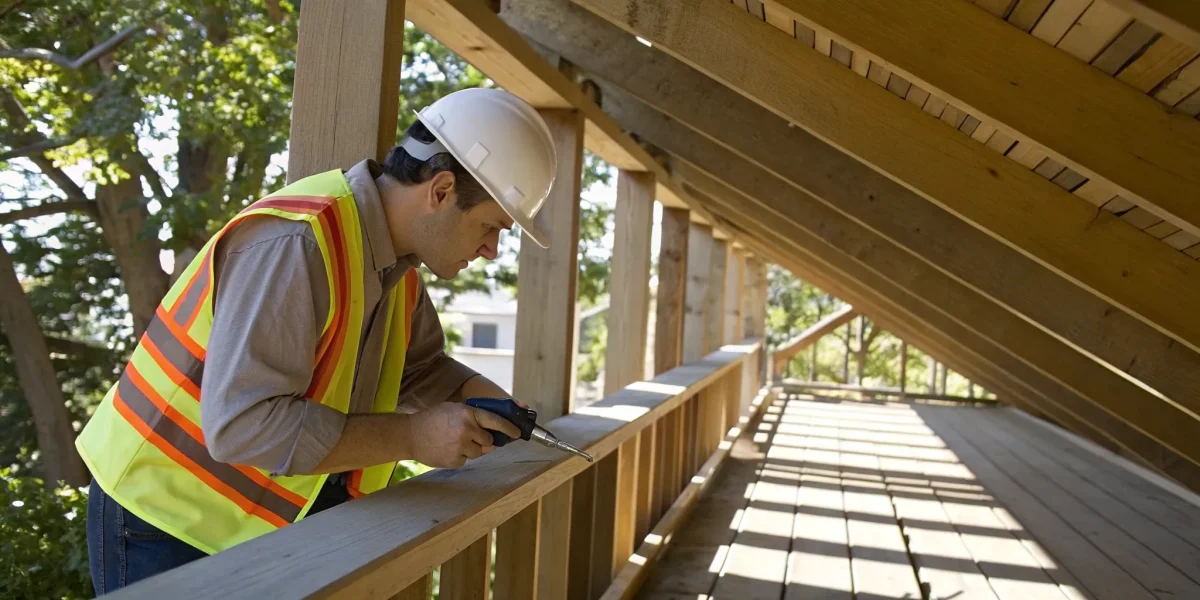
You can have the best roofing materials in the world, but if they’re installed incorrectly, they won’t protect your home. That’s where a workmanship warranty comes in. This coverage protects you from mistakes made by the original roofing contractor during installation. Think improperly fastened shingles that blow off in a moderate wind, or poorly installed flashing around a chimney that causes a leak. This part of the warranty is the installer’s guarantee of their own work. It’s a major reason why it’s so important to work with certified professionals who stand behind their installation quality.
Common Exclusions and Limitations
Now for the fine print. It’s just as important to know what your warranty doesn’t cover. Warranties are designed to protect against defects, not general aging or outside forces. This means things like normal wear and tear over the years, damage from severe weather like hail or hurricanes, or issues caused by someone walking on the roof improperly are typically excluded. Another major limitation to be aware of is that many warranties can only be transferred once—from the original owner to the second. If you’re the third owner, you may be out of luck. Always read the details to understand these boundaries.
Your Step-by-Step Guide to Transferring a Roof Warranty
So, you’ve closed on your new home and have a transferable roof warranty—congratulations! Now, you just need to get it officially switched over to your name. The process is usually pretty straightforward, but it requires careful attention to detail and, most importantly, timing. While the exact steps can differ slightly between manufacturers and installers, they generally follow the same path. Think of it as updating the contact information on a very important account. Following these steps will ensure your roof remains protected without any frustrating gaps in coverage, giving you one less thing to worry about as you settle in.
Step 1: Gather Your Documents
Before you pick up the phone or start filling out forms, get all your paperwork in order. Having everything you need on hand will make the entire process much smoother. You’ll typically need a copy of the original warranty, if the previous owner left it for you, along with your closing documents. Specifically, you’ll want a copy of the deed or closing papers that show the names of the old and new owners and the date the property changed hands. This proves the official transfer of ownership. If you have any records of past repairs or inspections, it’s a good idea to have those ready, too.
Step 2: Contact the Warranty Provider
Next, you’ll need to reach out to the company that issued the warranty. This could be the shingle manufacturer or the original roofing contractor. You can usually find their contact information on the warranty document itself or with a quick search online. Some companies have a dedicated phone number or an online portal specifically for submitting transfer requests. When you get in touch, let them know you are the new homeowner and want to initiate the warranty transfer. They will guide you to the correct forms and confirm exactly what they need from you to complete the process.
Step 3: Submit the Paperwork (On Time!)
This is the most critical step. Nearly every warranty provider has a strict deadline for transfer requests. In many cases, you must submit all the required paperwork and the transfer request within 60 days of the property closing date. This window can sometimes be as short as 30 days, so don’t put this task on the back burner. Missing this deadline can void your opportunity to transfer the warranty altogether. Mark the date on your calendar and treat it with the same importance as setting up your utilities. It’s a simple but crucial step to secure your LeakFREE® roof protection.
Step 4: Pay Any Transfer Fees
Finally, be prepared to pay a transfer fee. Most manufacturers and contractors charge a nominal fee to process the paperwork and update their records. While it might seem like just another small expense during a costly time, this fee is a tiny investment compared to the thousands of dollars you could spend on an unexpected roof repair. The cost is usually quite reasonable and well worth the continued peace of mind. When you contact the provider in Step 2, be sure to ask about the fee amount and the accepted payment methods so you’re ready to complete the final step without any delays.
What to Know About Fees and Restrictions
Transferring a roof warranty sounds straightforward, but a few details in the fine print can trip you up if you’re not paying attention. Before you finalize the process, it’s smart to get clear on any associated costs and timelines. These rules are set by the manufacturer or installer, so they can vary quite a bit. Knowing what to expect will help you make sure your warranty transfer goes smoothly and your roof stays protected without any unwelcome surprises. Let’s walk through the three most common restrictions you’ll encounter.
Transfer Fees
When you’re budgeting for a new home, every dollar counts. That’s why it’s important to know that you might have to pay a fee to complete the warranty transfer. This isn’t a hidden cost, but it’s one that new homeowners can easily overlook. The amount can range from a small administrative charge to a more significant sum, depending entirely on the warranty provider. The best approach is to ask about this fee as soon as you know a warranty is in play. Getting this information upfront helps you budget accurately and decide if the transfer makes financial sense for you.
Transfer Deadlines
Time is of the essence when it comes to warranty transfers. Most providers enforce a strict transfer deadline, which is a specific window of time after the property sale closes to get the paperwork submitted. This period is often around 30 to 90 days, but it can vary. Missing this deadline isn’t a small mistake—it could void the warranty completely, leaving you without the coverage you were counting on. As soon as you take ownership of the home, make it a priority to find out the deadline and get the process started. Set a reminder on your calendar so this critical task doesn’t fall through the cracks.
One-Time Transfer Rules
Here’s a detail that can really affect the long-term value of your warranty: many can only be transferred one time. This means if you’re buying a home from the original owner, you can have the warranty transferred to your name. However, when you eventually sell the home, the warranty may not be transferable to the next buyer. This is a common practice for many manufacturers. Understanding this limitation is key, as it impacts the resale value you might associate with the warranty. Always clarify if you are the first and only person the warranty can be transferred to.
The Real Benefits of a Transferable Warranty
A transferable roof warranty is much more than just a document; it’s a powerful asset that provides tangible value for both home sellers and buyers. It signals a well-maintained property and offers a layer of security that can make a huge difference during and after a real estate transaction. Let’s look at the key advantages that make it such a sought-after feature.
Protect Your Wallet from Unexpected Repairs
A new roof is one of the most significant investments you can make in a home, so protecting it makes perfect sense. A transferable warranty shields the new owner from the financial shock of sudden leaks or material failures. Instead of facing thousands of dollars in unexpected repair bills, they have a clear path to getting the issue resolved. This protection is a core benefit of programs like the LeakFREE® roof certification, which ensures the roof’s integrity. For a new homeowner already managing moving costs and other expenses, this financial safety net is invaluable.
Add Value and Appeal to Your Home
When you’re selling your home, you want it to stand out. A transferable roof warranty is a fantastic selling point that can make your property more attractive to potential buyers. It demonstrates that you’ve taken excellent care of the home and gives buyers confidence in their purchase. For real estate professionals, a home with a transferable warranty is easier to market because it removes a major point of hesitation for buyers. This added assurance can lead to faster offers and a smoother closing process, ultimately adding real value to your home.
Gain Confidence and Peace of Mind
Beyond the financial and market advantages, a transferable warranty offers something equally important: peace of mind. For sellers, it’s the satisfaction of passing on a well-protected home. For buyers, it’s the relief of knowing their new home’s first line of defense is covered. Many homeowners sell their properties long before a roof warranty expires, making this transferability a common and highly valuable feature. This assurance allows new owners to focus on settling in and making the house their own, without worrying about what’s happening overhead.
How to Check if a Roof Warranty Is Transferable
Figuring out if a roof warranty can be passed on to you isn’t always a straightforward process, but it’s a crucial step in protecting your investment. The good news is that with a little bit of digging, you can get a clear answer and understand exactly what you’re working with. The key is knowing where to look and what questions to ask. Think of it as a small investigation that can save you from major headaches and expenses down the road.
Before you get overwhelmed, just remember that all the information you need is out there. You just have to follow a few simple steps to uncover it. Whether you’re buying a new home or just want to understand the warranty on your current one, here’s how you can find out if it’s transferable.
Read the Fine Print
I know, reading the fine print is nobody’s favorite activity. But when it comes to a warranty for something as important as your roof, it’s absolutely worth your time. The warranty document is your single best source of information. Look for specific language that mentions transferability, new owners, or successors. Pay close attention to the details, including who is covered, the duration of the coverage, and any exclusions, like damage from storms or improper installation. The document should spell out the exact process for transferring the warranty, if it’s allowed.
Go Straight to the Source
If you can’t find the paperwork or the language is confusing, the most reliable next step is to go straight to the source. This means contacting the manufacturer or the original roofing contractor who installed the roof. Have the property address handy and any details you know about the roof installation. They can confirm whether the warranty is transferable and walk you through the necessary steps. This direct approach cuts through any guesswork and gives you the most accurate information possible.
Common Myths About Warranty Transfers
It’s easy to assume that all warranties transfer from one homeowner to the next, but that’s a common myth. The reality is that transferability varies a lot between manufacturers and installers. Many warranties can only be transferred once—typically to the second owner of the home. If you’re the third or fourth owner, you might be out of luck. It’s also critical to follow the rules outlined in the warranty to the letter. Missing a deadline or failing to register the transfer on time can make the warranty void. This is why a standardized option, like the NRCIA’s LeakFREE® roof certification, can offer much-needed clarity and consistency.
What to Do if the Warranty Isn’t Transferable
Discovering the roof warranty on your new home isn’t transferable can feel like a setback, but it’s not a dead end. Think of it as an opportunity to get a clear, up-to-date understanding of your roof’s condition and secure protection that’s tailored to you. Instead of inheriting the terms and potential limitations of an old warranty, you get to start fresh with a clean slate. This situation puts you back in control, allowing you to choose a protection plan that gives you genuine peace of mind.
Rather than worrying about what you’ve lost, focus on the proactive steps you can take. Your two best moves are to explore new coverage options and to schedule a professional roof inspection. These actions will not only protect your investment but also equip you with the knowledge and documentation you need as the new homeowner. It’s a straightforward path to ensuring your roof is sound and your finances are shielded from unexpected repair costs down the road.
Your Options for Roof Protection
If the original warranty is off the table, your first step is to secure new coverage. You can look into purchasing a standalone roof protection plan from a trusted provider. This is often a better alternative, as it’s a new agreement that starts with your ownership. For example, an NRCIA LeakFREE® roof certification functions as a warranty, providing assurance that your roof is sound and covering the cost of certain repairs if a leak occurs. By investing in a new plan, you gain confidence knowing exactly what’s covered, the duration of the term, and who to call if an issue arises.
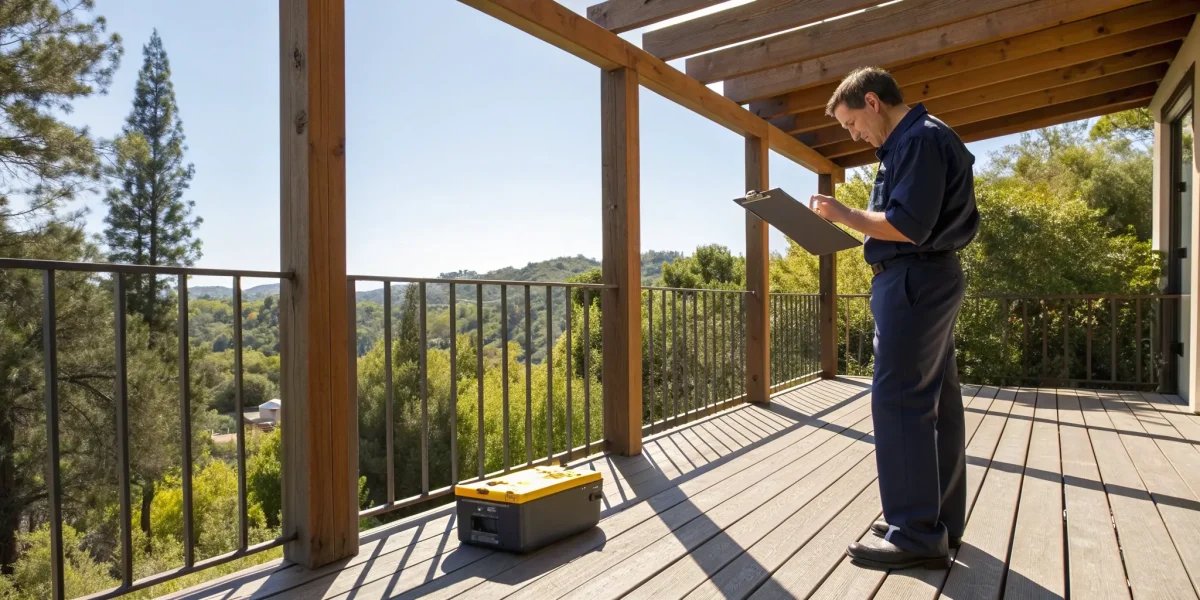
Get a New Inspection and Certification
Before you can get new coverage, you need to know the exact condition of your roof. Arranging for a new inspection and certification is a non-negotiable step. A certified inspector can identify any existing problems or areas of concern that may have been overlooked, giving you a complete picture of your roof’s health. This professional assessment is often required to qualify for a new warranty or protection plan. More importantly, it provides you with official documentation that confirms your roof meets specific standards, which is invaluable for your own records and can be a major asset if you decide to sell the home in the future.
Get the Most Out of Your Transferable Warranty
A transferable warranty is a fantastic asset, but it’s not something you can just set and forget. To ensure it stays valid and provides real protection for years to come, you need to be a little proactive. Think of it like the title to your car—it’s valuable, but you need to handle the paperwork and maintenance correctly to keep it that way. Fortunately, maintaining your warranty coverage isn’t complicated. It really comes down to three simple habits: keeping organized records, staying on top of routine maintenance, and only hiring qualified professionals for any roof work. By following these steps, you can make sure your warranty is ready to go when you need it most.
Keep Good Records
If you want the warranty transfer process to be smooth, good record-keeping is your best friend. As one expert points out, “Good record-keeping by the original homeowner makes the transfer process much easier for the new buyer.” Start a dedicated folder—digital or physical—for all your roofing documents. This should include the original warranty certificate, the installation contract, and receipts for any repairs or maintenance you’ve had done. It’s also a great idea to save reports from any professional inspections. Having this paper trail makes it simple to prove you’ve met the warranty’s requirements and is essential for maintaining a LeakFREE® roof certification. When it’s time to sell or file a claim, you’ll have everything you need in one place.
Don’t Skip Regular Maintenance
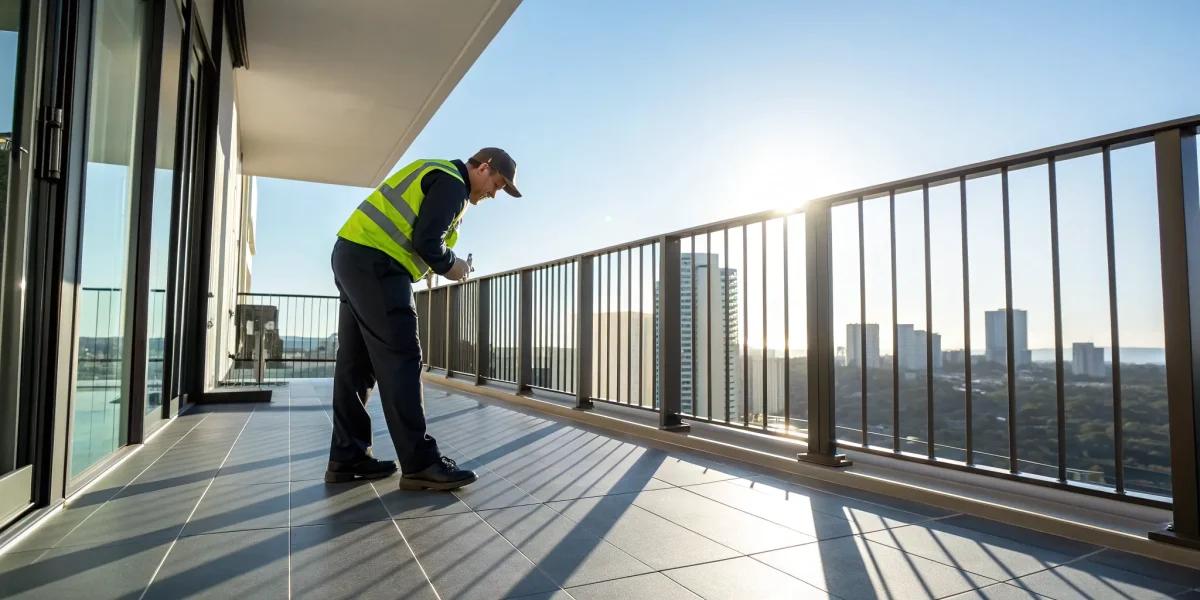
One of the quickest ways to void a roof warranty is by neglecting basic upkeep. In fact, “Poor maintenance is a common reason warranties get voided.” Most warranties require you to perform regular maintenance to keep the coverage active. This doesn’t have to be a huge chore. Simple tasks like cleaning your gutters, trimming overhanging tree branches, and visually checking for loose or damaged shingles can make a big difference. Beyond your own check-ups, scheduling periodic professional inspections is a smart move. A certified inspector, like those who serve homeowners through the NRCIA, can spot subtle issues you might miss, helping you address small problems before they become major, costly headaches. Consistent care protects your warranty and extends the life of your roof.
Always Work with Certified Pros
When it’s time for a repair or inspection, who you hire matters—a lot. Using an unqualified or uncertified contractor can actually void your warranty. That’s why it’s so important to “choose an experienced roofing company that can help you understand and get the right warranty.” Certified professionals are trained to work according to manufacturer specifications and industry best practices, ensuring any repairs maintain your warranty’s integrity. Before hiring anyone, ask for their credentials and confirm they have completed the necessary training and education. Working with certified experts gives you confidence that the job will be done right and your valuable warranty will remain intact.
Related Articles
- Is a Roof Warranty Transferable? A Complete Guide
- Is Your Roof Warranty Transferable to a New Owner?
- How Does a Roof Warranty Transfer? A Simple Guide
Frequently Asked Questions
What’s the real difference between a manufacturer warranty and a workmanship warranty? Think of it this way: a manufacturer warranty covers the product, while a workmanship warranty covers the project. The manufacturer promises that their shingles or tiles are free from defects. The roofing contractor, on the other hand, provides a workmanship warranty to promise that their team installed everything correctly. Both are important, as a great shingle installed poorly can still lead to leaks.
What happens if I miss the deadline to transfer the warranty? Unfortunately, missing the transfer deadline usually means the warranty becomes void. Most providers are very strict about their timelines, which are often 30 to 60 days after the home sale. This is why it’s so important to make the transfer a top priority as soon as you close on your new home. If you let it slip, you lose the opportunity to secure that valuable coverage.
Does a transferable warranty cover damage from a storm or a fallen tree? Generally, no. Transferable warranties are designed to protect you from material defects or installation errors, not from external events or “acts of God.” Damage from things like hail, high winds, or falling tree limbs would typically be a matter for your homeowner’s insurance policy. The warranty is there to ensure the roof performs as it should under normal conditions.
Is an NRCIA LeakFREE® Roof Certification different from a standard warranty? Yes, it serves a unique purpose. While traditional warranties cover why a roof might fail (like a bad shingle or a misplaced nail), an NRCIA LeakFREE® Roof Certification is a straightforward guarantee of performance. It certifies that your roof has passed a rigorous inspection and promises it will not leak for a specified period. It’s less about the parts and more about the result: a dry home.
Why do I have to pay a fee to transfer the warranty? The transfer fee is typically a small administrative charge to cover the company’s cost of updating their records, processing the paperwork, and officially assigning the warranty protection to you as the new owner. While it might feel like another closing cost, it’s a minor investment to ensure thousands of dollars in potential roof protection remains valid under your name.