Roof Inspection Report Template Free: A Pro Guide

Get a roof inspection report template free, plus expert tips on customizing your reports for clients. Make your roof assessments clear, detailed, and professional.

The physical work of a roof inspection is only half the job. The other half happens back at the office, turning field notes and photos into a coherent report for your client. This administrative work can be time-consuming and repetitive, taking you away from revenue-generating tasks. Streamlining this process is key to running a more efficient business. Instead of reinventing the wheel for every inspection, a structured template provides a ready-made format to quickly organize your findings. It ensures you cover all critical points without wasting time on formatting. A great roof inspection report template free download can be a game-changer, helping you produce professional reports faster and get back to what you do best.

Contact Us Now

Key Takeaways

  • Build Your Report on a Strong Foundation: A professional report is more than a checklist. Ensure yours includes client and property details, a thorough breakdown of the roof system, and high-quality photos to support every finding, establishing your credibility from the start.
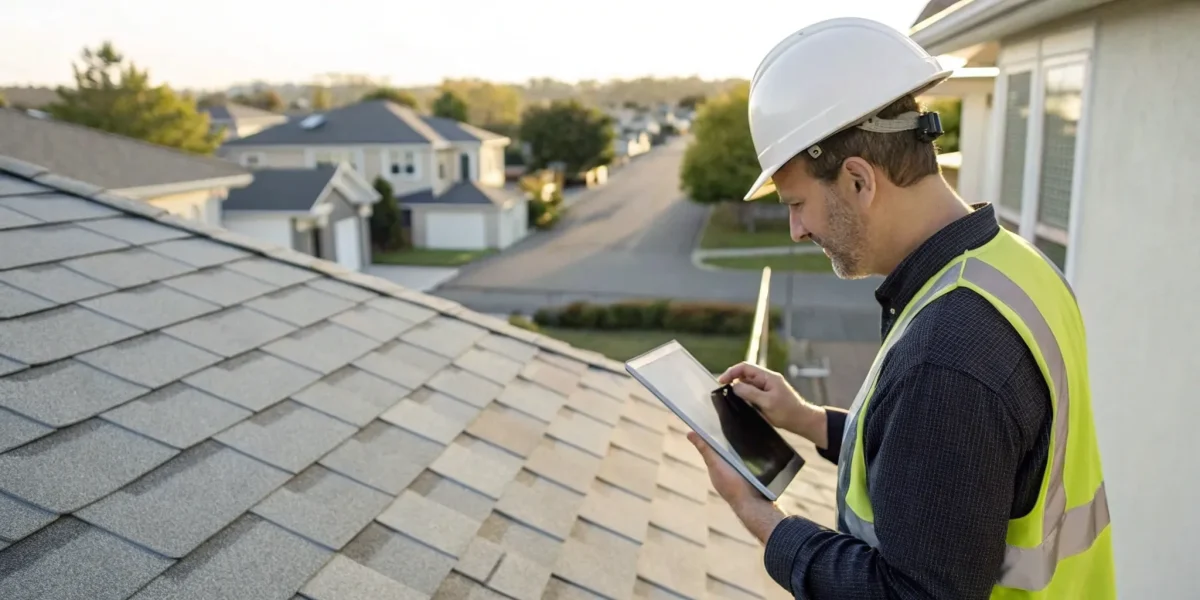
  • Go Digital to Streamline Your Workflow: Ditch the clipboard and embrace digital tools or specialized software. This allows you to customize reports with your branding, complete inspections on-site, and instantly integrate photos, saving you time and delivering a more polished product to your clients.
  • Make Your Recommendations Clear and Actionable: The most valuable part of your report is the guidance you provide. Translate your technical findings into a clear, prioritized plan using a simple rating system and specific recommendations, empowering property owners to make confident decisions about maintenance and repairs.

What Is a Roof Inspection Report Template?

Think of a roof inspection report template as your professional playbook. It’s a standardized document that guides you through every step of a roof assessment, ensuring you cover all the critical checkpoints without missing a beat. This framework helps you document the roof’s condition in a clear, consistent, and professional way. Instead of starting from scratch every time, a template provides a structured format to record your findings, from the type of roofing material to the state of the flashing and gutters. Ultimately, it allows you to create a detailed, easy-to-understand report that helps your clients plan for necessary repairs and ongoing maintenance.

Why a Solid Report Matters

A well-crafted report does more than just list problems—it builds trust and showcases your expertise. Using a standardized template makes your business look more professional and ensures that every inspector on your team delivers consistently high-quality work. For the client, a clear report demystifies the condition of their roof. It translates your technical findings into something a homeowner or property manager can easily understand, empowering them to make informed decisions. This clarity is essential for everyone you work with, from real estate agents needing documentation for a sale to insurance adjusters assessing a claim. A solid report is your best tool for communication and credibility.

Who Needs a Roof Inspection Template?

Just about everyone involved with a property transaction or maintenance needs a reliable roof inspection report. For roofing professionals and inspectors, templates are essential for streamlining workflows and maintaining a high standard of service. Homeowners and potential buyers rely on these reports to understand the health of a major component of their investment and to budget for future expenses. Real estate agents use them to provide transparent information during property sales, helping transactions move forward smoothly. Insurance companies and mortgage underwriters also depend on these documents to accurately assess risk and validate claims, making a standardized template a vital tool across the industry.

What to Include in Your Roof Inspection Report

A great roof inspection report does more than just list facts; it tells a clear story about the roof’s condition. Think of it as your primary communication tool with your client. It builds trust, demonstrates your expertise, and gives property owners the concrete information they need to make smart decisions. A vague or incomplete report can lead to confusion and frustration, while a detailed, well-organized one establishes you as a true professional. Every section should be clear, concise, and easy for a non-expert to understand. Let’s walk through the essential components that make up a comprehensive and effective report.

Property & Client Details

Before you get into the technical findings, start with the basics. This section grounds the entire report by clearly identifying who and what it’s for. Include the client’s full name, contact information, and the complete address of the inspected property. It’s also helpful to note the type of property, whether it’s a single-family home, a multi-unit building, or a commercial facility. This foundational information ensures the report is properly documented and easy to reference later. Think of it as the cover page of your assessment—it sets a professional tone and makes sure the right information gets to the right person.

Inspector Info & Site Conditions

This is where you establish your credibility and provide context for the inspection. Always include your name, your company’s name, and your contact information. If you’re certified, this is the place to list your credentials, like your status as an NRCIA certified inspector. Just as important is documenting the site conditions on the day of the inspection. Note the date, time, and weather—was it sunny, raining, or was there snow on the ground? These details matter because environmental conditions can affect visibility and access, providing a more complete picture of the circumstances surrounding your assessment.

Roof System Details

Now it’s time to outline the specifics of the roof itself. This section gives your client a technical snapshot of their roofing system. Detail the roof type (e.g., gable, hip, flat) and the primary roofing material used (e.g., asphalt shingles, metal panels, clay tiles). You should also estimate the age of the roof and note any visible signs of past repairs. Be sure to document the condition of key components like flashing, gutters, downspouts, vents, and chimneys. Providing this level of detail helps the client understand the makeup of their roof and gives context to the findings you’ll present next.

Key Findings: Exterior & Interior

This is the heart of your report. Here, you’ll present a thorough summary of your findings from both the exterior and interior inspections. For the exterior, document any issues like missing or damaged shingles, granule loss, popped nails, or compromised flashing. On the interior, look for signs of leaks, such as water stains on the ceiling, as well as issues in the attic like poor ventilation or mold. Using a checklist format can help you stay organized and ensure you don’t miss anything. The goal is to provide a clear, objective assessment that helps a homeowner understand if their roof qualifies for a LeakFREE® certification.

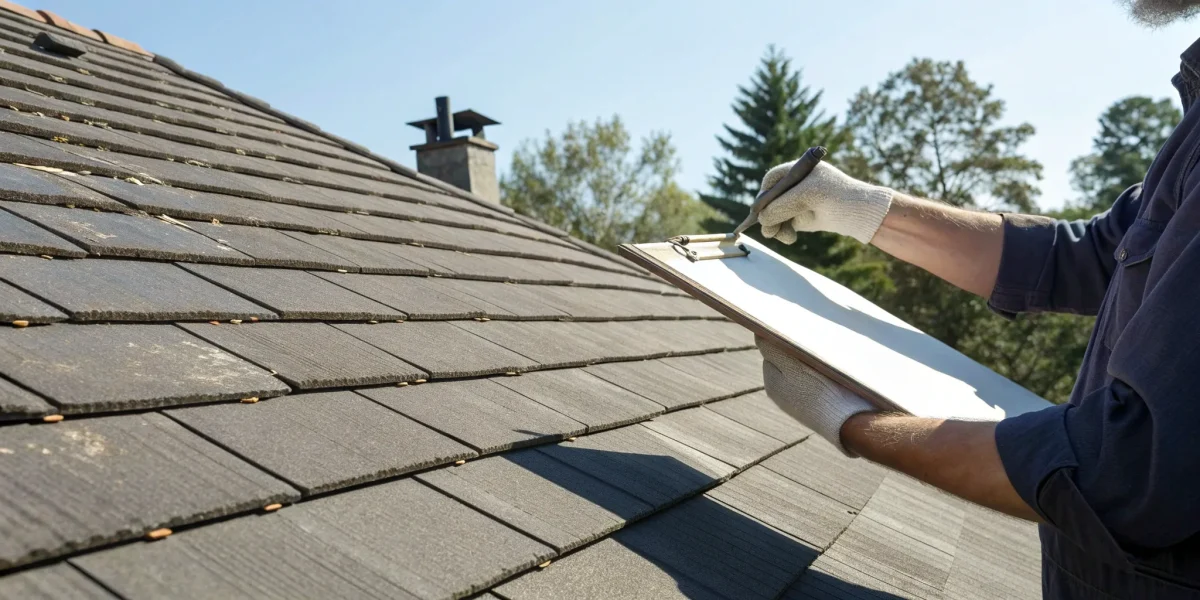
Documenting Damage with Photos

Visuals are everything. High-quality photos are non-negotiable in a professional roof inspection report because they provide undeniable proof of your findings. Take clear pictures of every issue you identify, from cracked shingles to rusted flashing. It’s also a good practice to include overview shots of each roof plane for context. To make your report even clearer, annotate your photos with arrows or circles to highlight specific areas of concern. This visual evidence makes it easy for the client to see exactly what you’re describing, bridging the gap between technical jargon and tangible reality.

Actionable Recommendations & Priorities

A report that only points out problems is only half-helpful. The final, and arguably most important, section should offer clear, actionable solutions. For each issue you’ve identified, provide a recommendation for repair or replacement. It’s incredibly useful to categorize these recommendations by urgency: what needs immediate attention to prevent further damage, what should be addressed in the near future, and what can simply be monitored. This approach transforms your report from a list of problems into a practical roadmap, empowering the property owner to plan and budget for necessary maintenance with confidence.

Where to Find the Best Free Roof Inspection Templates

Finding a reliable template is the first step toward creating professional, consistent reports. The good news is you don’t have to start from scratch. There are plenty of high-quality, free templates available that you can adapt for your business. The key is knowing where to look and what to look for. Whether you’re an independent inspector or part of a larger firm, the right template can save you time and help you deliver clear, valuable information to your clients. Let’s explore some of the best places to find free templates and decide which format is right for you.

Your NRCIA Member Resources

As an NRCIA member, you have access to a curated set of tools designed to help you succeed. We vet and provide resources that meet the highest industry standards, ensuring you can perform your job with confidence and professionalism. Our goal is to equip you with everything you need to conduct thorough inspections and produce clear, authoritative reports. By leveraging your NRCIA membership, you can access a wealth of information, including best practices for reporting and connections to industry-leading tools. This is one of the simplest ways to ensure your reports are comprehensive and aligned with the quality clients expect from a certified professional.

Other Reputable Template Sources

Beyond your member resources, several other platforms offer excellent free templates. Companies that create software for field service professionals often provide free tools to help you streamline your work. For example, Jobber offers a user-friendly roof inspection report template that makes it easy to document roof conditions and help clients plan for repairs. Another solid option is the standard MRCA Residential Roof Inspection Form, which you can find on sites like pdfFiller. These templates are a great starting point and can be customized to fit your specific needs, helping you maintain a professional image while ensuring you cover all the essential details in your inspections.

Choosing Your Format: Digital vs. Printable

When you select a template, you’ll need to decide between a printable PDF and a digital format. While paper forms might feel familiar, digital tools offer major advantages in efficiency and client communication. A digital report allows you to easily incorporate photos, share findings with a client via email instantly, and store records securely in the cloud. This approach not only saves paper but also makes your entire workflow smoother. Using a dedicated inspection software takes this a step further, letting you build custom reports, integrate with other business tools, and provide a more polished, modern experience for your clients.

Key Features of a Great Inspection Template

Not all templates are created equal. A truly great roof inspection template does more than just list findings—it acts as a powerful communication tool that protects your client, showcases your expertise, and streamlines your workflow. Think of it as the foundation of your final report. The right structure helps you present information clearly, ensuring your clients understand the condition of their roof and the reasoning behind your recommendations.

When you’re evaluating templates, look for a few key characteristics. A good template is organized, professional, and adaptable to the way you work. It should save you time in the field and at your desk, not create more administrative headaches. Whether you’re a seasoned inspector or just starting out, choosing a template with the right features will make your job easier and your reports more effective. The goal is to find a tool that helps you create a detailed, easy-to-understand report that empowers clients to plan for repairs and upkeep.

Logical Layout with Space for Photos

A great report tells a clear story, and that starts with a logical layout. The template should guide you through the inspection process systematically, from the client’s information to the final recommendations. This ensures you don’t miss a single detail and makes the final report easy for homeowners or property managers to follow. More importantly, look for a template that integrates photos directly alongside your notes. Visual evidence is your most powerful tool. A picture of a cracked shingle or damaged flashing placed right next to your written description makes the issue undeniable and helps clients grasp the urgency of a repair.

Professional Look & Custom Branding

Your inspection report is a direct reflection of your business. A sloppy, generic document can undermine your credibility, while a polished, professional report builds trust. The best templates allow you to add your company’s name, logo, and colors, reinforcing your brand identity. This simple touch makes the report instantly recognizable and helps clients remember your business for future needs or referrals. Presenting a clean, branded document shows you care about the details, which suggests you bring the same level of care to your inspections. This professional image is a key part of growing your reputation and your business.

Mobile-Friendly & Easy to Integrate

In this line of work, you’re rarely tied to a desk. Your tools need to be as mobile as you are. A top-tier template should be part of a system that works seamlessly on a tablet or smartphone, allowing you to input findings, take photos, and build the report directly from the roof. This on-site documentation saves hours of administrative work and reduces the risk of forgetting crucial details. The most effective solutions, like the NRCIA’s proprietary inspection software, let you create custom checklists and reports that can be completed right in the app, making your entire process faster and more accurate.

Easy-to-Use Checklists & Rating Systems

Consistency is key to providing reliable inspections. A template with a comprehensive checklist ensures you assess every component of the roof system, from the decking to the chimney flashing, every single time. This standardized approach is crucial for accuracy and liability. To make your findings clear, the template should also include a simple rating system. Using straightforward codes like G (Good), F (Fair – needs watching), and P (Poor – needs immediate action) translates complex technical assessments into terms anyone can understand. This helps clients quickly identify priorities without getting bogged down in jargon.

How Digital Tools Improve Your Reporting

Switching from a paper-based system to digital tools is one of the best moves you can make for your inspection business. It’s not just about saving paper; it’s about creating a more efficient, professional, and accurate workflow from start to finish. Digital reporting helps you capture information on-site, organize your findings logically, and deliver a polished final product to your clients in a fraction of the time. Think of it as your command center for every job, keeping all your notes, photos, and client details in one secure place.

This shift allows you to spend less time on administrative tasks and more time on what you do best: conducting thorough inspections. With the right software, you can generate comprehensive reports with just a few clicks, complete with your branding and high-resolution images. This level of professionalism builds client trust and sets you apart from competitors still relying on handwritten notes and clunky spreadsheets. By embracing technology, you’re not just improving a report; you’re refining your entire business process.

Streamline Your Work with NRCIA Software

Generic templates can only get you so far. Software designed specifically for roof inspectors understands your unique challenges and is built to solve them. The right tools make your work easier by automating repetitive tasks and guiding you through a logical inspection flow. Instead of juggling a clipboard, camera, and notepad, you can manage everything from a single device. NRCIA provides specialized inspection software that helps you create consistent, detailed, and professional reports every time. This ensures you cover all the necessary points for a thorough assessment, from material identification to documenting specific damage, all within a streamlined system.

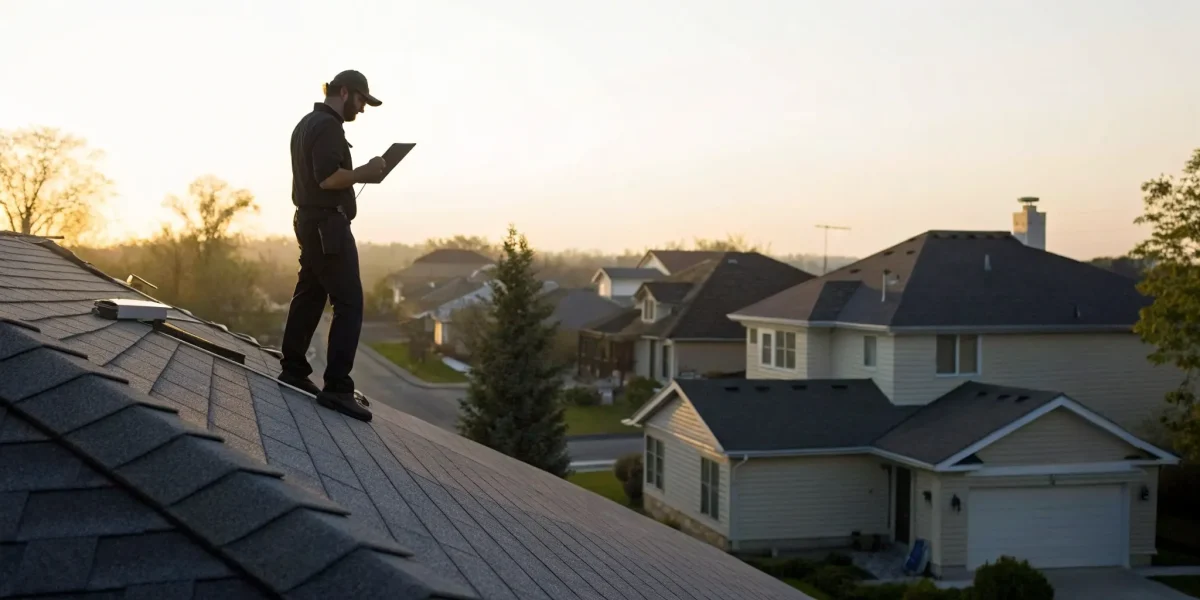
Leverage Mobile Apps & Cloud Storage

The real freedom of digital reporting comes from its mobility. Using a mobile app on a tablet or smartphone lets you complete your inspection report right on the roof. You can fill out checklists, type notes, and capture data in real-time, which drastically reduces the risk of forgetting crucial details by the time you get back to the office. All your information is then saved securely to the cloud, meaning you can access it from anywhere. No more worrying about losing paperwork or transferring files between devices. This accessibility ensures your reports are safe, organized, and ready whenever you or your client needs them.

Connect with Your Business Software

An inspection report is just one piece of the puzzle. The most effective digital tools integrate with your other business software to create a central hub for all your job information. When your reporting tool connects with your Customer Relationship Management (CRM) system, every client detail, job history, and communication log is stored in one place. This makes it incredibly easy for anyone on your team to access important data, whether they’re in the office or out in the field. This level of integration is a key benefit of our membership levels, which provide access to a connected ecosystem of professional resources.

Add Photos & Media in Real-Time

A picture is worth a thousand words, especially in a roof inspection report. Digital tools make it simple to add photos and other media directly into your report as you work. When you spot an issue like a cracked shingle or damaged flashing, you can snap a photo with your device and instantly embed it in the relevant section with your notes. This provides clear, undeniable visual evidence to support your findings and recommendations. For homeowners, seeing the problem firsthand builds trust and helps them understand the urgency of repairs, which is essential for delivering LeakFREE® certified roofs.

How to Customize Your Template for Better Results

A free template is a fantastic starting point, but the real magic happens when you make it your own. A generic report can feel impersonal and might not cover all the specific details your clients need. Customizing your template shows a higher level of professionalism and attention to detail, helping you stand out from the competition. A tailored report not only serves your clients better but also streamlines your workflow by ensuring you have the right fields for every job. Think of it as sharpening your most important tool.

A few thoughtful adjustments can transform a basic form into a powerful asset for your business, ensuring every report you deliver is clear, comprehensive, and a reflection of your quality work. This process allows you to pre-populate information that’s standard for your business, saving you time on every inspection. It also lets you structure the report in a way that makes sense for your process, guiding you through the inspection logically so you don’t miss a thing. Ultimately, a customized report is more than just a document; it’s a communication tool that builds confidence and clarifies complex information for your clients, making your recommendations easier to understand and act upon.

Add Your Company Branding

Your report is a direct representation of your business, so it should look the part. Adding your company name, logo, and brand colors is a simple step that makes a huge impact. It instantly makes the document look more official and helps clients remember who they hired. This consistent branding reinforces your professional identity and builds trust. When a real estate agent or homeowner receives a polished, branded report, it communicates that you are an established and credible expert. This small detail can be the difference between a one-time job and a long-term professional relationship built on recognized credentials and quality service.

Adapt the Template for Different Roofs

One size rarely fits all, especially when it comes to roofs. While the core elements of an inspection are similar, a sprawling commercial roof has different needs than a residential gable roof. Your template should be flexible enough to adapt. For example, commercial roofs are often larger and may have complex HVAC systems, drainage, and materials that require a more detailed form. You might create different versions of your template for residential, commercial, and specialized inspections, like those for multi-family properties. This ensures you’re always collecting the right information and providing the most accurate assessment for the specific type of property you’re inspecting.

Incorporate Local Building Codes

Following local rules and regulations isn’t just good practice—it’s essential for ensuring your inspections are compliant and credible. Building codes can vary significantly from one city or county to the next. Take the time to research your local requirements for roof inspections and integrate them directly into your template. This might include specific checklist items, required disclosures, or terminology. Having these codes built into your report demonstrates your expertise and commitment to safety. It also protects you and your client by ensuring everything is up to standard. Continuous professional training is a great way to stay current on these codes.

Establish a Consistent Rating System

Clarity is key when communicating your findings. A client needs to understand the condition of their roof at a glance, without getting lost in technical jargon. Implementing a simple, consistent rating system is the best way to achieve this. For example, using codes like “G” for Good, “F” for Fair (needs monitoring), and “P” for Poor (needs immediate action) makes your assessment easy to digest. Whatever system you choose, use it consistently across all your reports. This helps clients, especially repeat ones like property managers, quickly identify priorities. Using a dedicated inspection software can help you standardize this system effortlessly.

Common Reporting Mistakes to Avoid

Even the best template can’t save you from a few common reporting pitfalls. A polished, professional report builds trust and shows clients you’re an expert they can rely on. On the flip side, a report filled with vague descriptions, missing information, or generic advice can undermine your credibility and leave your client confused. Think of your report as the final, tangible product of your hard work on-site. It’s your chance to clearly communicate the roof’s condition and provide real value that helps clients make informed decisions about maintenance and repairs.

A great report is more than just a list of findings; it’s a roadmap for the property owner. It helps them understand the current state of their roof and plan for the future. When you take the time to create a thorough and clear document, you position yourself as a trusted advisor, not just an inspector. Avoiding a few key mistakes will ensure your reports are always clear, helpful, and professional. Let’s walk through the most common errors and how you can steer clear of them to deliver a report that stands out.

Forgetting to Tailor the Report

A template is your starting point, not the final word. One of the biggest mistakes is treating it like a one-size-fits-all document. Every roof and every client is different. A report for a first-time homebuyer will need a different tone and level of detail than one for an experienced commercial property manager. Your goal is to create a report that speaks directly to your client’s needs and concerns. Before you start writing, think about who you serve and what they need to know. Use the template to structure your findings, but fill it with custom details, specific observations, and language your client will understand. A personalized report shows you’ve paid attention and are providing a service tailored just for them.

Skipping Photos & Clear Recommendations

A picture is worth a thousand words, especially in a roof inspection report. Vaguely describing an issue like “damaged flashing” doesn’t have the same impact as a clear, high-resolution photo showing exactly what you mean. Always include photos to document any damage, areas of concern, or even parts of the roof that are in great shape. Visuals make your findings undeniable and help the client see what you see. Just as important, don’t just point out problems—offer solutions. A report that’s only a list of issues can feel overwhelming. Provide clear, actionable recommendations for how and when issues should be addressed. Prioritizing repairs helps clients create a plan and a budget, turning your report into a truly valuable tool for maintaining their LeakFREE® roof.

Missing Signatures and Dates

This might seem like a small detail, but it’s a critical one. An unsigned and undated report looks unprofessional and can even be considered incomplete. Your signature and the date of the inspection validate the document, making it official. This is especially important for reports used in real estate transactions, insurance claims, or for warranty purposes, as it establishes a clear record of the roof’s condition at a specific point in time. Make it a final checklist item before sending any report: confirm it’s signed and dated. This simple step adds a layer of authority and protects both you and your client. Using dedicated inspection software can help streamline this, as many platforms automatically add dates and allow for easy digital signatures, ensuring you never miss this crucial step.

For Homeowners: How to Get a Report You Can Trust

When it comes to your home, your roof is the first line of defense against the elements. So, when you need an inspection, you want to be absolutely sure the report you receive is accurate, thorough, and easy to understand. A vague or incomplete report can leave you with more questions than answers and potentially lead to costly surprises down the road. The goal isn’t just to get a piece of paper; it’s to get a clear roadmap that helps you make informed decisions about maintenance, repairs, or even the purchase of a new home.

Getting a report you can rely on comes down to a few key steps. It starts with choosing the right professional, continues with your involvement during the process, and ends with knowing what a high-quality report should contain. By taking an active role, you can ensure you have a complete picture of your roof’s health. This empowers you to plan for the future and protect your investment, giving you true peace of mind. We work with homeowners every day to provide this clarity and confidence.

Hire a Certified Inspector

The single most important step you can take is to hire a certified inspector. Anyone can climb a ladder and look at your roof, but a certification means the inspector has undergone specific training and adheres to a professional standard. A good roof inspection report helps you understand your roof’s condition and plan for any necessary maintenance or repairs, and a certified professional is trained to deliver exactly that. When you work with an NRCIA-certified inspector, you’re partnering with someone who has been trained to a national standard, ensuring a consistent and thorough evaluation every time. Don’t be afraid to ask for credentials before you hire—a true professional will be happy to provide them.

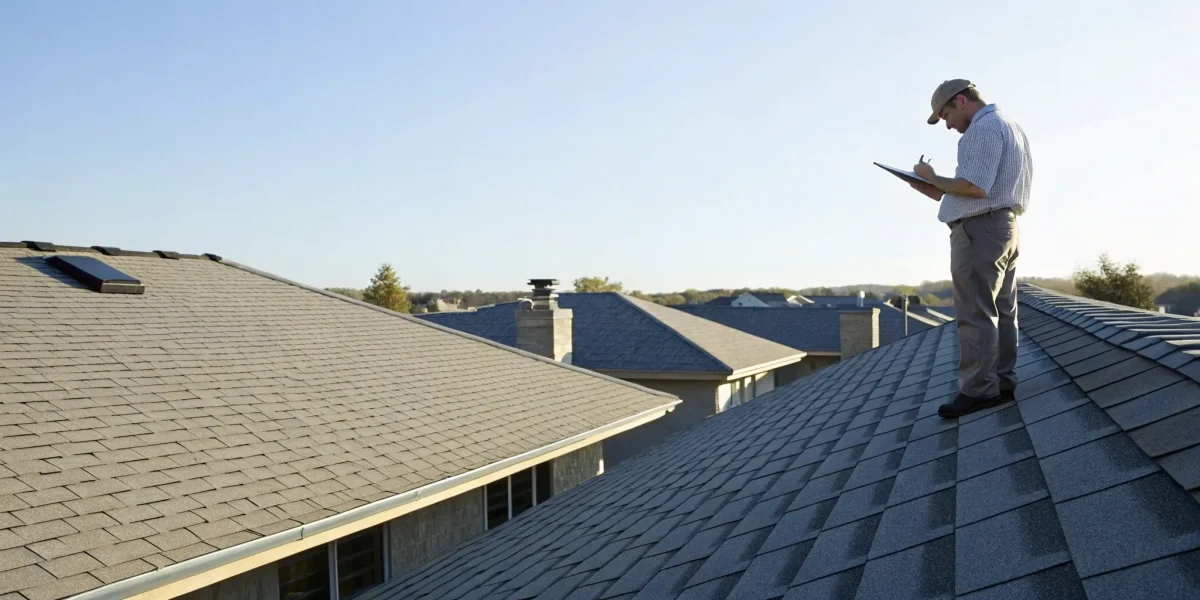
Be Present for the Inspection

While you should let the inspector do their work without interruption, being present during the appointment is a great idea. You don’t need to follow them onto the roof, but being available on the ground allows you to ask questions and get immediate feedback. Inspectors look for things like cracks, sagging, missing shingles, standing water, and damage from weather or foot traffic. Seeing a potential issue with your own eyes while the inspector explains its significance can be much more impactful than just reading about it later. This is your chance to learn about your roof from an expert and gain a deeper understanding of the final report.

Ask for a Detailed, Photo-Rich Report

A trustworthy report is built on evidence. Vague statements like “some shingles are worn” aren’t helpful. Instead, your report should be detailed and filled with high-resolution photos. You should always ask for photos to show any damage or specific parts of the roof the inspector is talking about. A comprehensive report will include sections for your information, the roof’s details, exterior and interior findings, a clear damage assessment, and actionable recommendations. The best inspectors use modern inspection software to generate these professional, photo-rich reports, making it easy for you to see exactly what they see and understand what needs to be done next.

Related Articles

Contact Us Now

Frequently Asked Questions

Why should I use a template instead of just creating my own report from scratch for each job? Think of a template as your quality control system. Starting from scratch every time opens the door for inconsistencies and forgotten details, especially on busy days. A template ensures you follow the same thorough process for every inspection, which protects you from liability and guarantees your client receives a comprehensive assessment. It also saves you a significant amount of administrative time, allowing you to focus on the inspection itself rather than on formatting a document.

My clients aren’t roofers. How can I make my technical findings easy for them to understand? This is where a great report truly shines. The key is to translate your technical assessment into a clear, practical story. Use high-quality photos with annotations to show exactly what you’re talking about—visuals are a universal language. Also, implement a simple rating system, like categorizing issues by urgency (e.g., “Immediate Action,” “Monitor,” “Good Condition”). This helps clients quickly grasp the priorities without getting bogged down in industry jargon.

Is a digital report really that much better than a printed one? Absolutely. While a printed report can get the job done, a digital one streamlines your entire process and delivers a more professional experience. With a digital tool, you can embed high-resolution photos directly into the report on-site, generate the final document instantly, and email it to your client before you even leave their driveway. It also creates a secure, easily accessible record of all your jobs, which is invaluable for your business and your clients.

If I use a template, how do I keep my reports from looking generic and the same as my competitors’? A template is your foundation, not the finished product. The best practice is to customize it to reflect your business. Adding your company logo, name, and brand colors is the first step. More importantly, you should tailor the content to the specific job and client. A report for a commercial property manager will have a different focus than one for a first-time homebuyer. This personalization shows you’re not just checking boxes but providing a thoughtful, expert service.

As a homeowner, what’s the biggest red flag I should look for in an inspection report? The biggest red flag is a lack of specific evidence. If a report makes claims about damage without providing clear photos to back them up, you should be skeptical. Another warning sign is vague language or a report that only lists problems without offering clear, prioritized recommendations for solutions. A trustworthy report should be a helpful roadmap that empowers you to act, not a confusing list of problems that leaves you with more questions than answers.

Free Roof Inspection Report Template & Pro Tips

Get a free roof inspection report template plus expert tips for clear, professional reports that help you impress clients and grow your roofing business.

After you leave a property, your report is what stays behind to do the talking for you. Its primary job is to communicate the roof’s condition in a way that empowers the owner to make smart, informed decisions. A simple list of issues without context or priority is overwhelming and unhelpful. A structured roof inspection report template provides the framework you need to tell a complete story. It guides you to document everything from the roof’s materials to specific areas of damage, complete with photo evidence and clear recommendations. This transforms your report from a technical summary into a valuable, actionable plan for your client.

Contact Us Now

Key Takeaways

  • Think of Your Report as Your Best Salesperson: A polished, professional report does the selling for you. It builds immediate trust and shows clients why you’re the right choice for the job before you even send a quote.
  • Make It Easy for Clients to Understand: Ditch the technical jargon. Use clear photos and prioritize your recommendations so property owners can easily grasp the situation and feel confident in your advice.
  • Standardize Your Workflow to Save Time: Using a consistent template or specialized software is the fastest way to create thorough, professional reports every time. This simple change protects your business and frees you up to focus on what you do best.

What Is a Roof Inspection Report Template?

Think of a roof inspection report template as your professional playbook. It’s a structured document that guides you through a systematic assessment of a roof, ensuring you don’t miss a single detail. The template provides dedicated sections to record everything from the roof’s age and materials to visible damage, wear and tear, and potential problem areas. Using a template means every inspection is thorough and consistent, which is the foundation of a trustworthy report.

This structured approach is essential for translating your findings into a clear, understandable format for your client. Instead of a jumble of notes, you present a polished, professional document that clearly outlines the roof’s current condition. It helps homeowners, property managers, and real estate agents grasp the situation quickly and make informed decisions. For professionals looking to standardize this process, using dedicated inspection software can take the guesswork out of creating and managing these reports, ensuring every client receives the same high level of detail and care.

Why Roof Reports Matter for Your Business

A detailed roof inspection report is one of the most powerful tools you have for building client trust. When you hand over a thorough, easy-to-read document, you’re not just telling a customer what’s wrong; you’re showing them your expertise and commitment to quality. These reports provide the clarity clients need to understand whether a simple repair will suffice or if a full replacement is on the horizon. By clearly documenting your findings, you empower them to make confident decisions about their property. This level of professionalism strengthens your reputation and sets your business apart from the competition, leading to more referrals and repeat business.

Who Benefits from a Standardized Template?

Frankly, everyone involved benefits from a standardized template. For you, the inspector or contractor, it creates a consistent workflow that guarantees a comprehensive evaluation every time. You can move through the inspection efficiently, knowing you’ve covered all your bases. For homeowners and property buyers, a standardized report provides a clear, reliable record of the roof’s health, making it easy to understand any necessary actions. This transparency is crucial, especially when a LeakFREE® roof certification is involved. Ultimately, your entire company gains a more professional image and a streamlined reporting process, making communication with all parties simple and effective.

What to Include in Your Roof Inspection Report

A thorough roof inspection report does more than just list problems—it tells a complete story about the roof’s condition, helping your client make informed decisions. Think of it as your most powerful communication tool. When you hand over a report that is clear, detailed, and professional, you build immediate trust and set yourself apart from the competition. A great report covers all the essential bases, leaving no room for confusion or doubt. It should be organized logically, making it easy for anyone, from a homeowner to a property manager, to understand the findings and the recommended next steps. Let’s break down the key components that every comprehensive roof inspection report should have.

Client and Property Information

Start with the basics to set a professional tone. This section grounds the entire report and serves as a clear record for both you and your client. Be sure to include the client’s full name and contact information, the complete address of the inspected property, and your own name and certification details. It’s also standard practice to note the date and time of the inspection. Adding a quick note about the weather conditions on that day—like “sunny and dry” or “overcast with light rain”—provides important context for your findings, especially when assessing moisture-related issues.

Roof System Details and Materials

Next, provide a detailed overview of the roof itself. This section gives your client a snapshot of what they’re working with. Include the type of building (e.g., single-family home, commercial building), the roof’s approximate age, and its expected remaining lifespan. You’ll want to specify the roofing materials used, such as asphalt shingles, metal panels, or tile. Documenting the roof’s structural components, like the pitch and underlying deck material, is also crucial. This information helps you create a baseline for the roof’s condition and is essential for recommending appropriate repairs or maintenance, ensuring everything aligns with the standards for LeakFREE® roofs.

Inspection Findings and Photo Evidence

This is the heart of your report. Clearly document everything you observed during the inspection, both good and bad. Note the condition of flashing, gutters, vents, and chimneys. Detail any signs of damage, such as cracked shingles, water stains, or granule loss. The single most effective way to communicate these findings is with high-resolution photos. Include pictures of any problem areas, using arrows or circles to pinpoint the exact issue. Visual evidence makes your findings undeniable and helps clients fully grasp the situation. Using a dedicated inspection software can make embedding and annotating photos a seamless part of your workflow.

Safety Notes and Accessibility

Your report should briefly mention how you accessed the roof, whether it was via a ladder, roof hatch, or another method. This detail is important for transparency and for planning any future work. More importantly, document any safety hazards you observed. This could include unstable structural elements, improper installations, or other issues that could pose a risk to anyone on the roof. Noting these concerns not only protects your client but also covers your own liability. This is especially critical for specialized jobs like California SB 721 inspections, where documenting the condition of elevated exterior elements is the primary focus.

Clear Recommendations and Priorities

Simply listing problems isn’t enough; a great report provides clear solutions. Conclude your findings with a section dedicated to actionable recommendations. For each issue you identified, suggest a specific course of action. To make it even more helpful, prioritize these recommendations. You can categorize them as “Urgent,” “Recommended,” or “Future Maintenance.” This helps the property owner understand what needs immediate attention and what can be budgeted for later. Providing this clear guidance positions you as a trusted advisor, not just an inspector. Honing this skill is a key part of professional development, which is why it’s a focus in our inspector training portfolio.

Why Use a Standardized Roof Inspection Template?

Switching from handwritten notes to a standardized template is one of the most effective changes you can make for your roofing business. It’s not just about looking organized; it’s about creating a system that saves you time, builds client trust, and protects your company. A consistent format ensures every inspection is just as thorough as the last, creating a reliable foundation for your reports. This simple shift can transform how you communicate with clients and manage your workflow, ultimately helping you secure more jobs and build a stronger reputation in the industry. By adopting a template, you’re investing in professionalism, clarity, and efficiency—three pillars of a successful business.

Look More Professional and Credible

First impressions are everything. When you present a client with a clean, well-organized, and consistently branded report, it immediately communicates your professionalism. It shows you have an established process and value thorough, detailed work. This isn’t just about appearances; it’s about building confidence from the very first interaction. A standardized format ensures you cover all the necessary checkpoints every single time, leaving no room for error or oversight. As one industry expert notes, “Good reports build trust with customers and show you are a professional.” This credibility is the bedrock of strong client relationships and can lead to more referrals, helping you stand out in a competitive market. It’s a key part of what it means to be a certified roof inspector.

Improve Client Communication and Trust

Most of your clients aren’t roofing experts. A report filled with technical jargon and disorganized notes will likely leave them feeling confused and uncertain. A standardized template helps you translate your expert findings into a clear, digestible format. When you “make it easy for homeowners to understand,” you empower them to make confident decisions about their property. A well-structured report “helps clients understand their roof’s condition and plan for any needed repairs or upkeep.” This transparency is fundamental to building trust. When clients feel you are a partner in protecting their investment, they are far more likely to approve your recommendations and hire you for future work. This is true for all the different clients you serve, from homeowners to property managers.

Streamline Your Workflow and Save Time

If you’re building each report from the ground up, you’re losing valuable time that could be spent inspecting more roofs or focusing on business growth. A template establishes a repeatable, efficient process. You’ll know exactly what information to gather on-site and where it fits into the final document. “Using technology and templates can save you time and make your reports look more professional.” Modern digital templates take this a step further, allowing you to quickly input findings, upload photos, and generate a polished report from a tablet or phone. With tools like NRCIA’s specialized inspection software, you can use custom forms with checkboxes and dropdowns to make the entire process faster and more accurate.

Ensure Legal Protection with Thorough Documentation

A detailed inspection report is more than a client deliverable—it’s a crucial business record. It acts as “a written assessment of the roof’s condition, supported by photographs and simple recommendations.” This documentation creates a clear, time-stamped record of the roof’s state, which can be invaluable in the event of a future dispute. It protects both you and your client by managing expectations and outlining pre-existing conditions. For commercial clients, thorough reports also help them “plan big repair jobs better… making sure roofs are fixed or replaced at the right time.” This level of detail provides accountability and helps you meet specific legal standards, such as those required for California SB 721 inspections.

How to Choose the Right Roof Inspection Template

With so many templates available, picking the right one can feel like a chore. But the template you choose is more than just a document—it’s a tool that shapes your workflow, client communication, and overall professionalism. A great template saves you time, protects you legally, and helps you present your findings clearly and effectively. To find the best fit for your business, focus on three key areas: customization, compliance, and integration. These elements will ensure your reports are not only thorough but also a powerful asset for winning jobs and building trust with your clients.

Look for Key Customization Features

Every roof is different, so your inspection template should be flexible enough to adapt. A rigid, one-size-fits-all checklist can force you to skip important details or add messy notes in the margins. Look for templates that allow you to create custom forms and checklists. This lets you tailor your inspection to specific roof types, materials, or client concerns. For example, you might need different fields for a commercial flat roof versus a residential shingle roof. This flexibility ensures your reports are always relevant and comprehensive, giving your clients the detailed information they need.

Check for Industry Compliance

Your report is a reflection of your professional standards. Using a template that aligns with industry best practices shows clients that you’re knowledgeable and credible. A good template will often use a simple, clear coding system—like rating conditions as Good, Fair, or Poor—to ensure consistency across all your inspections. This standardized approach makes your findings easy for homeowners and real estate agents to understand. Following established guidelines also helps ensure your inspections are thorough and meet the expectations of organizations like the NRCIA, reinforcing your commitment to quality and LeakFREE® roof protection.

Consider Integration with Your Current Software

To work as efficiently as possible, your inspection template should fit seamlessly into your existing workflow. The best templates integrate with the other software you use every day, like your CRM or invoicing system. Imagine creating a custom inspection form on your tablet, emailing the finished report to your client along with their invoice, and automatically saving a copy to their file—all from one platform. This level of integration eliminates redundant data entry and streamlines communication. When choosing a template, consider how it connects with your other tools or if a dedicated inspection software solution might be a better fit.

Common Mistakes in Roof Inspection Reporting

A great roof inspection can be completely undermined by a poor report. Even the most thorough inspector can lose a client’s trust with a report that’s confusing, unprofessional, or incomplete. The goal is to present your findings in a way that empowers the property owner to make informed decisions, not leave them with more questions than answers.

Avoiding a few common pitfalls can make a world of difference. When your report is clear, professional, and actionable, it becomes your best sales tool, demonstrating your expertise and building a strong foundation of trust with your client. Let’s walk through the most frequent missteps in roof inspection reporting and how you can steer clear of them to protect your reputation and grow your business.

Using Unclear Technical Jargon

You might know what “efflorescence” or “delamination” means, but your client probably doesn’t. Using overly technical terms without explanation is one of the fastest ways to confuse and alienate a homeowner or real estate agent. Your report should be a tool for clear communication, not a test of their roofing vocabulary. The best approach is to use simple, direct language whenever possible. If a technical term is necessary, take a moment to define it in plain English. Remember, you’re writing the report for your client, and making it easy for them to understand shows that you respect their time and value their business.

Including Price Estimates in the Report

Your inspection report should be an objective, factual assessment of the roof’s condition—nothing more. Including repair costs or sales estimates directly in the report can make clients feel pressured and may even call your objectivity into question. It blurs the line between inspection and sales pitch. A better practice is to present your findings first. Once the client has had a chance to review the condition of their roof, you can provide a separate quote or proposal for the recommended repairs. This two-step process feels more professional and gives the client space to make a decision without feeling rushed.

Lacking Sufficient Photo Documentation

A picture is truly worth a thousand words, especially in a roof inspection report. Failing to include enough clear, high-quality photos is a major mistake. Visual evidence validates your findings and helps the property owner see exactly what you’re talking about, from cracked shingles to damaged flashing. Each issue you identify should be accompanied by a photo. This proves you’ve done a thorough job and aren’t just using generic descriptions. Using modern inspection software can help you easily embed and annotate photos, drawing arrows or circles to highlight specific problem areas for maximum clarity.

Failing to Classify the Urgency of Repairs

A long list of recommended repairs can be overwhelming for any property owner. Without context, they have no way of knowing what needs immediate attention and what can wait. A great report helps them prioritize by classifying the urgency of each issue. You can use a simple system, such as labeling items as “Urgent,” “Recommended,” or “Monitor.” This turns a daunting list into an actionable plan. It helps the client understand the immediate risks and allows them to budget for future maintenance, positioning you as a helpful advisor and setting the stage for a long-term relationship.

How to Write Reports That Win More Jobs

A roof inspection report is more than just a summary of findings; it’s one of your most powerful sales and communication tools. When a potential client reads your report, they aren’t just learning about their roof—they’re deciding if they can trust you with the job. A clear, professional, and helpful report builds that trust instantly, positioning you as an expert who is there to solve their problems, not just point them out. It separates you from competitors who provide vague, jargon-filled documents that leave clients confused and uncertain.

By treating your report as a key part of the customer experience, you can turn a simple inspection into a signed contract. The goal is to give the property owner a clear path forward, making it easy for them to say “yes” to your recommendations. Implementing a few key strategies can transform your reports from simple documents into job-winning assets. Using tools like NRCIA’s specialized inspection software can help you consistently produce high-quality reports that reflect the quality of your work and build a reputation for excellence.

Use Clear, Client-Friendly Language

Your client is likely a homeowner or property manager, not a roofing expert. Avoid industry jargon and technical terms whenever possible. Instead of writing “fascia delamination,” try “the board along the roofline is peeling apart.” Your goal is to make the information accessible and easy to understand. If you must use a technical term, provide a simple explanation. A report that empowers the client with clear information builds confidence and shows that you’re on their side. Keep sentences short and to the point, focusing on what the client needs to know to make an informed decision.

Give Specific, Actionable Recommendations

Identifying a problem is only the first step. The real value for your client comes from your professional recommendations on how to fix it. Don’t just list the issues; offer clear, actionable solutions for each one. Every finding should be paired with high-quality photos that visually explain the problem. Seeing a cracked shingle or damaged flashing is far more impactful than reading about it. When you present a problem alongside a clear solution, like working toward a LeakFREE® roof certification, you guide the client toward a decision instead of leaving them to figure it out on their own.

Organize Findings by Priority

A long list of roof issues can be overwhelming for a client and may cause them to delay taking any action at all. To prevent this, organize your findings by urgency. Create categories like “Immediate Action Required” for critical issues like active leaks, “Recommended Repairs” for problems that could worsen over time, and “Items to Monitor” for minor concerns. This structure helps the client understand the risks and prioritize their budget effectively. By showing them what needs to be addressed now versus what can wait, you demonstrate that you respect their financial situation and are providing practical, honest advice.

Maintain Consistent, Professional Branding

Your report is a direct reflection of your business. A professionally branded document reinforces your credibility and helps clients remember you. Use your company’s logo, colors, and fonts to create a consistent look that aligns with your website and other marketing materials. A polished, branded report looks more authoritative than a generic checklist and shows that you pay attention to detail in every aspect of your work. This small touch makes a big difference in how clients perceive your company and can be a deciding factor when they choose a contractor. Displaying your NRCIA membership credentials on your report is another excellent way to build immediate trust.

Digital Tools to Streamline Your Reporting

Putting down the clipboard and picking up a tablet can completely change your reporting process. Digital tools don’t just save you time; they help you create consistent, detailed, and professional reports that build client trust and win more jobs. Think about it: instead of juggling a camera, a notepad, and your safety gear on a steep slope, you can capture everything you need on a single device. This shift makes your workflow much smoother, reduces the chance of errors, and produces a polished final document that reflects the quality of your work. From mobile apps for on-site data collection to comprehensive software that manages your entire workflow, the right technology can make a huge difference in your business. Let’s walk through a few options that can streamline your reporting.

Mobile Inspection Apps

This is where efficiency begins—right on the roof. Mobile inspection apps transform your smartphone or tablet into a powerful data collection tool. As you walk the property, you can fill out your checklist, make notes, and take photos that automatically sync to the correct section of your report. Many apps allow you to build flexible inspection checklists that you can customize for different roof types or specific job requirements. This means you can stop trying to decipher messy handwriting back at the office or matching stray photos to your notes. Everything is captured and organized in one place, making your on-site work faster and more accurate.

Cloud-Based Reporting Software

After you’ve completed the on-site work, cloud-based software helps you pull it all together into a clean, professional report. With all your inspection data stored securely in the cloud, you and your team can access the information from anywhere, whether you’re in the office or on the way to another job. This is a game-changer for collaboration. Many platforms also let you create custom digital inspection forms and email the final report directly to your client. This keeps all your client documents organized and creates a seamless, professional experience from start to finish.

NRCIA’s Specialized Inspection Software

For a truly professional edge, nothing beats software designed specifically for roofing inspectors. While generic apps can be useful, tools built for the roofing industry understand the specific details and standards required for a thorough inspection. Using technology with industry-specific templates saves you time and makes your reports look more professional. Our NRCIA inspection software is designed to meet the highest industry standards, guiding you through a comprehensive process that ensures you cover every critical detail. This level of precision and consistency helps you build credibility and shows clients you’re committed to quality.

Where to Find Professional Roof Inspection Templates

Once you know what to include in your report, the next step is finding a template that works for you. A great template saves you from reinventing the wheel and ensures you don’t miss any critical details. The good news is you have options, ranging from industry-certified templates to free downloadable files. The right choice depends on your business needs, your clients, and how you want to present your brand. Let’s look at a few of the best places to find high-quality templates that will help you create clear, professional, and effective roof inspection reports.

NRCIA Certified Templates

For roofing professionals who want to deliver the highest standard of service, starting with an NRCIA certified template is the way to go. These templates are designed to help you create comprehensive reports that build immediate trust with your customers. They guide you through a thorough process, ensuring every detail is documented correctly. Using our specialized inspection software, you can access templates that not only help homeowners make informed decisions about repairs but also highlight your professionalism. When a client sees a report built on an industry-leading framework, it reinforces that they hired a true expert.

Free Downloadable Options

If you’re just starting out or need a straightforward solution quickly, there are plenty of free templates available online. Many companies offer fillable PDFs or printable documents that cover all the basic components of a roof inspection. These are fantastic for streamlining your process and making sure you capture all the necessary information on-site. For example, you can find a great free roofing inspection report template that you can download and use right away. While they may not have the advanced features of specialized software, these free options are an excellent resource for getting organized without any initial investment.

Templates from Professional Associations

Beyond NRCIA, other professional associations in the roofing industry also provide valuable resources for their members and the public. These organizations often develop detailed forms and templates based on extensive industry knowledge and best practices. For instance, the Midwest Roofing Contractors Association (MRCA) offers a residential roof inspection form designed to help you track a roof’s condition and maintenance history over time. Using a template from a respected professional association can add another layer of credibility to your reports, showing clients that your work is aligned with established industry standards.

How Quality Reporting Builds Lasting Client Relationships

A roof inspection report is much more than a simple summary of findings; it’s one of the most powerful tools you have for building client relationships. When you deliver a clear, detailed, and professional report, you’re not just handing over a document. You’re demonstrating your expertise, building trust, and showing clients that you’re a reliable partner in protecting their property. This commitment to quality communication is what turns a one-time job into a long-term relationship with a client who will call you first for future needs and recommend you to their network.

Create Transparency with Detailed Findings

A thorough report is the foundation of a trusting relationship. When you provide detailed findings, complete with high-quality photos and specific notes, you show the client that you’ve done your due diligence. This transparency proves you have nothing to hide and that your recommendations are based on solid evidence. Good reports build trust with customers and show you are a professional. Instead of just telling a client their flashing is damaged, show them a clear picture with an annotation pointing to the exact spot. This level of detail removes ambiguity and helps clients feel confident in your assessment, making them more comfortable with your proposed solutions and your role as their go-to expert.

Educate Clients on Their Roof’s Condition

For most property owners, the roof is a bit of a mystery. Your report is your chance to be their guide. A well-written report translates technical jargon into understandable terms, helping clients grasp the current state of their roof and what it needs. The goal is to help clients understand their roof’s condition so they can plan for any needed repairs or upkeep. By clearly identifying defects, explaining the potential risks, and outlining cost-effective repair options, you empower them to make informed decisions. This educational approach positions you as a valuable advisor, not just a contractor, fostering a sense of partnership that clients truly appreciate.

Establish Trust Through a Professional Process

Every detail of your report contributes to the client’s overall impression of your business. A polished, consistently branded document makes your company look professional and organized. Using a standardized template or specialized inspection software ensures that every report you produce is clean, easy to read, and reflects the quality of your work. This professional process does more than just look good; it builds a deep sense of trust. When clients see that you’re organized and meticulous with your paperwork, they’ll feel assured that you’ll bring that same level of care and attention to the actual roofing work.

Related Articles

Contact Us Now

Frequently Asked Questions

Should I include my repair prices directly in the inspection report? It’s best to keep your inspection report and your sales quote separate. The report’s main purpose is to provide an objective, factual assessment of the roof’s condition. When you include pricing in the same document, it can feel like a sales pitch and may cause the client to question your findings. Deliver the report first to establish trust, then follow up with a separate, detailed proposal for the recommended work. This two-step process feels more professional and gives the client space to make a clear decision.

What’s the single most important thing to include in my report to build client trust? Clear, high-quality photo evidence is non-negotiable. While every section of the report is important, nothing builds trust faster than showing a client exactly what you saw. A picture of a cracked shingle or damaged flashing is far more convincing than a written description alone. When you visually document every issue, you remove all doubt and demonstrate that your recommendations are based on concrete findings, making it easier for clients to approve your proposed solutions.

Is a free, downloadable template good enough for my business? Free templates can be a great starting point, especially if you’re looking to bring more structure to your reporting process without an initial investment. They help ensure you cover the basics on every job. However, as your business grows, you may find that a dedicated inspection software or a certified template from an organization like NRCIA offers a more professional and efficient solution. These tools often provide better customization, branding options, and integration that can save you significant time in the long run.

My clients often get overwhelmed by a long list of issues. How can I present my findings without scaring them off? The key is to provide a clear sense of priority. Instead of just listing every single issue, organize your recommendations into categories like “Urgent,” “Recommended,” and “Future Maintenance.” This simple structure transforms a daunting list into a manageable action plan. It helps the property owner understand what needs immediate attention to prevent further damage and what can be budgeted for down the road, positioning you as a helpful advisor rather than just a bearer of bad news.

How can I make my reports look more professional without spending a ton of time on design? Using a standardized template is the easiest way to achieve a professional look every single time. A consistent format with your company logo and contact information immediately signals that you are an established and organized business. Digital tools and specialized software make this even simpler by allowing you to create polished, branded reports in just a few clicks. The consistency itself builds credibility and shows clients you pay attention to every detail.

Roof Inspection Report for Insurance: Free PDF Template

Get a roof inspection report for insurance PDF, plus expert tips on what to include for claims, insurance approval, and peace of mind for your property.

A roof inspection might seem like just another expense, but it’s one of the smartest financial moves a homeowner can make. Think of it as an investment in your property’s long-term health and your financial security. Insurance companies reward proactive homeowners. When you can prove your roof is in excellent condition, you demonstrate that your home is a lower risk, which can lead to better premiums. This simple step can save you money year after year. When it’s time to file a claim, having a detailed roof inspection report for insurance pdf ready can prevent costly delays and ensure you get the full coverage you deserve.

Contact Us Now

Key Takeaways

  • A Professional Report is Your Strongest Proof: Use a detailed inspection report to provide your insurer with the unbiased evidence they need for smoother policy approvals and stronger, faster claims.
  • Certification is Non-Negotiable: Ensure your report holds weight by hiring a certified inspector. An NRCIA professional provides the credible, standardized documentation that insurance companies trust.
  • Proactive Inspections Protect Your Wallet: Don’t wait for damage to happen. A timely inspection can uncover minor issues before they become major expenses and may even qualify you for lower insurance premiums.

Why Your Insurance Company Wants a Roof Inspection Report

Think of your roof as the first line of defense for your entire home. That’s exactly how your insurance company sees it. For them, a roof inspection report is all about understanding risk. A strong, well-maintained roof is less likely to fail during a storm, which means you’re less likely to file a costly claim. When an insurer sees a professional report detailing the good condition of your roof, they see a lower risk. This can translate into a smoother policy approval process and sometimes even better premiums. It’s a clear signal that you’re a responsible property owner.

A detailed report from a certified inspector gives the insurance company a clear, unbiased assessment of your roof’s health. It documents everything from the age and type of materials to the condition of flashing, gutters, and shingles. This isn’t just about finding problems; it’s also about proving the absence of them. By providing this documentation, you’re showing that you’re a proactive homeowner who takes care of their property. This simple step helps build trust and can make all the difference when you need your coverage the most. The report serves multiple stakeholders in the property industry, from homeowners to the insurance underwriters themselves.

When Do You Need an Inspection Report for Insurance?

You’ll likely need a roof inspection report in a few key situations. The most common is after a major weather event, like a hailstorm or high winds. An inspector can accurately document the scope of the damage, which is critical for filing a successful claim and ensuring you get the coverage you deserve. Another frequent trigger is when you’re buying or renewing a home insurance policy, especially for an older home. Insurers want to verify the roof’s condition before they agree to cover it. Finally, proactive inspections are a smart move for routine maintenance, as they can catch small issues like loose shingles or minor leaks before they become major, claim-worthy disasters.

Common Myths About Roof Inspections

Let’s clear up a few common misconceptions about roof inspections for insurance. One of the biggest myths is that your first call after spotting damage should be to your insurance agent. It’s often better to first get an independent assessment from a certified inspector. This gives you a complete picture of the damage so you can have a more informed conversation with your insurer. Another myth is that any quick look from a roofer is enough. Insurance companies value detailed, credible reports, which is why using a certified and trained professional is so important. Their findings carry more weight and can help prevent disputes down the line.

What’s Inside a Solid Roof Inspection Report?

Think of a roof inspection report as the official story of your roof’s health. It’s not just a simple pass/fail document; a truly solid report provides a detailed, easy-to-understand breakdown of your roof’s current condition. It gives you, your real estate agent, and your insurance company a clear picture of what’s going on up there. A professional report is organized, thorough, and backed by evidence, leaving no room for confusion. It should clearly outline any issues and provide actionable next steps, making it an essential tool for maintenance, sales, and insurance claims.

Key Property Details and Documentation

Every good report starts with the basics. This section lays the groundwork, providing all the essential context for the inspection. It should clearly list the client’s and inspector’s names and contact information, the property address, and the date of the inspection. It will also note important details like the roof’s age, the type of materials used (like asphalt shingles, tile, or metal), and its expected remaining lifespan. Details about the weather on inspection day are also included, as conditions can affect what an inspector can see. This foundational data ensures everyone reading the report is on the same page from the start.

Damage Assessment and Repair Plan

This is the heart of the report. Here, the inspector provides a detailed written assessment of the roof’s condition, identifying any defects, risks, or areas of concern. This isn’t just a list of problems; it’s an analysis. The report will explain the severity of any damage, from cracked shingles to signs of water intrusion. Most importantly, a quality report from a certified professional will outline the most effective and sensible repair options. This section gives you a clear roadmap for action, helping you understand what needs to be done to maintain a LeakFREE® roof and protect your property.

Clear Photographic Evidence

A picture really is worth a thousand words, especially when it comes to your roof. A reliable inspection report will always include clear, high-resolution photos to back up its findings. These images serve as visual proof of any damage or areas of concern mentioned in the assessment. For an insurance adjuster who can’t get on the roof themselves, this photographic evidence is invaluable. It documents the exact condition of the roof at the time of the inspection, highlighting everything from granule loss on shingles to damaged flashing around vents. This visual record makes the report more credible and easier for everyone to understand.

Inspection Method and Weather Notes

Transparency is key, and this section explains exactly how the inspector conducted their assessment. It will briefly describe the methods used to access and examine the roof, whether it was via a ladder, a roof hatch, or another means. It also details the scope of the physical examination, covering the roof surface, edges, drains, and waterproofing systems. Noting the weather conditions is also standard practice. An inspection on a clear, sunny day might reveal different issues than one conducted after a heavy rain. This information adds another layer of credibility and helps create a complete, accurate picture of the roof’s condition.

How to Get a Professional Roof Inspection Report

Getting a roof inspection report isn’t just about having someone walk around on your roof. It’s about getting a professional, detailed document that can stand up to the scrutiny of an insurance company. The process is straightforward when you know what to look for and who to trust. It starts with finding a certified professional who can provide a comprehensive assessment and ends with you holding a clear, actionable report that serves your needs, whether you’re filing a claim, buying a home, or just doing your due diligence.

Why a Certified Inspector Matters (Hint: NRCIA & LeakFREE®)

Not all inspectors are created equal, and your insurance company knows it. They need to see a report from a credible source to assess risk and process claims. This is where certification becomes non-negotiable. A certified inspector has proven their expertise against industry standards, ensuring their findings are accurate and trustworthy. The NRCIA takes this a step further with its LeakFREE® roof certifications, which offer the only standardized roof warranty in the industry. Choosing an NRCIA-certified inspector means you’re getting someone trained to the highest level, which gives your report instant credibility and provides you with unparalleled peace of mind.

Finding a Qualified Inspector Near You

Your search for an inspector should start with professional organizations that vet their members. The NRCIA is the perfect place to find a qualified professional who understands the specific requirements for insurance reports. When you’re evaluating potential inspectors, ask about their experience with insurance claims. A great inspector knows exactly what adjusters look for and how to document damage in a way that prevents disputes. They can help you understand how a thorough roof inspection for home insurance can protect your investment and even help lower your premiums by identifying and addressing risks before they become major problems.

Getting Your Report as a PDF

Once the inspection is complete, you’ll receive a detailed report. This document is your most important tool. A professional report should include a thorough damage assessment, clear photos, and an estimated repair plan. Insist on receiving this report as a PDF. This digital format is easy to save for your records and, more importantly, simple to forward to your insurance agent or adjuster. Many certified professionals use specialized inspection software to generate these reports, ensuring all the necessary details are included in a clean, standardized format that insurance companies prefer.

How an Inspection Report Can Help Your Insurance Claim

Filing an insurance claim for roof damage can feel overwhelming, but a professional inspection report is your best ally in the process. Think of it as more than just paperwork; it’s a detailed, factual account that speaks the language of insurance adjusters. Having this document in hand can dramatically streamline your claim, helping you secure the coverage you need without unnecessary delays or disputes. It transforms a stressful situation into a manageable one by providing clarity, evidence, and a clear path forward for repairs.

Strengthen Your Claim with Solid Proof

When you file a claim, your insurance provider needs concrete proof of the damage. A comprehensive inspection report provides exactly that. It serves as an unbiased, expert assessment that documents the full extent of the issue, from obvious storm damage to less visible problems. A certified inspector will detail the scope of the damage, which is critical for ensuring you receive the right coverage for a complete repair. Instead of relying on guesswork, you’re presenting a factual case supported by professional analysis and clear evidence, making it much harder for your claim to be undervalued.

Avoid Claim Denials and Disputes

Insurance claims can sometimes be denied due to reasons like suspected pre-existing damage or lack of maintenance. A thorough inspection report helps you get ahead of these issues. By documenting the roof’s condition, the report can clearly attribute the damage to a specific event, like a recent hailstorm, leaving little room for dispute. This documentation is also your best defense against a denial based on wear and tear. For ultimate peace of mind, a LeakFREE® roof certification provides an ironclad baseline of your roof’s condition, protecting your investment and simplifying any future claims.

Uncover Potential Insurance Discounts

A roof inspection report isn’t just for when things go wrong—it can also save you money. Many insurance carriers offer lower premiums for homes with roofs that are in excellent condition because a well-maintained roof poses a lower risk. Submitting a favorable inspection report to your provider can demonstrate that your home is a safe bet, potentially qualifying you for a discount. This proactive approach not only helps you save on monthly costs but also catches minor issues before they become major, expensive problems, which is a win-win for both you and your insurer.

How Much Does a Roof Inspection Cost (and Is It Worth It?)

Thinking about the cost of a roof inspection is a lot like thinking about an oil change for your car. It’s a small, proactive expense that helps you avoid much bigger, more stressful problems down the road. While the exact price tag can vary, the real question isn’t just about the upfront cost, but the long-term value it provides. A professional inspection gives you a clear picture of your roof’s health, which is essential for maintenance, insurance purposes, and your own peace of mind. When you weigh the minor cost against the major expenses it can prevent—like hidden leaks or structural damage—a regular roof inspection is one of the smartest investments you can make for your property.

It’s about shifting from a reactive mindset, where you wait for a problem to appear, to a proactive one, where you’re in control of your home’s biggest asset. This detailed assessment arms you with the information you need to make informed decisions, whether that’s planning for future repairs, negotiating a home sale, or simply ensuring your insurance coverage is adequate. The report you receive is more than just a piece of paper; it’s a tool for protecting your investment and securing your family’s safety. Ultimately, the cost is minimal compared to the security and potential savings it delivers.

What Influences the Price?

The cost of a roof inspection isn’t one-size-fits-all. Several factors play a role, including the size of your roof, its slope and complexity, the type of roofing material, and your geographic location. You might see offers for free inspections, but these are often basic visual checks tied to a sales pitch for repairs. For insurance purposes, you need something more substantial. A comprehensive assessment from a certified inspector provides the detailed documentation your insurer requires. This type of in-depth inspection has a fee, but it reflects the expertise and thoroughness needed to produce a report that holds up under scrutiny.

Weighing the Cost vs. Insurance Savings

Paying for a roof inspection can actually save you money in the long run. Insurance companies love proactive homeowners because a well-maintained roof is less likely to result in a claim. When you provide a professional inspection report, you’re showing your insurer that your property is a lower risk, which can translate directly into lower monthly premiums. Think of the inspection fee as a small investment that can yield continuous returns through reduced insurance costs. It’s a simple way to demonstrate responsible ownership and keep more money in your pocket over time, all while ensuring your coverage remains valid and active when you need it most.

The Value of Long-Term Protection

Beyond immediate insurance savings, a quality inspection offers invaluable long-term protection. The core benefit is catching small issues before they become catastrophic failures. An inspector can spot minor damage or wear and tear that, if left unaddressed, could lead to extensive water damage and thousands of dollars in repairs. This early detection is key. Furthermore, if you ever need to file a claim after a storm, a detailed inspection report serves as critical evidence. It documents the scope of the damage, supports your claim, and helps ensure you receive the full coverage you’re entitled to. This is the foundation of securing a LeakFREE® roof and protecting your property for years to come.

Common Mistakes to Avoid When Getting Your Roof Inspected

A roof inspection report is a powerful tool for your insurance claim, but a few missteps can weaken its impact. Getting ahead of these common mistakes will save you time, stress, and money, ensuring your claim process goes as smoothly as possible. Let’s walk through what to watch out for.

Don’t Hire an Uncertified Inspector

It might be tempting to call a general contractor or a standard home inspector, but when it comes to your roof, expertise matters. A generalist might miss subtle signs of damage that a specialist is trained to spot. For an insurance claim, you need an inspector who is certified specifically in roof systems. A certified roof inspector provides a detailed, credible assessment that insurance adjusters take seriously. They understand the specific documentation and evidence required to validate a claim, ensuring nothing gets overlooked. Hiring an uncertified inspector can lead to an incomplete report, which can delay or even derail your entire claim.

Poor Timing and Lack of Prep

When you suspect roof damage, especially after a major storm, time is not on your side. Waiting weeks or months to schedule an inspection is a critical error. Minor issues like a few missing shingles can quickly escalate into major leaks and structural problems, and your insurance policy may not cover damage that results from neglect. Acting quickly shows your insurer you’re proactive about protecting your property. Before the inspector arrives, do a little prep work: ensure there’s safe access to the roof and gather any notes you have about when you first noticed the damage. This helps the inspector work efficiently and build a more accurate timeline for your report.

Forgetting Key Documentation

A successful insurance claim is built on solid evidence, and it’s not just the inspector’s job to provide it. Before your inspection, pull together all your relevant documents. This includes a copy of your homeowner’s insurance policy, any warranties for your roof, and receipts from previous repairs. If you took photos or videos of the damage right after it happened, have those ready, too. Providing this information to your inspector gives them valuable context about your roof’s history and condition. It also helps you understand your policy and what to expect from the claims process, putting you in a much stronger position.

What Happens After You Submit the Report?

You’ve done your part: you hired a certified inspector, got a comprehensive report, and sent it off to your insurance company. Now, the ball is in their court. This part of the process can feel a bit like a waiting game, but understanding what’s happening behind the scenes can make it much more manageable. Let’s walk through what the insurance company does with your report and what you can expect as you wait for a decision.

The Insurance Review Process

Once your report is submitted, an insurance adjuster or underwriter will review it carefully. Their primary goal is to assess the condition of your roof and determine the level of risk associated with your property. They’ll look at the inspector’s findings on the roof’s age, materials, and overall structural integrity. If you’re filing a claim, they will use the report to evaluate the extent of the damage and verify that it’s covered under your policy. A detailed, professional report is crucial here, as it provides the clear, objective evidence they need to make a sound decision. For the insurance companies we work with, a standardized report from a certified inspector makes this process faster and more straightforward.

What to Expect: Timelines and Outcomes

The review timeline can vary, typically taking anywhere from a few days to several weeks. The complexity of your claim and the insurance company’s current workload are the biggest factors. After the review is complete, you will receive a formal decision. Generally, there are three possible outcomes: your claim is approved, the insurer requests additional information, or your claim is denied. If it’s denied, the report’s findings will usually be cited as the reason. Knowing these potential outcomes helps you prepare for the next steps, whether that’s scheduling repairs or preparing to appeal a decision. A solid report gives you the documentation you need to move forward confidently, ensuring you have proof of your roof’s condition and a path toward long-term LeakFREE® roof protection.

Get Your Free Roof Inspection Report Template (PDF)

A solid roof inspection report is your best tool for communicating with an insurance company. It translates a roofer’s findings into a clear, documented format that adjusters can easily understand. While a template is a fantastic starting point, remember that the real value comes from the expertise of the person filling it out. For insurance purposes, a report completed by a certified inspector carries the most weight.

Think of this template as your roadmap for a thorough roof check. It ensures no detail is missed and provides a professional, standardized way to present your findings. Whether you’re a homeowner preparing for a claim or a contractor performing the inspection, using a structured template helps everyone stay on the same page.

What’s Included in the Template

A good template is more than just a simple checklist; it’s a comprehensive record of the roof’s condition. Your report should always start with the basics: customer and property details, inspector information, and the weather conditions on the day of the inspection. From there, it should detail the roof type and materials before moving into the core assessment.

This includes sections for both exterior and interior checks, a dedicated area for documenting specific damage, and clear recommendations for repairs or maintenance. The most crucial part is the visual evidence—a section for photos is non-negotiable. Finally, space for additional notes and a customer sign-off makes the report complete, ensuring total transparency and agreement on the findings.

How to Use the Template for Your Insurance Claim

When you’re filing an insurance claim, this report becomes your primary piece of evidence. First, use it to meticulously document the roof’s condition and its estimated lifespan. Insurance companies need this baseline information to process your claim accurately. A detailed report leaves no room for ambiguity about the state of your roof before and after the damage occurred.

This documentation is what substantiates your claim. Instead of just saying the roof is damaged, you’re providing a point-by-point analysis with photographic proof. This professional approach can help you avoid unnecessary back-and-forth with your insurer. Using a template for regular inspections can also demonstrate a history of proactive maintenance, which can be a positive factor in your claim and your relationship with your insurance provider.

Related Articles

Contact Us Now

Frequently Asked Questions

Why is a certified inspector so important? Can’t my usual roofer just write up a report? Think of it this way: your insurance company needs an unbiased, expert opinion to make a decision. While your local roofer might be great at repairs, a certified inspector is specifically trained to document conditions according to industry standards that insurers recognize and trust. Their report is a credible, third-party assessment, not a sales quote for repairs, which gives it the authority needed to support your insurance policy or claim.

Should I only get a roof inspection after a storm or when I see a problem? While you should absolutely get an inspection after a major weather event, proactive inspections are one of the smartest things you can do as a homeowner. A regular check-up establishes a documented history of your roof’s condition. This helps you catch small issues before they become disasters and can even lead to lower insurance premiums. Plus, if you ever need to file a claim, that history makes it much easier to prove the damage is new and not from pre-existing wear.

What’s the real difference between a free “inspection” and a paid report for my insurance company? A free inspection is typically a sales tool. A contractor will take a quick look to see if you need repairs and then provide you with an estimate. A paid inspection report, on the other hand, is a comprehensive diagnostic document. You are paying for the inspector’s time, expertise, and the creation of a detailed file with written analysis and photographic evidence that is designed to be reviewed by an insurance adjuster.

How often should I have my roof inspected to keep my insurance company happy? There’s no single answer, but a good general guideline is to have your roof professionally inspected every two to three years, and always after a severe storm with high winds or hail. If your roof is older, you might consider an annual inspection. This regular cadence demonstrates to your insurer that you are actively maintaining your property, which reduces their risk and keeps you in good standing.

Does getting a professional report guarantee my insurance claim will be approved? While no report can offer an absolute guarantee, it dramatically improves your chances of a smooth and successful claim. A professional report provides the clear, undeniable evidence that adjusters need to validate the damage. It minimizes the back-and-forth and removes ambiguity, making it much more difficult for your claim to be unfairly denied or undervalued. It puts you in the strongest possible position for approval.

Free Roof Report Template & Step-by-Step Guide

Get a free roof report template and learn how to create clear, professional roof inspection reports with this practical, step-by-step guide.

Your reputation is built on the roof, but it’s cemented on paper. After a thorough inspection, the report you hand your client is a direct reflection of your professionalism and expertise. A messy, handwritten note with a few blurry photos can undermine even the best fieldwork, leaving clients confused and questioning your credibility. On the other hand, a clear, organized, and comprehensive document builds immediate trust. This is where a professional roof report template becomes your most valuable business tool. It’s more than just a checklist; it’s a system for delivering consistent, high-quality assessments that protect your business and give clients the confidence to act on your recommendations.

Contact Us Now

Key Takeaways

  • Build Trust Through Consistency: Adopt a standardized template to ensure every report you deliver is thorough, professional, and follows the same logical structure. This consistency is the foundation of your reputation and shows clients you have a systematic, high-quality process.
  • Create Actionable Solutions, Not Just a Problem List: A truly valuable report includes clear photos, simple explanations, and specific recommendations. This approach empowers property owners to make informed decisions and positions you as a trusted, problem-solving expert.
  • Embrace Digital Tools for Better Efficiency: Move beyond paper to solve common headaches like messy handwriting and lost forms. Using inspection software streamlines your entire workflow, saves you time, and guarantees every report you send is clean, legible, and professional.

What Is a Roof Report Template?

Think of a roof report template as the blueprint for every inspection you conduct. It’s a pre-designed document that guides you through the entire assessment process, ensuring you don’t miss a single detail. More than just a checklist, a well-structured template provides a consistent framework for recording your findings, from the type and condition of the roofing materials to the state of the gutters, flashing, and underlying structures. This isn’t about just filling in blanks; it’s about creating a comprehensive, professional record of the roof’s health that is easy for your client to understand.

A solid template is your first line of defense and a powerful tool for building a professional reputation. It’s the foundation for a document that not only protects you legally but also gives your clients the confidence to make smart, informed decisions about their property. By standardizing your process, you ensure every client receives the same high level of detail and care, every single time. This consistency is what separates a professional from an amateur and builds a foundation of trust from the very first interaction. Using a dedicated tool, like the NRCIA’s inspection software, can help you generate these detailed reports effortlessly, saving you time while improving the quality of your final product.

Why You Need One for Your Business

In the roofing business, your reputation is everything, and a professional report is a direct reflection of your work. A clear, easy-to-read report makes you seem more trustworthy and expert to customers. When a homeowner receives a detailed, organized document with photos and clear explanations, it shows you’re a thorough and credible professional. This builds immediate trust and sets you apart from competitors who might provide a vague, handwritten estimate. It’s a simple step that demonstrates your commitment to quality and transparency, making clients more comfortable with their investment and more likely to recommend your services.

Who Uses Roof Report Templates

Roof report templates are essential for a wide range of professionals whose work involves assessing property conditions. Of course, roofing contractors and certified inspectors use them daily to document findings and create accurate estimates for repairs or replacements. But they aren’t the only ones. Insurance adjusters rely on these templates to process claims consistently and fairly, while real estate agents use them to provide buyers with a clear picture of a property’s condition. Property managers also depend on them for routine maintenance checks and to keep detailed records for the buildings they oversee. Essentially, any of the professionals we serve can benefit from a standardized reporting process.

What to Include in a Professional Roof Report

A great roof report does more than just list problems—it tells a complete story about the roof’s current condition. Think of it as your primary communication tool with your client. A thorough, well-organized report builds trust, clarifies complex issues, and gives property owners the confidence to act on your recommendations. When you consistently include the right information, you establish yourself as a credible expert.

Every section of your report should serve a purpose, from identifying the property to providing visual proof of your findings. A standardized format ensures you never miss a critical detail and that every client receives the same high level of service. This consistency not only protects you and your client but also streamlines your entire inspection process. Let’s walk through the essential components that turn a basic checklist into a professional, actionable document that homeowners, real estate agents, and property managers will appreciate.

Customer and Property Details

Before you get into the technical specifics, your report needs to clearly state who and what it’s for. This foundational section should include the client’s full name, the property address, and the client’s contact information. It’s also crucial to add your name as the inspector and the exact date the inspection took place. This information ensures there is no confusion about which property was assessed and when. It creates an official record that is essential for real estate transactions, insurance claims, or maintenance history. Think of it as the cover page of your report—it sets a professional tone and makes the document easy to file and reference later.

Roof Specifications and Materials

This is where you outline the roof’s vital statistics. Documenting the core components provides essential context for your findings and recommendations. Be sure to include the roof type (e.g., gable, hip, flat), the primary roofing material (asphalt shingles, tile, metal), and the estimated age of the roof. You should also note the roof’s pitch and any distinct features like skylights, chimneys, or solar panels. Describing these specifications helps the property owner understand their specific roof system. It also explains why certain types of wear are occurring and why you’re suggesting particular solutions. This detailed overview is a key part of providing a LeakFREE® roof certification.

Weather Conditions

The weather on the day of your inspection can significantly influence what you see and how you interpret it. Your report should always include a brief note on the conditions—was it sunny, overcast, raining, or windy? Documenting recent weather events, like a heavy hailstorm or a week of rain, is also incredibly helpful. This context can explain certain types of damage and adds credibility to your assessment. For example, noting that you inspected the roof the day after a major storm helps connect visible damage directly to a specific event. It’s a small detail that demonstrates a thorough and thoughtful inspection process.

Damage Assessment

This section is the heart of your report. Here, you’ll provide a detailed account of any issues you discovered, from minor cosmetic flaws to urgent structural concerns. Use clear and straightforward language to describe problems like cracked or missing shingles, damaged flashing, signs of water pooling, or granule loss. The goal is to give your client a precise understanding of the roof’s health. A well-documented damage assessment helps property owners make informed decisions about repairs or replacement. The ability to accurately identify and report on these issues is a skill that comes with experience and proper inspector training.

Photo Documentation

Words can only do so much; photos provide undeniable proof. Including high-quality images in your report is essential for building trust and ensuring your client understands the issues. Take clear, well-lit pictures of every problem area you identify. It’s even better if you can annotate the photos with arrows or circles to pinpoint the exact location of the damage. This visual evidence helps homeowners see what you see, making them more comfortable with your recommendations. Modern inspection software makes it easy to embed photos directly into your report, creating a seamless and professional final document that leaves no room for doubt.

How Templates Improve Communication with Clients

A great roof report does more than just list findings—it builds a bridge of clear communication between you and your client. When a homeowner or property manager receives your report, they need to understand the condition of their roof and what steps to take next. Using a standardized template is one of the best ways to ensure your message is professional, consistent, and easy to act on. It transforms a simple document into a powerful tool for building your reputation and giving clients the confidence to make smart, informed decisions. A template ensures every report you deliver is as thorough and professional as the last, setting a high standard for your business.

Build Trust with Standardized Reporting

First impressions matter, and a well-organized report immediately signals professionalism. When every report follows the same logical structure, clients know what to expect. This consistency shows that you have a systematic and thorough process, which builds immense trust. A well-structured template acts as a blueprint for a document that helps your clients feel confident in your assessment. Instead of a jumble of notes and photos, they receive a polished, easy-to-follow analysis. This level of organization demonstrates your expertise and commitment to quality, making clients more likely to trust your recommendations and hire you for future work. It’s a simple way to show you’re a professional who values clarity and precision.

Create Clear, Actionable Recommendations

A report that only points out problems is only half-helpful. The real value comes from providing clear, actionable solutions. A good template includes dedicated sections for your recommendations, complete with photos of problem areas to provide visual context. This shows clients you’ve carefully examined their specific roof and aren’t just giving generic advice. When you suggest specific ways to fix the issues you found, you guide your client toward a solution and position yourself as a helpful expert. This approach turns a simple inspection into a valuable consultation, building a stronger relationship and making it easier for the client to approve necessary repairs or maintenance.

Ensure Legal Protection and Documentation

Thorough documentation is your best friend when it comes to liability. A detailed report protects both you and your client by creating a clear record of the roof’s condition at the time of inspection. A solid template ensures you don’t miss a single detail, from minor issues to major structural concerns. Having a dedicated section for every component, including annotated photos and thermal scans, creates a comprehensive file for every job. This meticulous record-keeping is invaluable for real estate transactions and insurance claims. Using tools like NRCIA’s inspection software can further streamline this process, ensuring your documentation is always complete and professional.

Must-Have Sections for Your Roof Report

A truly professional roof report does more than just point out a few missing shingles. It tells a complete story about the roof’s health, giving your clients the clarity and confidence they need to make smart decisions. Think of your report as a roadmap—it shows where the roof is now and the best path forward. To make sure your roadmap is clear, comprehensive, and professional, there are four sections you absolutely can’t skip. Including these key elements in your template will standardize your process, protect your business, and build lasting trust with every client you serve. This level of detail and consistency is exactly what sets a certified professional apart and is a core principle taught in our inspector training programs.

Exterior Inspection Checklist

This is the heart of your inspection. A detailed exterior checklist is your guide to ensuring nothing gets missed, helping you move from a general overview to a granular assessment. It’s a systematic way to document the condition of every component, from the main roofing material (shingles, tiles, metal) to the smaller details that matter just as much. Be sure to cover flashing around chimneys and vents, the state of the gutters and downspouts, and the integrity of skylights. A thorough checklist guarantees you’re providing an accurate and repeatable assessment every time, which is the foundation for a trustworthy LeakFREE® roof certification.

Interior Inspection Checklist

What happens on the roof doesn’t always stay on the roof. The interior inspection is where you uncover the consequences of exterior issues, like hidden leaks or poor ventilation. Your checklist for this part of the job should guide you through the attic and top-floor rooms. You’ll want to look for water stains on the ceiling, signs of mold or mildew, and damp or damaged insulation. Checking for proper ventilation is also critical, as trapped heat and moisture can wreak havoc on a roof’s structure from the inside out. This interior view gives your client the full picture of their roof’s performance and health.

Safety and Structural Assessments

Beyond checking for leaks, a top-tier report must address the roof’s structural integrity. This section shows your expertise and commitment to the client’s safety. Here, you’ll document the condition of the underlying roof deck, trusses, and support beams. Note any signs of sagging, rot, or other weaknesses that could compromise the entire system. A well-structured report that includes these assessments is your first line of defense and a powerful tool for building a professional reputation. For inspectors in certain areas, this section is also where you’d include findings for mandated checks, like California SB 721 inspections for elevated exterior elements.

Maintenance and Repair Recommendations

A report that only lists problems leaves your client wondering, “So, what now?” This final section is where you become their trusted advisor. Instead of just pointing out damage, provide clear, actionable recommendations to fix the issues you found. It’s helpful to prioritize your suggestions—what needs immediate attention versus what can be addressed as future maintenance? Suggesting specific repairs and next steps empowers the property owner to take action. Using professional inspection software can help you organize these recommendations and present them in a clean, easy-to-understand format that clients will appreciate.

Tools and Software for Creating Great Reports

While a solid template is your foundation, the right tools are what help you build a professional, efficient reporting process. Manually filling out paperwork, juggling photos, and typing up notes back at the office can eat up valuable time you could be spending on the next job. This is where technology steps in to make your life easier. Modern inspection software isn’t just about creating a digital version of your paper report; it’s about streamlining your entire workflow from the moment you step on the property to the second you send the final document to your client.

The best reporting tools combine several key features into one seamless experience. They offer dedicated inspection software that guides you through the process, ensuring you don’t miss a single detail. They include mobile apps that let you capture information and photos directly from the roof, eliminating the need for a separate camera and notepad. And they have robust photo documentation systems that make it simple to integrate clear, visual evidence into your findings. Using this kind of software helps you create consistently thorough and professional reports every single time, which builds credibility with clients and partners alike. It’s an investment that pays off by saving you time and helping you stand out from the competition.

A Look at NRCIA’s Inspection Software

If you’re looking for a tool designed specifically for roof inspectors, NRCIA’s inspection software is built to make your job simpler and your reports more powerful. This platform allows you to generate detailed, professionally formatted reports in just a few minutes, not hours. It’s designed to improve both your speed and your accuracy, so you can deliver comprehensive assessments to clients quickly without sacrificing quality. Beyond report creation, the software also gives you access to a resource library packed with expert articles and industry updates, helping you stay sharp and informed. It’s a complete toolkit for the modern roofing professional.

Mobile Apps for On-the-Go Inspections

The days of clipboards and messy handwriting are over. Mobile apps have completely changed the game for field inspections, allowing you to conduct your entire assessment from a phone or tablet. With a mobile inspection app, you can capture data, take photos, and generate your report in real-time while you’re still on-site. This immediate data entry means no detail gets lost or forgotten on the drive back to the office. The convenience is unmatched—you can work more efficiently, even in tricky environments, and provide instant feedback to your clients. This streamlined mobile workflow ensures you capture everything you need, right then and there.

Photo Documentation Systems

A picture is worth a thousand words, especially in a roof report. Effective photo documentation is one of the most critical parts of your assessment because it provides undeniable visual proof of your findings. High-quality images help your client see exactly what you’re talking about, whether it’s a cracked shingle, damaged flashing, or a potential leak source. Software that allows for easy photo capture and integration helps you build a stronger case for your recommendations. Including clear images in your report creates a transparent and trustworthy experience for your client, showing them you’ve done a thorough job and giving them confidence in your assessment.

Solve Common Inspection Headaches with a Template

If you’ve ever tried to decipher your own notes after a long day on a roof or spent hours piecing together a report from scratch, you know how frustrating the process can be. Juggling a clipboard, a camera, and your tools often leads to missed details, inconsistent reports, and a lot of wasted time back at the office. This is where a solid roof report template changes the game. It’s more than just a fill-in-the-blank document; it’s a system that brings order to the chaos and solves some of the most common inspection headaches before they even start.

Using a standardized template is one of the easiest ways to professionalize your workflow. It acts as a guide, ensuring you capture all the necessary information in a logical sequence, every single time. This not only makes your job easier but also provides your clients—whether they’re homeowners, real estate agents, or insurance adjusters—with a clear, comprehensive, and professional document they can trust. By implementing a template, you move from simply conducting inspections to delivering a polished, high-value service that sets your business apart. It’s a foundational tool for any serious inspector looking to build a reputable business.

Eliminate Messy Handwriting and Lost Paperwork

Let’s be honest: paper forms can be a nightmare. Traditional inspection methods often lead to messy handwriting, coffee-stained documents, and crucial paperwork getting lost in the shuffle between the job site and the office. These seemingly small issues can cause major problems, from misinterpreting critical data to appearing unprofessional in front of a client. A digital template completely removes these risks.

By going digital, every report is clean, legible, and securely stored. You no longer have to worry about losing a form or trying to read a smudged note. Instead, you create a permanent, easily accessible record for every job. This simple switch makes your entire operation more efficient and ensures the final report you deliver is as professional as the inspection itself.

Ensure Consistent Reporting Every Time

When you have multiple inspectors or want to build a recognizable brand, consistency is key. A well-designed roof inspection report template acts as your quality control, guaranteeing that every report your company produces is thorough and uniform. It ensures every inspector assesses the same critical points, from the flashing and underlayment to the gutters and ventilation.

This standardization is your first line of defense and a powerful tool for building a professional reputation. Clients learn to trust the quality and reliability of your work because they receive the same clear, detailed report every time. It eliminates guesswork and ensures that no matter who performs the inspection, the final product meets your company’s high standards, strengthening client confidence and your brand’s credibility.

Streamline How You Share Reports

The inspection isn’t over until the report is in the client’s hands. The old method of scanning and emailing bulky, multi-page documents is slow and inefficient. A modern template, especially when integrated into a central system, transforms this final step. With the right tools, you can generate and share a complete, professional report with your client, your office, and any other stakeholders in just a few clicks.

NRCIA’s inspection software is a perfect example of this efficiency. It keeps all job details, photos, and notes in one place, allowing everyone on your team to access the same information from the field or the office. This streamlined process not only saves you time but also improves communication, allowing you to deliver findings faster and provide a better overall customer experience.

Common Mistakes to Avoid in Your Roof Reports

A great roof report does more than just list findings; it builds trust, showcases your expertise, and gives your clients the confidence to move forward with your recommendations. But even the most thorough inspection can be undermined by a poorly constructed report. Small mistakes can create big problems, leading to confused clients, disputed findings, and a damaged reputation. The good news is that these pitfalls are easy to sidestep once you know what to look for.

Think of your report as the final, crucial step in your service. It’s your chance to translate what you saw on the roof into a clear, compelling story for the property owner. A professional, easy-to-understand document solidifies your credibility and sets you apart from the competition. On the other hand, a report filled with jargon, blurry photos, or missing information can leave clients feeling uncertain and less likely to trust your advice. This is especially true for the diverse clients we serve, from homeowners preparing for a sale to property managers handling large portfolios. Each one needs clear, reliable information to make informed decisions. By avoiding a few common stumbles, you can ensure your reports consistently reflect the quality of your work and help you build lasting relationships. Let’s walk through the most frequent mistakes and how you can avoid them to deliver reports that are as solid as the roofs you inspect.

Using Jargon That Confuses Homeowners

You might know what “flashing deterioration” or “granular loss” means, but your client probably doesn’t. Using technical roofing terms without explanation can make homeowners feel intimidated and confused. A clear, easy-to-read report makes you seem more trustworthy and expert. Instead of industry jargon, use simple, descriptive language. For example, instead of “soffit damage,” try “damage to the underside of the roof overhang.” Showing specific photos of their roof problems right next to your simple explanation makes your concerns more real to the customer and helps them understand exactly what needs to be fixed and why.

Inaccurate Measurements or Missing Details

Precision is everything in roofing. Common roofing estimate mistakes often start with inaccurate measurements or forgotten details. A small miscalculation in square footage or roof pitch can throw off your entire material order and cost estimate, leading to project delays and awkward conversations with your client. Double-check every number and make sure you’ve documented all relevant details, like the number of layers or existing ventilation. Investing in professional training and education can sharpen these essential skills, ensuring every report you produce is built on a foundation of accuracy and protects you from costly errors down the line.

Poor or Inadequate Photos

Your photos are the evidence that backs up your findings. Blurry, poorly lit, or context-free images don’t help anyone and can weaken your report’s credibility. Your goal is to show the client exactly what you saw. Include photos of problem areas on the roof, making sure each one is clear and well-framed. Take a mix of close-up shots to detail specific damage and wider shots to show where the problem is located on the roof. Annotating photos with arrows or circles to pinpoint issues is another great way to make your findings impossible to misunderstand.

Relying on an Outdated Template

Are you still using the same report template you downloaded years ago? An outdated or generic format can make your business look unprofessional. A well-structured roof inspection report template is your first line of defense and a powerful tool for building a professional reputation. Modern templates ensure consistency, guide you through all necessary inspection points, and present information in a clean, logical way. Using specialized inspection software can give you access to dynamic, up-to-date templates that adapt to different job types and streamline your entire reporting process from start to finish.

Best Practices for Filling Out Your Report

A thorough inspection is only half the battle; the report you deliver is what leaves a lasting impression. Think of it as the final, crucial step in your service. A clear, professional, and accurate report not only communicates your findings effectively but also builds client trust and protects your business. It transforms your technical assessment into a practical, understandable document that empowers property owners to make informed decisions. Adopting a few key practices can make all the difference between a report that gets filed away and one that gets results.

Write Clear, Jargon-Free Descriptions

Your client probably doesn’t know the difference between flashing and fascia, and that’s okay—it’s your job to explain it. Avoid industry jargon and use simple, direct language to describe your findings. Instead of just noting “spalling on the chimney,” try explaining it: “The brick on the chimney is flaking and crumbling, which can let water in and lead to bigger problems.” The goal is to make your report easy for anyone to understand. Keeping your descriptions concise and focused on the impact of each issue helps homeowners grasp the situation quickly. This kind of clear communication is a core part of professional inspector training and sets you apart from the competition.

Take Precise Measurements

Accuracy is non-negotiable in a roof report. Incorrect measurements can lead to flawed repair estimates, wasted materials, and a loss of credibility. Before you even start, make sure you’re using the right tools and double-checking your numbers. Common mistakes like miscalculating roof pitch or failing to account for complex angles can throw off your entire assessment. Taking the extra minute to verify your measurements on-site saves you from major headaches later. Using reliable inspection software can also help standardize this process, ensuring you capture every necessary detail with precision and consistency every single time. It’s a simple step that reinforces your professionalism and ensures your recommendations are built on a solid foundation.

Capture High-Quality Photos

Photos are your best evidence. They provide clear, visual proof of your findings and help clients see exactly what you’re describing. A good photo log builds immense trust and leaves no room for doubt. Make sure your pictures are clear, well-lit, and taken from multiple angles to show both context and detail. For example, take a wide shot of a damaged area and then a close-up of the specific issue. Annotating photos with arrows or circles to pinpoint problems is even better. This visual documentation is essential for everything from routine maintenance reports to certifying LeakFREE® roofs, as it creates an undeniable record of the roof’s condition at the time of inspection.

Include a Customer Sign-Off Section

A customer sign-off section is your final layer of professional protection. It’s a simple but powerful tool that confirms your client has received, reviewed, and understood the report. This section should include a space for the client’s signature and the date, along with a brief statement acknowledging receipt of the document. This formalizes the hand-off and minimizes potential disputes down the road by creating a clear paper trail. It’s a standard practice that demonstrates your commitment to transparency and accountability. Being part of an organization that upholds these standards is a key benefit of NRCIA membership, as it provides the framework and resources to operate with this level of professionalism.

How to Customize Your Template for Different Jobs

A great roof report template is your starting point, not the final word. While consistency is key for efficiency, the best inspectors know that a one-size-fits-all approach doesn’t work for every job. Different clients have different needs, and tailoring your report shows that you understand the specific context of their situation. Whether you’re inspecting a sprawling commercial complex or a single-family home, the details you prioritize will change. Customizing your report demonstrates a higher level of professionalism and helps your clients make smart, informed decisions based on what matters most to them.

Think of your template as a flexible blueprint. The core structure remains the same, but you can add, remove, or expand sections to fit the job’s unique requirements. This is where having the right tools makes a world of difference. Using professional inspection software allows you to easily adapt your reports on the fly, ensuring every client receives a document that is both comprehensive and perfectly suited to their needs. This adaptability not only makes your job easier but also strengthens your reputation as a thorough and client-focused expert.

Residential vs. Commercial Properties

The difference between inspecting a home and a commercial building is significant, and your report should reflect that. Commercial roofs are often larger and more complex, featuring flat or low-slope designs, extensive HVAC systems, and specialized drainage. Your commercial report template should include dedicated sections for these elements, along with notes on building code compliance and material specifications like TPO or EPDM.

Residential reports, on the other hand, need to be clear and accessible for homeowners who aren’t roofing experts. The focus will be on things like shingle condition, flashing around chimneys, gutter performance, and attic ventilation. The language should be straightforward, helping the homeowner understand the health of their roof without getting lost in technical jargon. Our comprehensive training prepares you to handle the unique demands of both property types.

Insurance Claims vs. Maintenance Inspections

The purpose of the inspection dictates the focus of your report. When dealing with an insurance claim, your report is a critical piece of evidence. It needs to be meticulously detailed, objective, and focused on documenting specific, storm-related damage. You’ll need to pinpoint the cause of the damage and provide clear photographic proof to support the claim for an adjuster.

A routine maintenance inspection has a completely different goal. Here, you’re acting as a proactive partner to the property owner. The report should highlight the roof’s overall condition, identify areas of wear and tear, and recommend preventative measures to extend its life. The tone is more advisory, aimed at helping the owner protect their investment and work toward goals like achieving one of our LeakFREE® roof certifications.

Pre-Purchase Inspection Requirements

For a potential homebuyer, a roof inspection report is a crucial part of their due diligence. They are relying on your expertise to make one of the biggest financial decisions of their lives, so building trust is essential. A pre-purchase inspection report must be exceptionally clear and thorough. It should detail the roof’s age, current condition, estimated remaining lifespan, and any existing issues that could lead to costly repairs.

This information empowers the buyer to negotiate confidently and avoid unexpected problems after closing. For the real estate professionals you work with, a clear, easy-to-read report makes you a valuable and trustworthy partner. Your report doesn’t just list problems; it provides the clarity and peace of mind your clients need.

Get Your Professional Roof Report Template

Creating a professional roof report is your chance to build trust and showcase your expertise. A polished, comprehensive report shows clients you’re thorough and gives them clear, actionable information. Instead of starting from scratch every time, a well-structured template serves as your foundation, ensuring you never miss a critical detail and that every report you deliver is consistent and professional. It’s one of the most effective tools for building a stellar reputation in the roofing industry.

Using a template streamlines your entire inspection process. Think of it as a detailed checklist that guides you through every step, from the initial property details to the final recommendations. A good roofing inspection form helps you stay accurate and organized, making sure no part of the roof is overlooked. This not only saves you valuable time on-site but also eliminates the headache of messy or lost paperwork back at the office.

When you’re ready to get started, you can download a free template in a fillable PDF format to see how it can simplify your data collection and help you present your findings clearly. While a basic template is a great first step, many professionals find they quickly need a more powerful solution. As your business grows, dedicated tools can help you manage your workflow more effectively.

That’s where specialized software comes in. For inspectors and contractors who want to deliver the highest level of service, NRCIA’s inspection software integrates every aspect of the reporting process into one platform. It goes beyond a simple form, allowing you to easily embed photos, generate consistent reports, and manage your client data seamlessly. This not only improves your efficiency but also reinforces the quality and credibility of your work.

Related Articles

Contact Us Now

Frequently Asked Questions

Why is a professional template better than a simple checklist I make myself? Think of a template as a complete communication system, while a checklist is just a to-do list. A professional template guides you to create a polished, easy-to-read document that includes client details, photo evidence, and clear recommendations. This consistency shows clients you have a thorough, repeatable process, which builds immediate trust and makes your business look more credible than one using a simple, handwritten list.

Do I really need software, or can I just use a paper template? While a paper template is a good start, digital software solves many common headaches. It eliminates messy handwriting, prevents lost paperwork, and allows you to embed high-quality photos directly into the report. This creates a clean, permanent record for every job and lets you share the final document with clients in just a few clicks, making your entire operation more efficient and professional.

What’s the biggest mistake inspectors make in their reports? The most common mistake is using technical jargon that confuses the client. Terms like “granule loss” or “soffit damage” mean nothing to the average homeowner. A great report uses simple, clear language to explain the problem and its impact. When you pair straightforward descriptions with clear photos, you empower your client to understand the issues and feel confident in your recommendations.

How much should I customize my report for different clients? You should absolutely tailor your report to the situation. For an insurance claim, your report needs to be highly detailed and objective, focusing on documenting specific damage. For a pre-purchase inspection, the focus shifts to the roof’s overall health and remaining lifespan to help a buyer make a smart investment. This adaptability shows you understand your client’s specific needs.

Will using a professional template actually help me get more business? Yes, absolutely. A clear, professional report is a direct reflection of your work and a powerful marketing tool. It builds trust with homeowners, makes you a reliable partner for real estate agents, and sets you apart from competitors. When clients receive a document that is easy to understand and looks professional, they are more likely to approve your recommendations and refer you to others.

Roof Inspector Job Description: Duties, Skills & Pay

Get a clear roof inspector job description, including daily duties, essential skills, and pay range. Learn what it takes to succeed as a roof inspector.

If you’re exploring career paths that offer stability and strong earning potential, the role of a roof inspector is worth a serious look. The demand for qualified inspectors is growing, driven by an active real estate market and an increasing need for assessments after severe weather events. This isn’t just a job; it’s a pathway to building your own business or becoming a highly valued expert in the construction and property industries. Understanding the complete roof inspector job description is the first step. It outlines a profession where your expertise directly translates into protecting property and providing genuine peace of mind for your clients.

Contact Us Now

Key Takeaways

  • It’s a job of details and dialogue: Your success hinges on both your technical ability to spot hidden roof issues and your communication skills to explain those findings clearly to homeowners and real estate professionals.
  • Invest in certification to build your business: Earning a professional credential is the most effective way to establish your expertise and gain client trust, demonstrating your commitment to quality and giving you a clear advantage in the market.
  • Your earning potential is in your hands: The demand for skilled inspectors is growing, and your income directly reflects your expertise. Factors like location, experience, and specialized certifications create a clear path for career and financial growth.

What Does a Roof Inspector Do?

So, you’re curious about what a roof inspector actually does all day? It’s more than just climbing ladders and looking at shingles. A roof inspector is a detective, a safety expert, and a clear communicator all rolled into one. Your main job is to assess the health of a roof, identify potential problems before they become costly disasters, and provide a clear, unbiased report of your findings. You’re the trusted expert that homeowners, real estate agents, and property managers rely on to protect their investments. Let’s break down the key responsibilities you’ll handle on a daily basis.

Your Core Responsibilities

At its heart, the role is all about evaluation. On a typical day, you might inspect anywhere from three to five different roofs, each with its own unique challenges. You’ll be responsible for thoroughly examining every aspect of the roofing system—from the shingles and flashing to the gutters and underlying structure. This hands-on work requires a sharp eye for detail and a deep understanding of how roofing systems function. You’ll use tools like tablets to efficiently document your findings on the spot, capturing photos and notes that will form the basis of your final report for the clients you serve.

Documenting and Reporting Your Findings

Once you’ve completed the physical inspection, your focus shifts to creating a clear and comprehensive report. This isn’t just a simple checklist; it’s a detailed narrative of the roof’s condition. Your report will include high-quality photographs of any issues you’ve identified, along with specific, actionable recommendations for repairs or maintenance. This documentation is vital, as it gives property owners the information they need to make informed decisions. Using specialized inspection software helps streamline this process, ensuring your reports are professional, consistent, and easy for anyone to understand.

Ensuring Safety and Code Compliance

A huge part of your job is acting as a guardian of safety and quality. You are responsible for making sure all aspects of a roof meet local building codes and industry safety standards. You’ll be on the lookout for common problems like leaks, cracks, poor installation, and missing shingles that could compromise the building’s integrity. By identifying these issues, you help protect the property from water damage, structural problems, and other hazards. Your expertise ensures that any work performed is done correctly, giving property owners peace of mind that their roof is not just functional, but truly a LeakFREE® roof.

What Skills and Qualifications Do You Need?

Becoming a successful roof inspector requires a unique mix of technical knowledge, physical capability, and strong interpersonal skills. While you don’t necessarily need a four-year degree to get started, a solid foundation in related fields and a commitment to professional development are essential. Think of it as being part detective, part communicator, and part athlete. You’ll be investigating potential issues, explaining your findings to clients, and doing it all from rooftops. This combination of skills is what separates a good inspector from a great one, building a reputation for reliability and expertise that clients can trust. Let’s break down the specific qualifications that will help you build a successful career.

Education and Experience Requirements

While there isn’t one single path to becoming a roof inspector, having a background in a related industry can give you a significant head start. Experience in construction, engineering, or architecture provides a strong understanding of building envelopes, materials, and structural integrity. If you’re new to the field, look for opportunities to gain hands-on experience, perhaps by working with a roofing contractor or as an apprentice to a seasoned inspector. This practical knowledge is invaluable for learning how different roofing systems are installed, how they fail over time, and what common issues to look for. The goal is to build a foundational understanding of how roofs work before you start inspecting them.

Essential Technical and Communication Skills

A great roof inspector needs a sharp eye for detail. You’ll be looking for subtle signs of damage, like hairline cracks, minor water staining, or improperly installed flashing, that could lead to major problems down the road. Beyond spotting issues, you need strong problem-solving skills to diagnose the root cause. At the same time, your technical expertise is only half the job. You must be able to communicate your findings clearly and professionally to the wide range of people we serve, from anxious homeowners to busy real estate agents. Explaining complex roofing concepts in simple, understandable terms is a critical skill that builds trust and helps your clients make informed decisions.

Physical Fitness and Safety on the Job

This is not a desk job. As a roof inspector, your office is often several stories high, and you need to be physically prepared for the demands that come with it. You must be comfortable with heights and confident in your ability to safely use ladders to access various roof levels. The job requires balance, agility, and the ability to move carefully across steep or uneven surfaces in different weather conditions. Prioritizing safety is non-negotiable. Understanding and consistently following safety protocols isn’t just about compliance—it’s about ensuring you can do your job effectively and return home safely at the end of every day.

Certification and Licensing

While state licensing requirements for roof inspectors can vary, earning a professional certification is the best way to establish your credibility and stand out in the industry. Certification demonstrates a formal commitment to your profession and proves you have the knowledge to perform thorough, accurate inspections. Reputable organizations offer specialized programs that cover everything from roofing materials and installation standards to inspection techniques and reporting. Investing in a quality training portfolio not only sharpens your skills but also gives your clients peace of mind, knowing they’ve hired a true professional who is dedicated to the highest industry standards.

How Much Can a Roof Inspector Earn?

Let’s talk about one of the most important questions you have when considering a new career: what’s the earning potential? As a roof inspector, your salary depends on several factors, including your experience level, where you work, and the certifications you hold. While there’s a wide range, this is a field with solid financial opportunities and strong demand, giving you plenty of room to grow your income as you build your expertise.

Understanding Your Salary Potential

As a roof inspector, you can generally expect to earn between $36,240 and $79,850 per year. New inspectors will likely start at the lower end of that scale, but with experience and the right credentials, you can move toward the higher end. Your employer also makes a difference. For example, inspectors working for local government agencies often earn more, averaging around $71,680 annually. Investing in professional development, like the courses in our training portfolio, is one of the best ways to increase your value and command a higher salary in the private sector.

Job Growth and Market Demand

The demand for skilled roof inspectors is on the rise. The field is projected to grow by 6% over the next decade, which is faster than the average for most jobs. This growth is fueled by a couple of key factors. First, technology is advancing, with about 20% of contractors now using drones to make inspections safer and more efficient. Second, an increase in severe weather events means more storm-damaged roofs need professional assessment. With hail damage alone expected to cause billions in losses, the need for qualified inspectors to assess and document damage isn’t slowing down anytime soon.

How Location and Experience Impact Pay

Where you live and work plays a big role in how much you can earn. Inspectors in states with a higher cost of living or more frequent storm activity tend to see higher paychecks. Some of the top-paying states include Massachusetts ($72,390), Illinois ($70,110), Connecticut ($69,170), and California ($69,000). In states with specific regulations, like the requirement for California SB 721 inspections, specialized knowledge can also lead to higher pay. As you gain more years of experience and build a reputation for thorough, reliable work, your income potential will continue to grow no matter where you are.

What Training Will You Need?

While hands-on experience is invaluable, formal training is what separates a good inspector from a great one. The right certifications not only teach you the technical skills you need but also give you the credibility to win clients and build a successful career. Think of it as building your professional foundation—the stronger it is, the higher you can build. Investing in training shows clients that you’re committed to quality and that you have a standardized process for every inspection you perform. It’s about more than just a certificate; it’s about mastering your craft and providing real peace of mind.

Get Certified with NRCIA’s LeakFREE® Programs

If you’re looking for a program that sets the industry standard, this is it. The NRCIA’s LeakFREE® certification is one of the most comprehensive training options available. It goes beyond the basics of identifying damage and covers everything from advanced inspection techniques for various roof types to critical safety protocols. What makes this certification unique is its focus on a standardized process, ensuring every roof you inspect is held to the same high standard. This level of detail not only prepares you for complex scenarios but also gives you the expertise to offer the industry’s only standardized roof warranty, a major selling point for your business.

Other Industry-Recognized Credentials

Beyond specialized roof inspection programs, it’s wise to consider other credentials that round out your skill set. Many inspectors start with a general home inspection certification, like those offered by InterNACHI®, which includes modules on inspecting residential roofs. This can give you a solid understanding of how the roof system integrates with the rest of the home. Additionally, safety should always be your top priority. Completing certifications from the Occupational Safety and Health Administration (OSHA) is essential. It demonstrates your commitment to a safe work environment for yourself and everyone on the property.

Mastering Inspection Software and Technology

In today’s market, a clipboard and a camera just don’t cut it anymore. Proficiency with technology is a must-have skill for any modern roof inspector. Using specialized inspection software allows you to efficiently document your findings, generate professional reports, and communicate clearly with clients. This technology helps you create a detailed, visual record of the roof’s condition, complete with photos and notes, which is invaluable for homeowners, real estate agents, and insurance companies. Learning to use these tools effectively will make your workflow smoother, your reports more professional, and your business more competitive.

What’s the Job Really Like?

A job description can give you the highlights, but what does a typical day or week actually involve for a roof inspector? Beyond the technical skills, this career requires a specific blend of physical readiness, sharp observation, and great communication. It’s a role where you’re rarely behind a desk, and every property presents a new puzzle to solve. You’ll be working directly with homeowners, real estate agents, and contractors, making your ability to clearly explain complex issues just as important as your ability to find them. Let’s pull back the curtain on the day-to-day realities of the job.

The Physical Demands and Safety Protocols

First things first: this is a physically active job. You’ll spend a lot of time on your feet, climbing ladders, and carefully walking on various roof surfaces, from steep asphalt shingles to flat commercial roofing. Being comfortable with heights is non-negotiable. You need to be in good physical condition to carry your equipment and move around safely. Following strict safety protocols isn’t just a suggestion—it’s essential to prevent falls and injuries. Proper training and certification will equip you with the safety knowledge you need to protect yourself on every job site, ensuring you can do your work confidently and return home safely each day.

Dealing with Weather and Difficult Access

As a roof inspector, you work outdoors, which means you’re often at the mercy of the weather. You might be inspecting under the hot sun one day and dealing with wind or cold the next. Learning to work safely in different conditions is part of the job. Some roofs are also harder to access than others due to their height, pitch, or surrounding landscape. You’ll need to be a creative problem-solver to figure out the best and safest way to conduct a thorough inspection. Your primary goal is to get a clear view of every part of the roof system to check for common issues like damaged shingles, cracked tiles, or failing flashing.

Spotting Hidden Damage and Communicating with Clients

Your most important skill is a keen eye for detail. You’re not just looking for obvious problems; you’re searching for subtle signs of wear, water intrusion, or structural issues that an untrained person would miss. A successful inspection means identifying potential problems before they become expensive disasters for the property owner. After the inspection, your job is to translate your technical findings into a clear, understandable report. You’ll need excellent written and verbal communication skills to explain the roof’s condition to clients, whether they’re homeowners or real estate professionals, and provide them with actionable recommendations.

Tools and Tech That Make the Job Easier

While the fundamentals of roof inspection haven’t changed, technology has made the job safer and more efficient. You won’t just be relying on a ladder and a flashlight. Many inspectors now use tools like high-resolution drones to get a detailed look at hard-to-reach areas without putting themselves at risk. On the ground, you’ll likely use a tablet to document your findings in real-time with photos and notes. Specialized inspection software helps you organize this information into a professional, comprehensive report for your client. Embracing these tools allows you to perform more thorough inspections and deliver a higher quality of service.

Related Articles

Contact Us Now

Frequently Asked Questions

Do I need a background in roofing to become an inspector? While a background in roofing or construction is a definite advantage, it’s not a strict requirement. If you’re new to the industry, your first step should be a comprehensive training program. A quality certification will teach you the technical knowledge you need, from understanding different roofing materials to identifying installation errors. This formal education gives you the strong foundation necessary to start your career with confidence.

What’s the difference between a roof inspector and a general home inspector? Think of it as the difference between a family doctor and a heart specialist. A general home inspector examines the entire house and provides a broad overview of the roof as one part of a much larger report. A certified roof inspector provides a specialized, in-depth analysis of the entire roofing system. We focus exclusively on its condition, workmanship, and remaining lifespan, offering a level of detail that is critical for making major financial decisions.

How physically demanding is the job on a daily basis? This is an active career, so you should be prepared for the physical aspects. You’ll spend a lot of time on your feet, carrying tools, and climbing ladders. Being comfortable and steady at various heights is essential. The job doesn’t require you to be a top athlete, but it does demand good balance, mobility, and a constant focus on safety to handle different roof types and weather conditions.

Why is getting a certification like the NRCIA’s LeakFREE® so important? Certification is all about establishing credibility and trust. It shows clients that you have committed to a high standard of professional knowledge and follow a consistent, thorough process for every inspection. When you hold a respected credential, property owners and real estate agents know they are hiring an expert who can provide an accurate and reliable assessment, which is key to building a strong reputation in this field.

How much of the job is interacting with people versus working alone? You get a healthy balance of both. The inspection itself is typically a solo activity, allowing you to concentrate on the technical details without interruption. However, the rest of your time involves clear communication. You’ll be scheduling appointments, walking clients through your findings, and answering questions from homeowners, agents, and contractors. Strong people skills are just as vital as your technical expertise for success in this role.

Free Roof Inspection Checklist PDF (Instant Download)

Get your free roof inspection checklist PDF for a thorough, step-by-step guide to evaluating your roof’s condition. Download instantly and inspect with confidence.

What you can’t see can definitely hurt you, especially when it comes to your roof. From the ground, everything might look perfectly fine, but hidden damage like granule loss, cracked flashing, or poor attic ventilation could be silently compromising your home’s integrity. A quick glance isn’t enough to catch these subtle but serious issues. You need a systematic guide to ensure you’re looking in all the right places. That’s why a detailed roof inspection checklist PDF is such a valuable tool. It serves as your roadmap, guiding you through a thorough evaluation of every component to uncover problems before they lead to leaks.

Contact Us Now

Key Takeaways

  • Adopt a proactive inspection schedule to save money: Using a checklist to regularly examine your roof helps you find and fix small problems before they become expensive, widespread damage.
  • A systematic approach ensures a complete assessment: Following a checklist methodically guarantees you cover every critical area, from gutters and flashing to attic ventilation, creating a consistent and reliable record of your roof’s health.
  • Know when to call a certified professional for safety and expertise: For steep roofs, complex issues, or simply for peace of mind, an expert can safely identify hidden damage and provide a complete, unbiased assessment.

What Is a Roof Inspection Checklist?

A roof inspection checklist is your roadmap for thoroughly evaluating a roof’s condition. Think of it as a systematic guide that helps you spot potential issues before they turn into major headaches. Using a checklist ensures you cover all the bases, from the shingles and flashing to the gutters and interior attic space. Regular inspections are one of the best ways to protect a property investment, as they can uncover hidden damage, developing leaks, and other vulnerabilities that might otherwise go unnoticed.

An annual inspection can help you prevent a host of problems, from worn-out roofing materials to water intrusion that can compromise the building’s structure. Whether you’re a homeowner trying to stay on top of maintenance or a professional inspector preparing a report, a checklist brings structure and consistency to the process. It transforms a casual look-over into a detailed, recordable assessment, which is exactly what you need to maintain a healthy, long-lasting roof. The goal is to create a clear, actionable record of the roof’s health, making it easier to plan for repairs or routine upkeep.

Why a Systematic Approach Is Key

When it comes to roof inspections, winging it just doesn’t cut it. A systematic approach is essential for a truly thorough evaluation. Following a checklist ensures that no area is overlooked, from the smallest sealant crack to the overall structural integrity. This methodical process helps you document every finding consistently, which is crucial for tracking the roof’s condition over time. For professionals, this detailed examination helps clients understand the value of your work and the specific issues you’ve identified.

A structured inspection also builds trust. When a property owner sees a detailed report, they know you’ve done your due diligence. Using professional inspection software can take this a step further, allowing you to integrate photos and notes directly into your checklist for a comprehensive, easy-to-understand final report. It’s about moving beyond a simple glance and providing a close, detailed visual examination that leaves no stone unturned.

How Early Detection Saves You Money

Catching roofing issues early is one of the smartest financial decisions a property owner can make. Small problems like a cracked shingle or peeling sealant are typically inexpensive and quick to fix. But if left unaddressed, they can lead to widespread water damage, mold growth, and costly structural repairs. Regular inspections help you find these problems before they escalate into budget-breaking emergencies.

The savings are significant. Some experts estimate that for every dollar spent on preventive maintenance, you can avoid about four dollars in future repair costs. By identifying vulnerabilities early, you not only save on repairs but also protect the interior of the building from leaks that could ruin ceilings, walls, and personal belongings. This proactive approach is the foundation of programs designed to deliver LeakFREE® roofs, which focus on preventing problems before they ever start.

Common Myths About Roof Inspections

Several common myths about roof inspections can lead property owners to neglect this critical maintenance task. One of the most prevalent is the belief that if a roof isn’t actively leaking, it doesn’t need an inspection. This couldn’t be further from the truth. Many serious issues, like granule loss on shingles, damaged flashing, or poor ventilation, don’t cause immediate leaks but can lead to premature roof failure.

Another myth is that a quick visual inspection from the ground is sufficient. While you might spot an obviously missing shingle, a ground-level view won’t reveal all damage. Issues with flashing, sealants around vents, and the subtle signs of hail damage require a much closer look. Dispelling these myths is important for everyone we serve, from homeowners to real estate agents, as it highlights the true value of a comprehensive, professional inspection.

What to Check on the Outside of Your Roof

Your exterior roof inspection is your first line of defense against costly repairs. This is where you’ll spot the most obvious signs of wear and tear. You can do a thorough visual check from the ground with a good pair of binoculars, so don’t feel like you need to climb a ladder just yet. Walk around the entire perimeter of your home, taking your time to look at each section of the roof from different angles. A systematic approach ensures you don’t miss anything. Pay close attention to areas with valleys, peaks, and anywhere the roof meets a wall. These spots are often the first to show signs of trouble.

Assess Your Roofing Material

Start with the main surface of your roof. What you’re looking for will depend on your roofing material. For asphalt shingles, check for any that are cracked, curling at the edges, or missing entirely. Also, look for dark streaks or patches of moss and algae, which can trap moisture. If you have a tile or slate roof, scan for cracked or broken tiles. For metal roofs, keep an eye out for any signs of rust, dents, or panels that seem loose. The goal is to identify any weak spots where water could potentially get in. Maintaining the integrity of your roofing material is the first step toward a LeakFREE® roof.

Inspect Flashing and Sealants

Flashing is the thin metal material installed where your roof meets a vertical surface, like a chimney or wall, and in the valleys of your roof. Its job is to direct water away from these vulnerable areas. Carefully examine all flashing for signs of rust, cracks, or separation from the roof. The sealant used around flashing can also dry out and crack over time, creating a direct path for water. Make sure the caulking is intact and doesn’t have any gaps. These seemingly small details are critical for preventing leaks, which is why they are a major focus for any certified roof inspector.

Examine Gutters and Downspouts

Your gutters are an essential part of your roofing system. When they get clogged with leaves, twigs, and other debris, water can’t drain properly. Instead, it backs up and can seep under the edge of your roof, potentially rotting the wood of your eaves and fascia. Check to see that your gutters are clear and securely attached to the house. A great tip is to look inside your gutters for an excessive amount of shingle granules. A few granules are normal, but a large accumulation can mean your shingles are aging and losing their protective outer layer, signaling it might be time for a replacement.

Check Vents, Chimneys, and Skylights

Anything that penetrates your roof—like vents, chimneys, or skylights—is a potential spot for a leak. Inspect the area around each of these features carefully. Look at the boots or seals around plumbing vents to ensure they aren’t cracked or deteriorating. For chimneys, check the masonry for any cracks or crumbling mortar and ensure the flashing around the base is secure. If you have skylights, look for any cracks in the glass or signs of condensation between the panes, which could indicate a failed seal. These complex areas often require an expert eye, which is why they are a key part of our inspector training.

What to Look for Inside Your Home

A thorough roof inspection goes beyond the exterior. Some of the most telling signs of a problem are hiding inside your house, particularly in the attic. What happens on your roof directly impacts the space below it, so grabbing a flashlight and heading upstairs is a crucial step. Catching issues from the inside helps you pinpoint the source of a problem before it causes widespread damage to your ceilings and walls. It’s the best way to get a full picture of your roof’s health.

Inspect the Attic

Your attic is the first line of defense after the roof itself. Start by turning off the lights and looking for any daylight peeking through the roof boards—a sure sign of a hole. Next, check for moisture. Look for dark stains, water tracks on the wood, or damp spots, especially around chimneys and vents. Also, check for brittle or cracked sealant around these penetrations. A healthy attic is key to a LeakFREE® roof, and spotting these issues early can save you from major headaches down the road.

Spot the Signs of Water Damage

You don’t always need to be in the attic to find evidence of a leak. Water has a way of making its presence known throughout your home. Keep an eye on your ceilings and walls, especially on the top floor, for signs of water damage. Look for yellowish stains, peeling paint, or bubbling drywall. You might also notice mold growth or a persistent musty smell. Don’t dismiss a small spot; it could indicate that water is pooling and slowly damaging your home’s structure. Addressing it quickly is the best way to prevent a small drip from turning into a costly repair.

Check Insulation and Ventilation

Proper insulation and ventilation are the unsung heroes of a healthy roof. In the attic, inspect your insulation to ensure it’s dry. If it’s damp or compacted, it won’t work effectively and points to a moisture problem. At the same time, check for adequate ventilation. Your attic needs to breathe to prevent moisture buildup, which can lead to wood rot and ice dams. Make sure soffit and ridge vents aren’t blocked. A well-ventilated attic helps regulate temperature and extend the life of your shingles. This is a key area that our certified inspectors are trained to assess.

Your Guide to Seasonal Roof Inspections

Your roof is your home’s first line of defense against the elements, and its needs change right along with the seasons. A small issue in the fall can become a major leak by the time the spring thaw arrives. That’s why a proactive approach to roof maintenance is so important. By scheduling regular checks, you can catch potential problems before they turn into costly repairs.

Think of it like a regular health check-up for your roof. Experts generally recommend inspecting your roof at least twice a year—once in the spring and again in the fall. These biannual inspections help you address any damage from the previous season and prepare for the one ahead. Of course, you should also plan to check things out after any major storm. This simple rhythm of seasonal inspections is one of the best ways to extend the life of your roof and ensure it’s always ready to protect your home. A well-maintained roof is the foundation of a LeakFREE® home, giving you peace of mind year-round.

Spring: Checking for Winter Damage

Once the snow melts and the days get longer, it’s the perfect time to assess how your roof held up against winter’s chill. Harsh weather, from heavy snow and ice dams to strong winds, can take a toll. A thorough spring inspection helps you spot and fix any issues before the heavy rains of April and May arrive. Regular inspections can uncover problems with your roof before they make you vulnerable to leaking or damage.

Start by looking for shingles that are cracked, curled, or missing altogether. Check the flashing around chimneys, vents, and skylights for any signs of lifting or cracking. You’ll also want to clear out gutters and downspouts, which are often clogged with debris left over from winter. This “spring cleaning” for your roof ensures it’s in top shape for the warmer months.

Fall: Preparing for Cold Weather

As the leaves begin to change, your focus should shift to getting your roof ready for the cold, wet weather ahead. A fall inspection is all about proactive maintenance. Finding and fixing small problems now can prevent them from becoming major headaches once snow and ice make repairs difficult, if not impossible. This is the time to ensure your roof is sealed tight and ready to handle whatever winter brings.

Clear your gutters of fallen leaves and twigs to prevent ice dams, which can cause water to back up and seep under your shingles. Examine the seals around vents and pipes, as these can contract and crack in the cold. It’s also a good idea to check for any loose shingles that could be vulnerable to winter winds. Taking these steps helps ensure your home stays warm and dry all season long.

After a Storm: Assessing the Impact

While seasonal checks are essential, some inspections can’t be planned. After a major weather event like a hailstorm, hurricane, or severe windstorm, you should check your roof for damage as soon as it’s safe to do so. High winds can lift or tear off shingles, while hail can leave dents and cracks that compromise your roof’s integrity. Even heavy rain can expose existing weaknesses.

Look for obvious signs of trouble like missing shingles, large branches, or visible damage to vents and flashing. Inside, check your attic and ceilings for new water stains. A post-storm inspection should assess for things like roof deck damage, compromised underlayment, and sealant deterioration. If you see anything that concerns you, it’s best to call a certified roof inspector to get a professional assessment.

How Often Should You Inspect Your Roof?

One of the most common questions property owners ask is how often they should inspect their roof. While there’s no single answer that fits every situation, a consistent inspection schedule is the best way to protect your investment. Think of it as preventative care for your home or building. Regular inspections help you find problems early, before they turn into big, expensive repairs or cause leaks that damage your property.

The right frequency depends on three main factors: your roof’s material, your local climate, and its age. A brand-new metal roof in a mild climate has very different needs than a 15-year-old asphalt shingle roof in an area known for severe storms. By understanding these variables, you can create a smart, proactive maintenance plan that saves you money and gives you peace of mind.

Inspection Frequency by Roof Type

Different roofing materials have unique vulnerabilities and lifespans, which dictates how often you should check on them. For example, asphalt shingles, the most common residential roofing material, should be inspected at least once a year. You’ll want to look for things like curling, cracking, or missing granules. On the other hand, more durable materials like metal, slate, or tile might require less frequent checks, but you’ll still need to inspect seams and flashing for any signs of failure. The goal is always to catch minor issues before they escalate. A proactive approach is key to maintaining a healthy roof and is a core principle behind our LeakFREE® roof certifications.

When Weather Should Prompt an Inspection

Your routine schedule is your baseline, but severe weather should always trigger an immediate inspection. It’s critical to check your roof after any major weather event, even if you don’t see any obvious damage from the ground. High winds can lift shingles, hail can create dents and cracks, and heavy snow can put immense stress on the structure. After a storm passes and it’s safe to do so, walk your property to look for fallen debris or missing roofing materials. Then, perform a more thorough check using a checklist. This post-storm inspection is one of the most important things you can do to prevent a small, weather-related issue from becoming a major leak.

Adjusting Your Schedule as Your Roof Ages

Just like anything else, roofs require more attention as they get older. While an annual inspection is a good starting point for a newer roof, you should increase that frequency as it ages. For roofs over 10 years old, it’s wise to conduct inspections at least twice a year, typically in the spring and fall. This allows you to assess any damage from winter storms and prepare the roof for the cold months ahead. Older materials are more brittle and susceptible to damage, and sealants can degrade over time. By keeping a closer eye on an aging roof, you can extend its life and better plan for its eventual replacement, a crucial task for all types of property stakeholders.

Common Roof Inspection Mistakes to Avoid

Even the most seasoned professional can make a mistake, but when it comes to a roof, small oversights can lead to big problems. A thorough inspection is your best defense against future headaches and costly repairs. Knowing what to watch out for helps you perform a more accurate assessment every time.

The most common errors fall into three categories: missing what you can’t easily see, cutting corners on safety, and failing to keep a good record. By being mindful of these potential pitfalls, you can ensure your inspection is comprehensive and valuable. Whether you’re a homeowner checking on your property or a contractor serving a client, avoiding these mistakes will help you protect the investment under your roof. Let’s walk through what to look out for.

Overlooking Hidden Damage

It’s easy to focus on the obvious, like missing shingles, but some of the most serious issues aren’t immediately visible. One of the biggest mistakes is neglecting to check for hidden damage in places like the fascias. These boards along the roofline play a key role in your roof’s structure, and any deterioration can signal deeper problems. It’s also a common myth that if your roof isn’t actively leaking, it doesn’t need an inspection. Damage can exist for months or even years without a single drop of water appearing on your ceiling. That’s why a proactive approach is so important for maintaining a LeakFREE® roof.

Ignoring Safety Precautions

Your safety, or the safety of your inspector, should always come first. Climbing onto a roof is inherently risky, and skipping safety protocols is a mistake you can’t afford to make. A frequent oversight is the failure to wear appropriate safety gear, such as a harness, gloves, and proper non-slip footwear. Taking the time to set up a sturdy ladder and ensuring the roof is safe to walk on can prevent a life-altering accident. Proper inspector training always emphasizes a safety-first approach, because no inspection is worth an injury. Never compromise on safety measures, no matter how quick the job seems.

Forgetting to Document Your Findings

An inspection is only as good as its report. If you don’t document your findings clearly, you lose valuable information and create confusion. Failing to take visual records, like photos or diagrams, makes it difficult to explain the roof’s condition to a homeowner or client. Visuals provide clear evidence of any issues you identify and serve as a crucial reference point for future inspections. Using a standardized system, like NRCIA’s inspection software, ensures that you capture all the necessary details in a professional format. Good documentation builds trust and makes it easier to plan for necessary repairs.

Why a PDF Checklist Is Your Best Tool

When you’re on a roof, the last thing you want to juggle is a flimsy piece of paper and a pen. And relying on memory alone is a surefire way to miss something important. A PDF checklist is the perfect middle ground—structured, professional, and always available on your phone or tablet. It ensures you conduct every inspection with the same level of detail, creating a consistent and reliable process every single time. This simple tool transforms your inspections from a guessing game into a systematic evaluation, giving you, your clients, or your family peace of mind. Let’s look at a few reasons why a digital checklist is an inspector’s best friend.

Easy to Access and Use Anywhere

One of the biggest advantages of a PDF checklist is its portability. You can download it to your phone or tablet and have it ready to go wherever the job takes you—no internet connection required. This is a huge plus when you’re in an attic with spotty service or on a new construction site without Wi-Fi. Digital tools ensure you collect all the critical information, from photos to signatures, without interruption. For professionals looking for an even more integrated solution, specialized inspection software can streamline this process further by automatically generating reports that are easy to share with clients and insurance companies.

Add Photos and Notes with Ease

A picture is worth a thousand words, especially in a roof inspection report. A PDF on your device makes it simple to snap photos of potential issues—like cracked shingles or damaged flashing—and organize them with your findings. This visual documentation provides clear, undeniable evidence of your observations, which is incredibly helpful when explaining repairs to a homeowner or filing an insurance claim. Instead of just describing a problem, you can show it. This adds a layer of credibility and clarity to your work, ensuring everyone is on the same page about the roof’s condition.

Keep a Professional Record of Your Inspections

Every inspection you complete adds to the story of a roof’s life. Saving your completed PDF checklists creates a clean, professional, and chronological record of its condition. This history is invaluable for tracking wear and tear over time, scheduling preventative maintenance, and justifying future work. For homeowners, it’s a detailed log of their home’s upkeep. For professionals, it’s a portfolio of your meticulous work. This level of documentation is fundamental for maintaining a LeakFREE® roof certification and demonstrates a commitment to quality and long-term care that clients truly appreciate.

How to Use Your Roof Inspection Checklist

Having a checklist is the first step, but knowing how to use it effectively is what separates a quick glance from a thorough inspection. A great checklist provides structure, ensuring you don’t miss a single detail from the ground to the ridge cap. Think of it as your roadmap to a comprehensive roof assessment. By following a consistent process, you can confidently track your roof’s condition, catch issues before they become costly disasters, and maintain a detailed record for future reference. For professionals, this systematic approach is the foundation of every reliable inspection and is a core component of our specialized inspection software. Whether you’re a homeowner doing a seasonal check or a contractor performing a client inspection, these steps will help you get the most out of your checklist.

Step 1: Get Prepared

Before you even think about getting on the ladder, take a moment to get everything in order. Proper preparation is about more than just safety; it’s about setting yourself up for an efficient and effective inspection. Start by gathering your tools: the checklist, a camera or smartphone for photos, a notepad, and any necessary safety equipment. Performing an annual inspection helps you prevent a host of problems, from minor material damage to major leaks, so treat this preparation phase as the critical first step in protecting the property. Having everything you need on hand means you can focus entirely on the task without interruptions.

Step 2: Follow a System

To ensure nothing gets overlooked, work through your checklist methodically every single time. A consistent system is the key to a thorough inspection. Don’t just wander around looking for obvious problems. Instead, follow the checklist section by section. For example, you might start with a ground-level assessment, then move to the roof itself to check the materials, flashing, and vents, and finally, inspect the interior spaces like the attic. This structured approach guarantees that you cover all critical areas, from the gutters to the insulation. For inspectors looking to refine their process, our training portfolio offers in-depth guidance on developing a professional, repeatable system.

Step 3: Document and Track Everything

Your inspection isn’t complete until you’ve documented your findings. This record is crucial for tracking your roof’s condition over time and identifying patterns or recurring issues. Don’t just rely on memory. Take plenty of photos, especially of any areas that show wear, damage, or potential concern. Get wide shots for context and close-ups to capture specific details. Add notes to your checklist describing what you see. This visual and written record is invaluable for planning repairs, filing insurance claims, or providing a history to a future buyer. It’s this level of detailed tracking that forms the basis of our industry-leading LeakFREE® roof certifications.

When to Call a Professional

A DIY roof inspection is a great first step, but it’s not a substitute for a professional assessment. While our checklist helps you spot obvious issues, some problems require a trained eye and specialized equipment. Knowing when to hand things over to an expert is key to protecting your home and your wallet. A professional can provide a detailed report that’s essential for insurance claims, real estate transactions, or simply getting a complete picture of your roof’s health.

Think of it this way: you can take your own temperature, but you see a doctor for a full diagnosis. Your roof deserves the same level of care. If your inspection uncovers anything that makes you uncertain, or if you simply want the peace of mind that comes with an expert opinion, it’s time to make the call.

For Your Safety

Your personal safety is the top priority. Getting on a roof is inherently risky, especially if it has a steep pitch or if you’re dealing with wet or icy conditions. Professionals have the right equipment and training to work safely at heights. This includes essentials like harnesses, non-slip footwear, and an understanding of how to move around without causing damage or risking a fall. If you don’t have the proper safety gear or feel even slightly uncomfortable with the height, it’s not worth the risk. A trip to the emergency room is far more expensive than a professional inspection fee.

When You Need an Expert Eye

One of the most common myths is that a roof is fine as long as it isn’t actively leaking. The truth is that many serious issues, like granule loss, subtle hail damage, or compromised flashing, aren’t obvious to the untrained eye. A professional inspector knows exactly what to look for. They can identify potential problems long before they lead to a leak inside your home. This expert assessment helps you catch minor issues before they become major, costly repairs, ensuring you get the full lifespan out of your roof and maintain its protective integrity.

The Value of an NRCIA Certified Inspector

Not all inspectors are created equal. When you hire an NRCIA certified inspector, you’re getting a professional who has completed specialized training and adheres to the industry’s highest standards. They provide an unbiased, thorough evaluation of your roof’s condition, giving you a clear and accurate report. This expertise is invaluable, saving you from future repairs and enhancing your home’s value. Investing in a certified inspection ensures your roof is in optimal condition, giving you confidence and the ultimate peace of mind that comes with our LeakFREE® roof protection.

Get Your Free Roof Inspection Checklist

Taking a proactive approach to roof maintenance is the smartest way to protect your property investment. Small issues like a cracked shingle or clogged gutter can quickly escalate into major problems, leading to water damage, structural issues, and expensive repairs. A regular, systematic inspection is your first line of defense. To help you get started, we’ve created a comprehensive checklist that walks you through a professional-grade inspection, step by step. This tool is perfect for homeowners who want to stay on top of seasonal upkeep and for industry professionals looking to standardize their evaluation process. It takes the guesswork out of the equation, ensuring you cover all your bases every single time. Think of it as your roadmap to a thorough and effective roof assessment. By following a consistent checklist, you create a valuable record of your roof’s condition over time, making it easier to plan for future maintenance and budget for eventual replacement. It empowers you to understand your roof’s health, communicate more effectively with contractors, and make informed decisions that will extend the life of your roof and safeguard your home or building. This isn’t just about finding problems; it’s about building confidence in the integrity of your property’s most critical shield against the elements.

Built on the NRCIA Standard

This isn’t just a generic list of things to look at. Our checklist is designed around the same high standards required of every NRCIA certified inspector. It provides a systematic framework for identifying potential issues before they turn into costly, time-consuming repairs. A consistent and thorough inspection process is the foundation of a healthy, long-lasting roof. By using this guide, you can spot subtle signs of wear and tear, address vulnerabilities, and maintain the integrity of your roof. This ensures it provides the reliable protection you depend on, season after season. It’s about applying a professional methodology to your own maintenance routine.

What’s Inside the Checklist

Our downloadable PDF is your step-by-step guide to a complete roof assessment. It covers every critical area, so you can be confident that nothing important is overlooked. We’ve organized it to be clear and easy to follow, whether you’re on the ground or on the roof. Here’s a quick look at what you’ll be examining:

  • Roof Materials: Assess the condition of shingles, tiles, or membranes to ensure they are secure and intact.
  • Water Problems: Identify signs of leaks, moisture, or pooling water that could lead to significant damage.
  • Pests and Debris: Check for nests, insect infestations, or debris buildup that can compromise your roofing system.
  • Structural Components: Inspect flashing, sealants, chimneys, and vents to confirm they are sound and properly sealed.
  • Interior Spaces: Look for signs of water damage or poor ventilation in your attic and on interior ceilings.

Download your free checklist from our resource library and start inspecting your roof with confidence.

Related Articles

Contact Us Now

Frequently Asked Questions

Do I really need to get on my roof for an inspection? Your safety should always come first, so you should never get on a roof unless you have the proper safety equipment and training. The good news is that you can spot many common issues from the ground with a good pair of binoculars. A careful walk around the property can reveal missing shingles, clogged gutters, and other obvious problems. For a closer look at things like flashing, sealants, and subtle hail damage, it’s always best to call a professional who knows how to work safely at heights.

What should I do if I find a problem during my inspection? The first step is to document what you see. Take clear photos of the issue from a few different angles to have a good record. Unless you have significant roofing experience, it’s best to avoid attempting a DIY repair, as you could unintentionally make the problem worse. Your best course of action is to contact a certified inspector or a reputable roofing contractor. They can properly diagnose the severity of the issue and recommend the most effective solution.

Is a roof inspection the same thing as a LeakFREE® roof certification? That’s a great question. Think of a standard inspection as a snapshot in time—it tells you the roof’s condition on that specific day. A LeakFREE® roof certification is a more comprehensive process. It starts with a thorough inspection, includes any necessary minor repairs to ensure the roof is sound, and is backed by a warranty against leaks for a set period. The inspection is the first step, while the certification is the ongoing peace of mind.

How long should a thorough roof inspection take? The time it takes can vary based on the roof’s size, complexity, and age. If you’re a homeowner doing a seasonal check-up, you can likely complete a solid visual inspection from the ground in about 30 to 60 minutes. A professional inspection, however, is much more detailed and typically takes between one and three hours. A certified inspector is meticulously examining and documenting every component of the roofing system to create a complete and accurate report.

My roof is brand new. Do I still need to inspect it? Yes, it’s still a very good idea. An annual inspection on a new roof helps ensure it was installed correctly and allows you to catch any potential defects in the materials while they’re still under the manufacturer’s warranty. Storms and falling debris can also cause damage at any time, regardless of a roof’s age. Getting into the habit of regular inspections from the beginning is the best way to protect your investment for the long haul.

How to Become a Certified Roof Inspector: A Simple Guide

Learn how to become a certified roof inspector with this straightforward guide covering training, skills, certification steps, and career tips.

Starting your own business means finding a service that is always in demand. Every property sale, insurance claim, and maintenance check creates a need for a qualified roof inspector. This provides a steady stream of potential clients and a solid foundation for a profitable business you can build on your own terms. But to succeed, you need credibility from day one. Earning a professional certification is the single most important step to establishing yourself as an expert that clients can trust. This guide is your complete roadmap, explaining how to become a certified roof inspector, from choosing the right training program to marketing your new business and building a loyal client base.

Contact Us Now

Key Takeaways

  • Choose a program that builds true expertise: A reputable certification path involves more than a single course; it requires comprehensive training, hands-on experience, and a commitment to continuing education to prepare you for a long-term career.
  • Combine technical knowledge with strong communication: Your value isn’t just in finding issues on a roof, but in your ability to clearly explain those findings to clients in a professional report they can understand and act on.
  • Use your certification as a strategic business tool: Your credentials open the door to higher earning potential and allow you to build a niche by specializing in areas like commercial properties, insurance claims, or offering exclusive LeakFREE® warranties.

What Does a Certified Roof Inspector Do?

So, what does a certified roof inspector actually do? It’s about much more than just spotting a few missing shingles. A certified inspector is a trained professional who provides a thorough evaluation of a roof’s condition, ensuring it’s safe, secure, and built to last. Think of yourself as a detective for the top of a building. You’ll be the go-to expert for homeowners needing peace of mind, real estate agents closing a deal, and property managers maintaining their investments. Your detailed assessments help people make informed decisions and protect one of their most valuable assets.

A Day in the Life of an Inspector

As a roof inspector, no two days are exactly the same, but they all revolve around a core mission. Roof inspectors are essential for making sure roofs are safe and strong on homes and other buildings. Your day might start with scheduling inspections and communicating with clients, then heading out to a property. You’ll spend time on-site, carefully examining the roof system, taking photos, and making detailed notes. The job is a great mix of hands-on fieldwork and focused office time, where you’ll compile your findings into a clear, professional report. Because people care so much about keeping their properties safe, this job is in high demand, serving a wide range of clients who depend on your expertise.

The Types of Inspections You’ll Perform

A professional inspection goes far beyond a quick glance from the ground. A roof inspector checks the whole roof, including its structure, materials, and overall condition—not just for leaks. At NRCIA, our inspectors perform a detailed ‘five-zone inspection’ that covers the property from the inside out: the interior ceilings, attic, exterior walls, garage, and the rooftop itself. You’ll conduct visual checks for damage, assess the quality of materials, and identify any potential safety hazards. After gathering photos and notes from each zone, you’ll deliver a comprehensive report within 24-48 hours, giving your client a complete picture of their roof’s health and the assurance that comes with a LeakFREE® certification.

What Qualifications Do You Need to Become a Certified Roof Inspector?

Becoming a trusted roof inspector is about more than just being comfortable with heights. It’s about building a foundation of knowledge and credibility that homeowners, real estate agents, and property managers can rely on. While you don’t need a four-year degree, you do need to meet specific requirements that prove your expertise and commitment to professional standards. Think of these qualifications as the essential building blocks of your career. They ensure you have the technical skills to identify potential issues with a roof and the professional integrity to deliver accurate, unbiased reports.

The path to certification is designed to set you up for success. It separates the professionals from the hobbyists and gives clients peace of mind knowing they’ve hired an expert. When you’re certified, you’re not just saying you know how to inspect a roof; you’re showing that you’ve been trained to a specific, industry-recognized standard. This credibility is what will help you build a client base and a sustainable business. The right training and certification not only prepare you for the job but also signal to clients that you are a serious, qualified professional they can trust with one of their most valuable assets. Let’s walk through exactly what you’ll need to get started on this rewarding path.

Education and Experience Requirements

Your journey begins with the right education. To become a certified inspector, you’ll need to complete a training program that covers the essentials: different roofing systems, proper inspection techniques, and critical safety protocols. While a high school diploma is typically the only prerequisite, any prior experience in construction or roofing will give you a significant advantage. This hands-on background helps you better understand building codes, materials, and what to look for on the job. The goal of your initial training portfolio is to build a strong base of technical knowledge, so you can confidently assess any roof you encounter.

Background Checks and Licensing

A certification is a mark of trust, and reputable organizations work hard to protect that. As part of the process, you can expect to undergo a background check. At the NRCIA, for example, all members must pass their training, adhere to a strict code of ethics, and maintain their license annually. This process ensures that every certified inspector meets a high standard of professionalism and accountability. Fulfilling these requirements isn’t just about checking a box; it’s about building a reputation for integrity. This commitment to quality is what allows you to grow your business, increase your earning potential, and become a go-to expert in your community.

Which Training Program is Right for You?

Choosing a certification program is one of the most important decisions you’ll make for your career. The right training not only gives you the technical knowledge you need but also provides the credibility to attract clients and grow your business. While there are several paths you can take, they aren’t all created equal. It’s important to find a program that offers comprehensive education, practical experience, and ongoing support to help you succeed long-term. Let’s look at some of the top options available so you can make an informed choice.

The NRCIA Path to Certification

If you’re looking for a clear, structured path to becoming a respected inspector, the NRCIA is the industry standard. As the nation’s leading authority on roof inspections, our certification process is designed to make you an expert. The journey involves four key steps: completing our in-depth training, passing the certification exam, gaining hands-on field experience, and committing to annual continuing education. This comprehensive approach ensures you have the skills and confidence to handle any inspection. Our training portfolio covers everything you need to know, setting you up for a successful and profitable career from day one.

Other Industry-Recognized Courses

Beyond the NRCIA, you’ll find other organizations that offer roof inspection courses, such as the International Association of Certified Home Inspectors (InterNACHI). Most of these programs follow a similar model where you take classes and must pass an exam to prove your competency. Getting a certification from any reputable organization is a great way to validate your skills and build trust with clients. When you’re exploring your options, look for programs that provide solid study materials, practice tests, and a clear curriculum to help you prepare for your exam and your career ahead.

The Importance of Hands-On Training

No matter which certification you earn, nothing replaces real-world experience. Classroom learning is essential, but applying that knowledge on an actual roof is where you truly hone your craft. I always recommend working alongside a seasoned inspector after you get certified. This mentorship allows you to get comfortable with essential tools like moisture meters and drones in real-life scenarios. Seeking an entry-level position or internship is a fantastic way to build your confidence and learn the nuances of the job that can only be taught in the field. Becoming an NRCIA member connects you with a network of professionals who can offer this kind of invaluable guidance.

Your Step-by-Step Guide to Certification

Ready to turn your interest in roof inspection into a professional credential? The path to certification is a straightforward process of learning, testing, and gaining real-world experience. Think of it as building your career from the ground up—you start with a solid foundation of knowledge and then layer on the practical skills that make you a true expert. Each step is designed to make you a competent, confident, and trusted inspector that homeowners and real estate professionals can rely on. This isn’t about jumping through arbitrary hoops; it’s about methodically acquiring the expertise that clients will depend on for one of their biggest investments. This guide breaks down the entire process into four clear milestones. We’ll cover everything from your initial training and passing the exam to getting crucial hands-on experience and maintaining your credentials for years to come. It’s a commitment, but one that pays off in a rewarding and stable career where you provide a genuinely valuable service. Let’s walk through exactly what it takes to become a certified professional.

Enroll and Complete Your Coursework

Your first move is to enroll in a high-quality training program. This is where you’ll learn the fundamentals that every great inspector needs to know. Comprehensive coursework will cover everything from different roofing systems and materials to essential safety protocols and proven inspection techniques. Choosing the right program is critical, as it sets the stage for your entire career. The NRCIA’s training portfolio is designed to give you a thorough understanding of the industry, ensuring you have the knowledge to handle any inspection that comes your way.

Prepare for and Pass the Exam

Once you’ve completed your coursework, the next step is to pass your certification exam. This isn’t just about memorizing facts; it’s about proving you can apply what you’ve learned. The exam is a crucial checkpoint that validates your expertise and demonstrates your competency to clients and employers. A good training program will do more than just teach you the material—it will prepare you to confidently tackle the exam. Passing is a major accomplishment that officially marks your entry into the world of certified roof inspection, so take your preparation seriously and celebrate your success.

Fulfill Your Practical Experience Requirements

While classroom learning is essential, nothing beats hands-on experience. Getting out in the field is where the lessons truly sink in and you learn to spot the subtle issues that only a trained eye can see. Practical experience is what separates a good inspector from a great one. You can gain this experience by working alongside a veteran inspector or by taking on inspections under supervision. Joining a professional organization like the NRCIA connects you with a network of experienced members who can offer mentorship and guidance as you build your skills and confidence.

Maintain Your Certification for the Long Term

Earning your certification is a fantastic achievement, but it’s not the finish line. The roofing industry is always evolving with new materials, building codes, and inspection technologies. To remain a trusted expert, you’ll need to commit to ongoing education. Continuing education keeps your skills sharp and ensures you’re always up-to-date on the latest industry standards. This commitment to lifelong learning not only maintains your certification but also reinforces your reputation as a dedicated professional who provides the highest level of service to your clients.

What Skills Do You Need to Succeed?

Earning your certification is a huge accomplishment, but it’s just the beginning. The most successful roof inspectors combine their formal training with a specific set of practical skills that build trust and establish their reputation as true experts. Think of your certification as your license to drive, and these skills as the ability to handle any road condition with confidence.

Developing these abilities doesn’t happen overnight. It comes from a commitment to continuous learning and a genuine desire to provide the best possible service to your clients. From understanding the intricate details of a roofing system to clearly explaining your findings to a homeowner, each skill plays a vital role. Mastering them will not only help you perform more accurate inspections but also grow your business. Whether you’re working with real estate agents on a tight deadline or helping a family feel secure in their new home, these are the core competencies that will define your career and set you apart from the competition.

Master the Technical Side of Roofing

A deep understanding of roofing systems is the bedrock of your expertise. This goes beyond just identifying different materials; it’s about knowing how they’re installed, how they age, and how they fail. A comprehensive training portfolio is essential for building this foundation, covering everything from safety protocols to the complexities of various roof types. Your clients are relying on you to be the expert, and having this technical knowledge allows you to accurately diagnose issues, predict potential problems, and provide sound recommendations. This is the knowledge that gives you the confidence to stand behind every inspection you perform.

Prioritize Safety and Code Compliance

Working on roofs comes with inherent risks, which makes safety your top priority—for yourself and for the property. A thorough knowledge of safety regulations and local building codes is non-negotiable. These codes aren’t just rules to follow; they are standards designed to ensure a roof is structurally sound and can withstand the elements. Since requirements can vary by state and even municipality, staying current is part of the job. This diligence protects you from liability and ensures your clients receive an inspection that is both accurate and compliant, giving them total peace of mind.

Learn to Communicate and Write Great Reports

You can perform the most detailed inspection in the world, but if you can’t explain your findings clearly, your work loses its value. Strong communication skills are crucial, both in person and in your written reports. You need to translate technical jargon into straightforward advice that a homeowner or real estate agent can understand and act on. Your inspection report is the final product of your work, and it should be clear, concise, and professional. Using quality inspection software can help you create comprehensive reports that detail your findings and build credibility with your clients.

Develop a Keen Eye for Detail

A great roof inspector sees what others miss. This skill is about meticulous observation—spotting the subtle signs of water intrusion, identifying a small section of damaged flashing, or noticing fasteners that were improperly installed. It involves performing thorough visual checks, assessing the roof’s underlying structure, and evaluating the quality of the materials. This keen eye for detail is what separates a basic inspection from a truly comprehensive one. It’s a skill that sharpens with every roof you climb, and it’s what will earn you a reputation for being thorough, reliable, and trustworthy in your field.

What’s in a Professional Inspector’s Toolkit?

A great inspector is only as good as their tools. Showing up prepared not only helps you do a thorough job but also signals your professionalism to clients. Your toolkit will be a mix of high-tech gadgets, essential safety gear, and smart software to pull it all together. Let’s walk through what you’ll need to carry out inspections safely and effectively.

Essential Inspection Tools and Tech

To perform a comprehensive assessment, you need more than just a good eye. Your basic kit should include measuring devices to accurately calculate roof dimensions and slopes. An infrared camera is a game-changer for detecting hidden moisture or heat loss that isn’t visible otherwise. Of course, you’ll need a sturdy ladder and a safety harness to access roofs securely. Don’t forget the smaller essentials, either—a powerful flashlight and inspection mirrors are perfect for getting a clear view of those dark, hard-to-reach spots. Mastering these tools is a core part of any good training program, helping you find and document issues with confidence.

Must-Have Safety Equipment

Your personal safety should always be your top priority on any job site. Working at heights comes with obvious risks, so never cut corners on safety equipment. Your standard personal protective equipment (PPE) includes a hard hat, safety glasses, and sturdy, non-slip footwear. For any steep-slope roof, fall protection gear like a harness and lanyards is non-negotiable. It’s also smart to keep a well-stocked first aid kit in your vehicle for any minor scrapes or cuts. Adhering to strict safety protocols is a hallmark of a true professional and a key part of maintaining your NRCIA membership in good standing.

Software for Efficient Reporting

In this business, your final report is your final product. Professional, easy-to-read reports build client trust and set you apart from the competition. Modern inspection software is designed to make this process seamless. Look for features that let you create standardized report templates you can customize for each job. The ability to integrate photos directly into your findings provides clear visual evidence for your clients. And with cloud storage, you can securely save your reports and access them from anywhere. The right inspection software streamlines your workflow, so you can spend less time on paperwork and more time growing your business.

How Much Can You Earn as a Certified Roof Inspector?

Pursuing a new certification is a significant step, and it’s smart to think about the financial return on your investment of time and money. Becoming a certified roof inspector isn’t just about adding a new skill; it’s about creating a clear path to greater earning potential and business stability. With the right credentials, you can position yourself as a trusted expert in a field where expertise is highly valued and rewarded. Let’s break down what you can expect to earn and why certification makes such a big difference.

Understanding Your Earning Potential

Your income as a roof inspector is directly tied to your qualifications. While anyone can offer inspections, certified professionals are consistently chosen for bigger, more complex, and higher-paying projects. Clients, whether they’re homeowners or commercial property managers, are willing to pay a premium for the peace of mind that comes with a certified inspection. As you build experience, your earning potential grows even more. Becoming an NRCIA Certified Roof Inspector signals that you have a specialized skill set, allowing you to confidently charge what your expertise is worth and take on more lucrative jobs that are often unavailable to uncertified inspectors.

Job Opportunities and Market Demand

The demand for qualified roof inspectors is strong and steady. Every property sale, insurance claim, and routine maintenance schedule creates a need for a thorough roof assessment. People are more focused than ever on protecting their properties, which means they are actively seeking out professionals to ensure their roofs are safe and secure. This consistent demand provides a reliable stream of work for inspectors across the country. You’ll find opportunities serving a wide range of clients, from individual homeowners to real estate agents and large insurance companies, creating a stable foundation for your career or business.

The Financial Value of Certification

Ultimately, certification is about building credibility. It’s a formal declaration that you have the specialized knowledge and skills that clients and manufacturers trust. This trust is the cornerstone of a successful inspection business. When you have credentials from a respected organization like the NRCIA, you stand out from the competition. This allows you to not only attract more clients but also to justify higher fees for your services. An NRCIA membership is more than just a line on your resume—it’s a powerful business asset that directly contributes to your bottom line by establishing you as a go-to expert.

Where Can You Specialize as a Roof Inspector?

Once you have your certification, you can start thinking about the kind of inspector you want to be. While you can certainly be a generalist, choosing a specialty can help you build a stronger reputation, attract specific clients, and become the go-to expert in your area. Think of it as carving out your own corner of the market. Specializing allows you to focus your skills, streamline your marketing, and often, charge more for your expertise. From offering exclusive warranties to focusing on specific property types, here are a few paths you can take to build your niche.

Offer NRCIA’s LeakFREE® Certifications

One of the most direct ways to set yourself apart is by offering a service no one else can. As an NRCIA member, you have the exclusive ability to provide LeakFREE® roof certifications. This isn’t just a standard inspection report; it’s a guarantee that the entire roof will remain leak-free for the duration of the certification. For homeowners, buyers, and real estate agents, this level of assurance is a massive selling point. By specializing in these certifications, you’re not just identifying problems—you’re providing a solution and peace of mind, making your services incredibly valuable in any real estate transaction.

Focus on Insurance and Warranty Inspections

If you have a knack for details and documentation, specializing in insurance and warranty inspections could be a great fit. These inspections are critical for processing claims after storm damage or for verifying that work meets a manufacturer’s warranty standards. Credibility is everything in this niche. An NRCIA certification shows insurance companies and manufacturers that you have the specialized knowledge to provide accurate, unbiased assessments they can trust. This path requires a deep understanding of roofing systems and the ability to write clear, comprehensive reports that hold up to scrutiny. It’s a reliable field with consistent demand from various property stakeholders.

Choose Between Commercial and Residential Properties

Do you prefer working with homeowners or business clients? The answer can help you decide whether to focus on residential or commercial properties. Residential inspections often involve helping families make informed decisions about their homes, working closely with real estate agents on tight deadlines. Commercial inspections, on the other hand, involve larger, more complex systems on buildings like warehouses, retail centers, and apartment complexes. You’ll work with property managers and business owners, dealing with different materials and challenges. While you can certainly serve both markets, specializing in one allows you to master its unique demands and become the preferred inspector for that type of client.

Serve a Niche Market like California’s SB 721

Sometimes, the best niche is right in your backyard. Local and state regulations can create unique opportunities for certified inspectors. For example, California’s Senate Bill 721 requires periodic inspections of exterior elevated elements, like balconies and decks, on multi-family residential buildings. This law created a specific, ongoing need for qualified professionals. The NRCIA offers a specialized certification for these CA SB 721 inspections, enabling inspectors to meet this regional demand. Pay attention to the laws in your area—you might find a similar, underserved market that you can build your business around.

How to Maintain Your Roof Inspector Certification

Earning your certification is a huge milestone, but it’s just the beginning. Think of it less like a diploma you hang on the wall and more like a subscription to excellence. The roofing industry is constantly changing, with new materials, updated building codes, and better inspection techniques emerging all the time. Maintaining your certification shows clients and employers that you’re not just qualified, but that you’re committed to staying at the top of your game. It’s what separates a good inspector from a great one and is essential for long-term career growth.

This ongoing commitment is what protects the value of your credential and builds trust in your expertise. It ensures you’re always equipped to provide the most accurate, reliable, and up-to-date assessments for every property you inspect. By staying active with your certification, you’re not just checking a box—you’re investing in your career, opening doors to promotions or even starting your own business. It’s a continuous cycle of learning and renewal that keeps you sharp and in demand. Below, we’ll cover the three key pillars of keeping your certification active and valuable.

Meet Your Continuing Education Requirements

The best inspectors are lifelong learners. The construction world doesn’t stand still, and neither should your education. Continuing education (CE) is a core part of maintaining your certification, ensuring you’re always familiar with the latest materials, installation methods, and diagnostic tools. These requirements aren’t just busywork; they are designed to keep your skills sharp and relevant. Fulfilling your CE credits is a direct investment in your career, helping you provide more value to your clients and paving the way for advancement. The NRCIA offers a comprehensive training portfolio to help you meet these requirements and stay ahead of the curve.

Stay Current on Industry Updates

Beyond formal coursework, staying informed about industry shifts is critical. Building codes get updated, new safety regulations are introduced, and market trends can change how you approach an inspection. A great certification body does more than just test you; it keeps you in the loop. Being part of an organization like the NRCIA means you have a partner dedicated to providing you with timely updates and resources. This helps you perform your job effectively and confidently, knowing you’re aligned with the latest standards. Active NRCIA membership ensures you have access to the information you need to protect your clients and your reputation.

Understand the Renewal Process

Your certification has an expiration date for a reason—it confirms that your skills are current. The renewal process is your opportunity to demonstrate your ongoing commitment to professional standards. Typically, this involves submitting proof that you’ve completed your continuing education requirements, reaffirming your adherence to a code of ethics, and paying a renewal fee. It’s a straightforward process designed to uphold the integrity of the certification itself. By keeping your credentials current, you’re not only securing your own professional standing but also contributing to the high standards that make certified inspectors so trusted in the industry.

How to Launch Your Roof Inspector Career

Earning your certification is a huge milestone, but it’s also just the beginning. Now it’s time to turn that credential into a thriving career. Launching your business successfully comes down to three key areas: building your network, marketing your services, and continuously growing your expertise. Think of it as building a sturdy, three-legged stool—if one leg is weak, the whole thing can wobble. By focusing on these pillars from the start, you’ll create a solid foundation for a long and successful career as a certified roof inspector. Let’s walk through how you can get started in each area.

Build Your Professional Network

Your network is your most valuable asset. Start by connecting with the people who will hire you or refer you to clients: real estate agents, insurance agents, property managers, and roofing contractors. Attend local industry events and introduce yourself. Joining professional organizations like the NRCIA is another great way to meet peers and potential partners who value high standards. These connections won’t just send business your way; they’ll also become a source of support and knowledge. Building genuine relationships based on trust and the quality of your work will pay dividends for years to come, creating a steady stream of referrals that marketing alone can’t buy.

Market Your Inspection Services

Once you’re certified, you need to let people know you’re open for business. Start by defining what makes you different. As an NRCIA inspector, you can offer exclusive services like LeakFREE® roof certifications, which is a powerful selling point for homeowners and real estate professionals. Create a simple, professional website that outlines your services, credentials, and contact information. From there, you can reach out to local real estate offices to introduce yourself and explain the value you bring to their transactions. Effective marketing isn’t about being flashy; it’s about clearly communicating how you solve problems for your clients and why they should trust you with their roof.

Grow Your Expertise and Client Base

Your initial certification proves you have the foundational skills, but the best inspectors never stop learning. The roofing industry is always changing, with new materials and building codes emerging. Committing to ongoing training not only keeps your skills sharp but also builds incredible credibility with clients, contractors, and manufacturers. This dedication to your craft is what turns a one-time client into a lifelong customer who refers you to others. As you gain experience, you can specialize in areas like commercial properties or insurance claims to further increase your value and earning potential. The more you know, the more you can grow your business and become the go-to inspector in your area.

Related Articles

Contact Us Now

Frequently Asked Questions

Do I need to have roofing or construction experience to start? While a background in a related field can give you a head start, it is not a requirement. A quality certification program is designed to teach you everything you need to know, from safety protocols to the specifics of different roofing systems. What’s most important is having a keen eye for detail, a commitment to high standards, and a desire to become a trusted expert.

How is an NRCIA certification different from other programs? The main difference is our focus on providing a complete solution, not just an assessment. As an NRCIA-certified inspector, you have the exclusive ability to offer LeakFREE® roof certifications, which come with a warranty. This gives you a powerful and unique service that homeowners, buyers, and real estate agents value, setting you apart from inspectors who can only identify problems.

Can I run my own business as a roof inspector, or do I need to work for a company? You have the flexibility to choose the career path that works best for you. Many certified inspectors go on to launch their own successful businesses, enjoying the freedom of being their own boss. Others prefer the structure of joining an established inspection firm or roofing company. Your certification is a valuable credential that opens doors to both opportunities.

What kind of ongoing support can I expect after I get my certification? Your certification is the beginning of our relationship, not the end. We provide our members with continuing education to keep their skills sharp, timely updates on changing industry standards, and access to a professional network of peers. You also get resources like our specialized inspection software to help you work more efficiently and professionally.

How long does the certification process usually take? The timeline really depends on your personal schedule and how quickly you move through the coursework and exam preparation. The process is designed to be thorough so that you are fully prepared for the field. We structure our training to be comprehensive yet flexible, allowing you to learn at a pace that fits your life while still meeting the high standards required for certification.

Roof Inspection Cost: What Are You Paying For?

Get a clear breakdown of roof inspection cost, what influences pricing, and how a professional inspection can help you protect your home and budget.

When you’re buying or selling a property, the roof’s condition is one of the biggest variables in the entire transaction. For sellers, an uninspected roof can become a major point of contention, potentially lowering the final sale price. For buyers, it represents a huge unknown that could lead to unexpected expenses right after closing. This is where a professional assessment becomes essential. The roof inspection cost is a small price to pay for the clarity and confidence it brings to both sides of the table. It provides a transparent, unbiased report that removes guesswork, streamlines negotiations, and ensures the property’s value is accurately represented. It’s a critical step for a smooth, fair, and successful real estate deal.

Contact Us Now

Key Takeaways

  • A Small Inspection Fee Prevents Major Repair Costs: A proactive inspection is your best defense against expensive, unexpected roof failures. It allows you to address minor issues like cracked shingles or failing sealant before they lead to significant structural damage.
  • Your Inspector’s Credentials Directly Impact the Outcome: The quality of your inspection depends on the professional you hire. Always choose a certified, licensed, and insured inspector to receive an accurate report you can rely on for repairs, insurance claims, and real estate transactions.
  • Follow a Simple Schedule for Consistent Protection: Don’t wait for a leak to appear. Schedule a professional roof inspection annually, after any severe weather event, and more often as your roof ages to maintain its health and extend its lifespan.

What’s the Real Cost of a Roof Inspection?

Let’s get straight to it: what will a professional roof inspection set you back? For a typical single-family home, you can generally expect to pay between $150 and $350. The national average hovers right around $236, giving you a solid benchmark. Of course, that number isn’t set in stone. If you have a very large home or a roof with a steep pitch and complex features like multiple chimneys or skylights, the cost could be higher, sometimes reaching up to $900.

It’s easy to see that figure as just another line item on your home maintenance budget, but it’s much more helpful to view it as an investment in your property’s health and safety. A thorough inspection is your first line of defense against small issues—like a few cracked shingles or failing flashing—that can spiral into major, wallet-draining problems like structural damage and interior water leaks. Think of it this way: paying a couple of hundred dollars now can save you thousands in repairs down the road.

Ultimately, the price covers the expertise of a professional who can spot trouble you might miss. This proactive step provides peace of mind for homeowners and critical information for real estate professionals and property managers. By catching issues early, you’re not just fixing a roof; you’re protecting the value of your entire property and working toward a truly LeakFREE® roof. The real cost isn’t what you pay for the inspection—it’s what you could pay by skipping it.

Breaking Down the Cost of a Roof Inspection

When you get a quote for a roof inspection, you might wonder what goes into that final number. It’s not just a flat fee; the price reflects the unique details of your property and the expertise required to do the job right. Think of it less as a simple service and more as a tailored assessment of one of your home’s most critical assets. Several key factors influence the final cost, from the sheer size and style of your roof to the inspector’s qualifications. Understanding these elements helps you see exactly what you’re paying for: a thorough, professional evaluation that protects your investment. Let’s walk through the main components that determine the price of a quality roof inspection.

Roof Size and Complexity

It makes sense that a larger roof takes more time to inspect, and that extra time is factored into the cost. But it’s not just about square footage. A complex roof with multiple levels, steep angles, dormers, and skylights requires a much more detailed examination than a simple, flat roof on a rectangular home. Each of these features creates a potential point for leaks or failures, so an inspector needs to carefully check every valley, seam, and joint. You’re paying for the inspector’s meticulous attention to detail and the time it takes to cover every inch of a complicated structure, ensuring nothing gets missed.

Roofing Material

The material covering your roof plays a big role in the inspection cost. A standard asphalt shingle roof is the most common and straightforward to inspect. However, if you have premium or specialized materials like slate, clay tile, wood shakes, or metal, the inspection requires a higher level of expertise. These materials can be fragile and are easily damaged if not handled correctly. An inspector needs specific knowledge to assess them properly. A certified inspector with experience in various roofing systems may charge more for this specialized skill, but it’s a worthwhile investment to avoid costly repairs from an improper inspection.

Roof Slope and Accessibility

How easy is it to get on and around your roof? A low-slope, single-story roof is relatively simple to access and walk on. But if your home is multiple stories high or has a very steep pitch, the inspection becomes more challenging and dangerous. Inspectors need to use extra safety equipment, like harnesses and ropes, to perform their job safely. This additional risk and the specialized gear required will naturally increase the price. Limited accessibility due to trees, fences, or other obstructions can also add to the time and effort involved, which is reflected in the final cost.

Your Location

Just like with many other services, where you live affects the price of a roof inspection. Labor rates and the general cost of doing business vary significantly from one region to another. An inspection in a dense urban area with a high cost of living will typically be more expensive than one in a rural community. Local market demand also plays a part. In areas prone to severe weather like hurricanes or hail, experienced inspectors are in high demand and their pricing may reflect that. The key is to find a qualified local professional who understands the specific challenges your region’s climate poses for roofs.

Inspector Credentials and Experience

When it comes to a roof inspection, you truly get what you pay for. A lower price might come from an inspector who is new, uninsured, or lacks formal training. On the other hand, a higher quote often comes from a seasoned professional with verifiable credentials and a solid reputation. An inspector with an NRCIA certification has undergone rigorous training and is committed to a high standard of practice. You’re paying for their expertise, their investment in advanced tools, and the peace of mind that comes from a comprehensive and accurate report that you can trust.

Time of Year

Believe it or not, the season can influence the cost of your roof inspection. The busiest times for roofing professionals are typically in the spring and fall, as well as immediately following a major storm. During these peak periods, demand is high, and you might find that prices are a bit higher and scheduling is tighter. If your inspection isn’t urgent, consider booking it during a slower period, like early winter or mid-summer. You may find more flexible scheduling and potentially better pricing when inspectors aren’t as busy. Planning ahead can sometimes save you a little money without sacrificing quality.

Which Type of Roof Inspection Is Right for You?

Not all roof inspections are created equal. The method your inspector uses can depend on your roof’s condition, the type of property, and what you need the inspection for. Understanding the different approaches will help you choose the right service and know exactly what you’re paying for. Whether you’re a homeowner wanting a routine check-up or a real estate agent needing documentation for a sale, there’s an inspection type that fits your needs. Let’s walk through the most common options so you can make an informed decision.

Physical Inspections

This is the classic “boots on the roof” approach and what most people picture when they think of a roof inspection. A certified inspector will physically walk on your roof to get a hands-on look at its condition. They’ll carefully examine the shingles or tiles for wear and tear, check the flashing around chimneys and vents, and inspect gutters for blockages or damage. This direct method allows for a tactile assessment that can reveal subtle issues like loose shingles or soft spots in the decking. It’s a thorough and reliable way to get a complete picture of your roof’s health, making it a standard choice for many homeowners and property managers.

Drone Inspections

For roofs that are particularly steep, complex, or made of delicate materials like slate or clay tiles, a drone inspection is an excellent alternative. Using a high-resolution camera, a drone can capture detailed images and videos from every angle without anyone having to set foot on the roof. This method is not only safer but also incredibly efficient, often cutting down on inspection time. Drones can easily access hard-to-reach spots and provide a clear visual record of any potential issues. This modern approach combines safety with advanced inspection software to deliver precise and comprehensive results.

Infrared Inspections

Sometimes, the biggest roofing problems are the ones you can’t see. An infrared inspection uses thermal imaging technology to detect temperature variations across your roof’s surface. These differences can pinpoint areas where moisture is trapped beneath the roofing material, even if there are no visible signs of a leak. Finding hidden moisture early is key to preventing rot, mold, and serious structural damage. This specialized inspection is perfect if you suspect a persistent, hard-to-find leak or want to assess your home’s energy efficiency by identifying areas of heat loss. It’s a powerful tool for protecting your home and ensuring a truly LeakFREE® roof.

Comprehensive vs. Basic Packages

When you get a quote, you’ll likely see options for basic or comprehensive inspections. A basic inspection typically covers the exterior roof surface and is great for a quick health check. A comprehensive package, however, offers a much deeper assessment. It usually includes everything in a basic inspection plus an interior check of the attic for signs of leaks, poor ventilation, or structural issues. More importantly, a comprehensive inspection is often required to obtain a roof certification. While it costs more upfront, the added peace of mind and official documentation can be invaluable, especially during a real estate transaction or for insurance purposes.

What to Expect During a Roof Inspection

A professional roof inspection is much more than a quick glance from the ground. It’s a comprehensive assessment of your entire roofing system, from the shingles on top to the decking underneath. A certified inspector follows a detailed checklist to ensure every component is evaluated for safety, performance, and longevity. They are trained to spot subtle signs of wear and tear that an untrained eye would easily miss.

The goal is to give you a complete and accurate picture of your roof’s current condition. Think of it as a health check-up for one of your home’s most critical assets. The inspector will document their findings, take photos of any problem areas, and provide you with a clear, actionable report. This process empowers you to make informed decisions about maintenance and repairs, helping you address small issues before they turn into costly emergencies. Understanding what the inspector is looking for can help you feel more confident in the process and the results.

Checking Exterior Materials

The first thing an inspector will do is carefully examine the primary roofing material. They’ll look for obvious signs of trouble like cracked, curling, or missing shingles. If you have a tile roof, they’ll check for broken or slipped tiles. For metal roofs, they’re on the lookout for rust, loose panels, or damaged sealant. Beyond just damage, they’ll also assess the overall condition, noting any moss, algae growth, or significant granule loss on asphalt shingles. This hands-on evaluation of your roof’s surface is the first line of defense in identifying vulnerabilities and ensuring your home has a LeakFREE® roof.

Evaluating Flashing and Vents

Some of the most common leak sources aren’t on the main surface of the roof but at the points where it meets other structures. An inspector pays close attention to these areas. They will check the flashing—the metal pieces that seal joints around chimneys, skylights, and vents—for rust, gaps, or deterioration. They’ll also examine vent covers, plumbing boots, and the caulking around them to ensure they are watertight. Clogged gutters and overhanging tree branches that could cause damage are also noted, as proper drainage and clearance are essential for your roof’s long-term health.

Inspecting the Attic

A thorough inspection isn’t complete without looking at the roof from the inside. By going into your attic, an inspector can spot problems that aren’t visible from the outside. They’ll look for signs of water intrusion, such as stains on the underside of the roof deck, damp insulation, or mold growth. They will also check for any light shining through from the outside, which indicates a hole or gap. This interior view also allows them to assess the attic’s ventilation and insulation, as poor airflow can lead to moisture buildup and premature aging of the roof structure.

Identifying Common Problems

The inspector’s job is to connect all the dots and identify both current and potential issues. By combining their exterior and interior findings, they build a complete picture of your roof’s health. Catching problems early means they are usually cheaper and easier to fix. Common issues like failing sealant around a vent or a small area of damaged shingles can be simple repairs if addressed promptly. An NRCIA-certified inspector is trained to identify these vulnerabilities, providing a crucial service for the various property stakeholders who rely on a sound roof, from homeowners to real estate professionals.

Receiving a Detailed Photo Report

After the physical inspection is complete, you won’t be left with just a verbal summary. A key part of the service is a detailed written report that outlines everything the inspector found. This document will include high-resolution photos of any problem areas, providing clear visual evidence of the issues. It will also contain descriptions of the problems and prioritized recommendations for repairs or maintenance. This professional report, often generated with specialized inspection software, is an invaluable tool you can use to schedule repairs, negotiate with sellers, or file an insurance claim.

How to Prepare for Your Roof Inspection

A roof inspection is a straightforward process, but a little prep work can go a long way in making sure it’s as smooth and thorough as possible. Taking a few simple steps beforehand helps your inspector work safely and efficiently, and it ensures you get the most accurate assessment of your roof’s condition. Think of it as setting the stage for a productive check-up. By clearing the way and gathering your notes, you empower the inspector to focus on what they do best: identifying any potential issues before they become major headaches. These preparations are simple, quick, and help you get the maximum value from your investment in a professional inspection. It’s about creating a partnership with your inspector, where you provide the access and information they need to give you a complete picture of your roof’s health. This proactive approach not only streamlines the inspection itself but also helps you feel more confident in the results and any recommended next steps.

Clear Debris and Provide Access

Before your inspector arrives, take a quick walk around your property. Your goal is to give them a clear and safe workspace. Start by clearing away any leaves, branches, or other debris from the roof surface and gutters. If you have patio furniture, toys, or vehicles near the house, it’s a good idea to move them back a few feet to create a safe perimeter for ladders. The inspector will also likely need to check your attic for signs of leaks or water damage, so make sure the access point is clear of boxes or other stored items. This simple cleanup allows the inspector to move freely and get a complete view of every part of your roof system, from the shingles down to the interior structure.

Get Multiple Quotes

When you’re looking for a roof inspector, it’s smart to get a few different quotes to understand the going rate in your area. While the average inspection costs between $125 and $376, prices can vary. Reaching out to at least three certified professionals will give you a solid baseline. But remember, the goal isn’t just to find the lowest price—it’s to find the best value. A cheaper inspection might be less thorough, potentially missing critical issues that could cost you more down the road. When comparing quotes, look at the inspector’s credentials, read reviews, and consider the level of detail they promise in their report. Investing in a highly qualified inspector from an organization like the NRCIA ensures you’re getting true expertise.

Understand What’s Included in the Price

Not all roof inspections are created equal, so it’s crucial to know exactly what you’re paying for. A standard physical inspection typically involves the inspector walking the roof to examine the condition of the shingles, check the flashing around chimneys and vents, and inspect the gutters. However, some packages are more comprehensive than others. Before you commit, ask for a checklist or a sample report to see the level of detail they provide. Will they use a drone for hard-to-reach areas? Does the inspection include a thorough check of the attic? Clarifying these details upfront helps you compare quotes accurately and ensures there are no surprises on inspection day.

Document Any Known Issues

You know your home better than anyone. If you’ve noticed a water stain on the ceiling or found shingles in your yard after a storm, share that information with your inspector. Before they arrive, make a list of any specific concerns you have. If you have records from previous repairs or inspections, gather those as well. Providing this history gives your inspector valuable context and helps them focus on potential problem areas. This proactive communication ensures your concerns are addressed directly. Plus, keeping up-to-date inspection records can be a huge help if you ever need to file an insurance claim, as it provides a clear history of your roof’s condition.

How to Choose a Certified Roof Inspector

Finding the right roof inspector is just as important as getting the inspection itself. The quality of the inspection, the accuracy of the report, and your peace of mind all depend on the professional you hire. Not all inspectors have the same level of training or adhere to the same standards. Taking the time to vet your options ensures you get a thorough evaluation from a true expert who can give you a clear picture of your roof’s condition. An inspector’s credentials can tell you a lot about the quality of service you can expect, so it’s worth paying attention to the details before you make a decision.

Why NRCIA Certification Matters

When an inspector is NRCIA-certified, it means they’ve completed a demanding training program and are committed to the highest industry standards. This isn’t just a line on a business card; it’s your assurance that the person examining your roof has a deep understanding of roofing systems, materials, and common points of failure. A certified professional follows a standardized process, ensuring no detail is overlooked. This level of expertise is what separates a basic look-over from a comprehensive assessment that truly protects your investment. The NRCIA’s extensive training portfolio is designed to produce inspectors who deliver consistent, reliable results every time.

Key Qualifications to Look For

Beyond certification, there are a few key credentials you should always look for. First, confirm that the inspector is licensed and fully insured. This protects you from any liability in case of an accident on your property. Second, look for someone with a solid reputation and proven experience, especially with your specific type of roofing material. An inspector who primarily works with asphalt shingles may not be the best choice for a tile or metal roof. The best professionals, like those who pursue different NRCIA membership levels, are dedicated to continuous learning and staying current with industry best practices.

Questions to Ask Your Inspector

Before you commit, have a list of questions ready to ask any potential inspector. This helps you understand their process and what you’re paying for. Start by asking what their inspection includes—will they check the attic, flashing, and gutters? Inquire about their process and how long it will take. Most importantly, ask what kind of report you will receive. A professional inspection should always conclude with a detailed written report, complete with photographs, that clearly outlines any findings. This documentation is crucial for repairs, insurance claims, or real estate transactions, and is a core component of services like the LeakFREE® roof protection.

How Often Should You Schedule a Roof Inspection?

Knowing when to call in a professional for a roof inspection can feel like a guessing game, but it doesn’t have to be. While there’s no single magic number that works for every home, a few key factors—like your roof’s age, your local climate, and recent weather events—can provide a clear roadmap. Think of it less as a chore and more as a proactive strategy to protect one of your biggest investments: your home. Regular check-ups are the best way to ensure your roof remains in top condition, preventing small, fixable issues from turning into costly emergencies.

A consistent inspection schedule is the foundation of a healthy roof and is essential for maintaining a LeakFREE® roof certification. Generally, you can break down the timing into three main categories: routine annual checks, immediate post-storm assessments, and more frequent inspections as your roof gets older. Understanding which category your roof falls into will help you stay ahead of potential problems and give you peace of mind, knowing your home is properly protected from the elements.

The Case for Annual Inspections

It’s a good rule of thumb to get a professional roof inspection once a year. Consider it a routine health check-up for your home. An annual inspection allows a certified professional to spot subtle signs of wear and tear, like cracked sealant or a few loose shingles, before they escalate into major leaks or structural damage. This simple, proactive step not only helps extend the life of your roof but also saves you significant money and stress down the road. By catching issues early, you can address them with minor repairs instead of facing a complete—and often unexpected—roof replacement.

When to Inspect After Bad Weather

Mother Nature can be tough on roofs. That’s why you should always get an inspection after big storms or strong winds to check for hidden damage. Events like hailstorms, hurricanes, or even just unusually high winds can lift shingles, crack tiles, and damage flashing around chimneys and vents. This kind of damage often isn’t visible from the ground, but it can create the perfect entry point for water. A timely post-storm inspection by a professional provides an accurate assessment of your roof’s condition and gives you the detailed documentation you’ll need for any insurance claims.

Inspections Based on Your Roof’s Age

Just like anything else, roofs have a lifespan. If your roof is getting older (in the 20- to 30-year range), it’s time to start paying closer attention. You should get an inspection right away if your roof is old, as aged materials are far more susceptible to damage from sun, wind, and rain. Years of exposure can cause shingles to become brittle and curl, or granules to wear away, leaving the underlying structure vulnerable. For an older roof, you might even consider inspections more frequently than once a year, especially if you live in an area with harsh weather. This helps you monitor its condition and plan for a replacement, rather than being caught off guard by a sudden failure.

How a Roof Inspection Saves You Money

It’s easy to think of a roof inspection as just another expense on a long list of home maintenance tasks. But what if you reframed it as an investment? A professional inspection isn’t just about finding problems; it’s about protecting your finances from the much larger, unexpected costs that a neglected roof can create. Think of it as a financial health check for one of your home’s most critical assets.

By scheduling regular inspections, you’re taking a proactive step that can save you thousands of dollars down the line. From catching minor issues before they become catastrophic failures to ensuring you have the proper documentation for insurance claims, a detailed report from a certified inspector is a powerful tool. It provides peace of mind and a clear plan for maintaining your roof’s integrity. This preventative approach is key to extending your roof’s lifespan and avoiding the budget-breaking shock of a premature replacement. A LeakFREE® certified roof, for example, not only protects your home but also solidifies its value through a nationally recognized warranty.

Catching Problems Early

The old saying “a stitch in time saves nine” is especially true for your roof. A small, hidden leak can quietly cause rot, mold, and structural damage that costs a fortune to fix. Regular inspections help you find these issues when they are still minor and manageable. As experts at This Old House note, “Catching problems early means they are usually cheaper and easier to fix.” A certified inspector can spot cracked shingles, failing flashing, or blocked gutters before they lead to a major crisis. This allows you to handle a simple repair instead of a complex and expensive restoration project, ultimately helping your roof last longer and protecting your home from the elements.

Strengthening Insurance Claims

When a major storm or unexpected event damages your roof, the last thing you want is a battle with your insurance company. An up-to-date inspection report serves as your baseline—a clear record of your roof’s condition before the damage occurred. This documentation is invaluable for supporting your claim and proving the extent of the new damage. Having these records on hand can streamline the entire process, helping you get your claim approved faster and for the correct amount. It removes the guesswork and provides concrete evidence, which is exactly what insurance adjusters need to process your claim efficiently.

Protecting Your Property Value

Your roof is one of the first things potential buyers notice, and its condition can significantly impact your home’s curb appeal and market value. A well-maintained roof signals that the entire property has been cared for, making it much more attractive to buyers. A recent inspection report or a certification can be a major selling point, giving buyers confidence and potentially speeding up the sale. As one guide points out, “A well-kept roof can increase your property’s value and make it more appealing if you decide to sell.” It prevents buyers from using a questionable roof as a bargaining chip to lower your asking price, ensuring you get the full value your home deserves.

Why a Roof Inspection Is a Smart Investment

Think of a roof inspection less as an expense and more as a health check-up for your home. It’s a proactive step that protects your property from top to bottom. Most significant roof problems don’t happen overnight; they start as small, often invisible issues. A tiny crack in a shingle, a loose piece of flashing, or a small patch of moss can seem harmless, but they create openings for water to seep in. A certified inspector has the trained eye to spot these minor concerns before they escalate into major water damage, mold growth, or structural rot. Catching these problems early is the key to preventing expensive, time-consuming repairs down the road and ensuring you have a LeakFREE® roof.

Spending a few hundred dollars on an inspection today can save you thousands in the future. The cost of replacing a few shingles is minimal compared to the expense of a full roof replacement or repairing extensive water damage inside your home. Regular inspections also play a crucial role in keeping your manufacturer’s warranty valid, as many warranties require proof of routine maintenance. By identifying and addressing small issues, you extend the lifespan of your existing roof, getting the most out of your initial investment. It’s a simple financial calculation: a small, predictable cost now helps you avoid a large, unexpected one later.

A well-maintained roof is a major asset, whether you plan to stay in your home for decades or sell it next year. For homeowners, it provides invaluable peace of mind, knowing your family and belongings are protected. For real estate professionals and sellers, a recent inspection report from a certified professional is a powerful selling point. It demonstrates to potential buyers that the property has been cared for and removes a major point of uncertainty from the negotiation process. A certified, healthy roof can directly contribute to your property’s market value and help it sell faster. Ultimately, an inspection is an investment in your property’s integrity and its future worth.

Related Articles

Contact Us Now

Frequently Asked Questions

Why do roof inspection quotes vary so much? The price of a roof inspection isn’t a flat fee because every roof is different. A quote reflects the specific details of your property, such as the roof’s size, steepness, and the type of material used. A complex slate roof on a three-story home simply requires more time, risk, and specialized knowledge to inspect than a standard asphalt shingle roof on a single-story house. The inspector’s credentials and experience also play a role, as you’re paying for their expertise and the quality of their report.

Is a drone inspection as thorough as having someone walk on my roof? Both methods can be incredibly thorough when done by a certified professional. The best approach really depends on your roof. For materials that are fragile and easily damaged, like clay tile or slate, or for roofs that are dangerously steep, a drone inspection is often the safer and more effective choice. It provides high-resolution images of every angle without risk. For more standard roofs, a physical inspection allows for a hands-on assessment to feel for soft spots or lift shingles. A great inspector will know which method is right for your situation.

What’s the difference between a roof inspection and a roof certification? Think of a roof inspection as a detailed report card that tells you the exact condition of your roof at a specific moment in time. It identifies any existing issues and recommends repairs. A roof certification, on the other hand, is a guarantee. After an inspection, and once any necessary repairs are completed, a certification like the NRCIA’s LeakFREE® warranty ensures your roof meets high standards and protects it against leaks for a set period. It’s an extra layer of protection that’s especially valuable during a home sale.

My roof is only a few years old. Do I still need an annual inspection? Yes, it’s still a very smart move. An annual check-up on a newer roof helps catch things like minor storm damage, sealant failure, or even potential installation errors that might not be obvious right away. Many manufacturer warranties actually require proof of regular maintenance to remain valid. A yearly inspection protects your investment, ensures your warranty stays intact, and addresses small issues before they have a chance to cause real damage.

What happens if the inspector finds a problem? Finding a problem is actually a good thing because it means you can fix it before it gets worse. If an inspector identifies an issue, you won’t be left guessing what to do next. You’ll receive a detailed report with clear photos and written explanations of the problem, along with prioritized recommendations for repairs. This professional report gives you a clear action plan and serves as a valuable tool you can use to get accurate quotes from qualified roofing contractors.

Roof Inspection Cost Per Square Foot: A Breakdown

Get a clear breakdown of roof inspection cost per square foot, including what affects pricing and tips to help you budget for your next roof inspection.

Thinking about a roof inspection as just another expense is missing the bigger picture. It’s one of the most effective ways to save money in the long run. A small leak or a few damaged shingles can quickly escalate into thousands of dollars in water damage and structural repairs. The upfront fee for a professional inspection is minor in comparison. By catching small issues early, you prevent catastrophic failures and extend the life of your entire roofing system. We’ll explore how the roof inspection cost per square foot is a small price to pay for the significant long-term savings and peace of mind that come with proactive maintenance.

Contact Us Now

Key Takeaways

  • Understand What Shapes Your Quote: A roof inspection quote is based on more than just square footage. Factors like your roof’s material, its complexity (think steep pitches and multiple levels), and even your geographic location will influence the final price.
  • View Inspections as an Investment: Spending a few hundred dollars on a professional inspection now can save you thousands later. Regular check-ups catch minor issues before they become major disasters, extend the life of your roof, and strengthen potential insurance claims.
  • Vet Your Inspector Carefully: Don’t just go with the cheapest quote. Look for a certified professional, like one from the NRCIA, and always verify their insurance. Be wary of unsolicited “free” inspections, as they are often a setup for a high-pressure sales pitch.

How Much Does a Roof Inspection Cost?

One of the first questions on everyone’s mind is, “What’s this going to cost me?” It’s a fair question, and the answer is that it depends. While there are national averages to give you a ballpark figure, the final price tag for a professional roof inspection is shaped by your roof’s specific characteristics and where you live. Think of it as an investment in your property’s health. A thorough inspection from a certified professional can uncover minor issues before they become major, wallet-draining problems. Understanding the typical cost helps you budget accordingly and ensures you’re getting a fair price for a critical service that protects your home or commercial building.

A Look at National Averages

Generally speaking, you can expect a standard roof inspection to cost between $125 and $375. Most homeowners find their final bill lands somewhere in that range, with the national average sitting around $250. This price typically covers a physical, on-the-roof assessment where an inspector checks for signs of damage, wear and tear, and potential leak spots. Keep in mind, this is for a basic inspection of an average-sized roof. If you need a more advanced assessment, like one using an infrared camera to detect hidden moisture or a drone to view hard-to-reach areas, the cost can go up. These specialized services provide a deeper look into your roof’s condition but come with a higher price tag.

Why Your Location Matters

Where your property is located plays a huge role in the cost of a roof inspection. A quote in a major city will likely be higher than one in a rural town, simply because the cost of doing business is different. Local market demand is another big factor. For instance, in areas prone to hurricanes or heavy storms, demand for inspectors can spike, which often leads to higher prices. The complexity of homes in your region can also influence the cost. If your property is difficult to access or has a particularly steep or complex roof design, the inspector will factor that extra time and risk into the price. This is why homeowners and real estate professionals across the country see such a wide range of quotes for what seems like the same service.

What Factors Shape Your Inspection Bill?

When you get a quote for a roof inspection, you’ll notice it’s not a simple, flat fee. Several key elements influence the final price, from the specifics of your roof to the person you hire to do the job. Understanding these factors helps you see exactly what you’re paying for: a detailed assessment of one of your property’s most critical assets. Think of it less as a standard service and more as a customized evaluation tailored to your home. Let’s break down what goes into that final number.

Roof Size and Complexity

It makes sense that a larger roof takes more time to inspect, which translates to a higher cost. But it’s not just about the total square footage. A roof’s complexity plays a huge role, too. If your roof has multiple levels, steep pitches, dormers, valleys, or several skylights, the inspector has more angles and potential weak points to examine carefully. Each of these features adds time and intricacy to the job. A simple, flat roof on a small home is a much quicker task than a sprawling, multi-gabled roof on a large one.

Material and Age

The type of material on your roof and how old it is are major factors in an inspection’s cost. An asphalt shingle roof is pretty standard, but materials like slate, tile, or metal require a more specialized eye and sometimes different inspection techniques. An older roof also demands a more detailed look, as the inspector will be searching for signs of age-related wear, brittleness, or past repairs. Remember, every roofing material has a lifespan. A thorough inspection helps you catch small issues before they become expensive problems, ensuring you get the most out of your LeakFREE® roof.

Accessibility and Safety

How easy—or difficult—it is to get onto your roof directly impacts the price. A single-story home with a low-slope roof is straightforward to access. However, a steep, multi-story roof requires extra safety equipment and caution, increasing the time and risk for the inspector. You can expect to pay more if your roof is particularly high or has a sharp pitch. Obstacles like large trees, fences, or limited yard space can also make access tricky, adding to the labor involved and, consequently, the cost of the inspection.

Your Geographic Location

Where you live matters. Inspection costs can vary significantly from one region to another based on the local cost of living, regional labor rates, and market demand. For example, prices might be higher in major metropolitan areas compared to rural towns. You may also see seasonal price shifts in areas prone to severe weather, like hurricanes or heavy snowfall, as demand for inspections spikes. Local building codes and insurance requirements can also influence the scope and price of an inspection in your specific area.

Inspector Qualifications

You’re not just paying for someone to walk on your roof; you’re paying for their expertise. A highly experienced and certified inspector will likely charge more than a general contractor who offers inspections as a side service. An inspector with credentials from an organization like the NRCIA has undergone specialized training and education to identify issues that others might miss. While it might be tempting to go with the lowest bidder, investing in a qualified professional provides peace of mind and a far more reliable assessment of your roof’s condition.

What Are the Different Types of Roof Inspections?

Not all roof inspections are created equal. The right approach depends entirely on your situation—whether you’re performing a routine check-up, assessing damage after a storm, or getting ready to sell your property. Understanding the different methods helps you choose the right service and know what to expect from the final report. A qualified inspector might even use a combination of techniques to get a full picture of your roof’s health.

For professionals, mastering these various inspection types is key to providing top-tier service. That’s why comprehensive training and education are so vital for building a trusted reputation in the industry. Knowing the difference between a simple visual check and a deep-dive thermal scan ensures you get the information you need. Let’s break down the most common types of roof inspections so you can make the best decision for your property.

The Classic Physical Inspection

This is the method most people picture: a trained inspector physically gets on your roof to examine its condition up close. They will walk the entire surface, checking for damaged shingles, loose flashing, signs of wear and tear, and potential leak spots around chimneys, vents, and skylights. It’s the most common and traditional type of inspection, providing a direct, hands-on assessment. For most standard homes, a physical inspection is thorough enough to catch common issues. This type of inspection typically costs between $150 and $400, making it an accessible option for routine maintenance checks.

High-Tech Drone Inspections

For roofs that are especially steep, complex, or otherwise unsafe to walk on, a drone inspection is an excellent modern solution. An inspector operates a high-resolution drone to capture detailed photos and videos of every angle of your roof from above. This technology is perfect for identifying damage that might be hard to see from the ground or even during a physical walk-through. The detailed imagery can be integrated into sophisticated inspection software to create precise and easy-to-understand reports. Drone inspections usually cost between $150 and $400, offering a safe and effective alternative to a traditional physical check.

Advanced Infrared Inspections

Some of the most damaging roof problems, like trapped moisture under the surface, are completely invisible to the naked eye. This is where an infrared inspection becomes invaluable. Using a special thermal imaging camera, an inspector can detect temperature differences across your roof that indicate hidden moisture, saturated insulation, or energy loss. By identifying these issues early, you can prevent widespread rot, mold, and structural damage. Because it requires specialized equipment and expertise, an infrared inspection is more expensive, typically ranging from $400 to $600, but it provides a level of detail you can’t get any other way.

Specialized Inspections for Insurance or Real Estate

Sometimes, you need an inspection for a very specific reason. If you’re selling your home, a pre-sale inspection gives potential buyers confidence in the roof’s condition, which can smooth out negotiations. After a major storm, an insurance claim inspection provides the detailed documentation that insurance companies and real estate professionals require to process a claim accurately. These reports are often more detailed than a standard inspection and are tailored to meet specific industry requirements. Depending on the complexity, these specialized inspections usually cost between $200 and $600.

How Does Roof Size Affect the Price?

It probably won’t surprise you to hear that the bigger your roof, the more your inspection will cost. It’s a simple matter of time and resources. A sprawling roof with multiple levels and complex features takes a lot longer to assess than a simple, single-story gable roof. As a general rule, you can expect the price to go up by about $50 to $100 for every extra 1,000 square feet of roofing area. This isn’t just about walking a larger surface; it’s about meticulously checking every shingle, flashing, and seam. A thorough inspection is the foundation of true protection, which is why our inspectors are trained to be incredibly detailed. This commitment to quality is what stands behind every one of our LeakFREE® roof certifications. So, while a larger roof means a higher initial inspection fee, it’s a necessary step to protect a larger, more valuable asset.

How Inspectors Calculate Square Footage

You might wonder how an inspector arrives at that final square footage number. It’s not just a simple length-times-width calculation you might do for a room in your house. A professional inspector measures the roof’s dimensions and factors in its complexity, including the pitch (or steepness) and the number of facets, dormers, and valleys. For example, a basic inspection on a 1,000-square-foot roof might run between $75 and $210. For a 2,000-square-foot roof, that cost could nearly double, reflecting the added time and detailed work required to cover the larger, more intricate surface.

Understanding Minimum Fees

No matter the size of your roof, most inspections come with a minimum fee. Think of it as a standard charge to get a qualified professional out to your property with their tools and expertise. This fee is usually around $75. It ensures the inspector is compensated for their travel time, insurance, and the initial setup, even if you have a very small roof on a detached garage or a tiny home. It’s a standard practice that covers the baseline cost of a professional service call, guaranteeing you get an expert eye on your property from the moment they arrive.

Do Larger Roofs Get a Discount?

It seems logical to ask if you get a “bulk discount” for a larger roof, but that’s not usually how it works in the world of roof inspections. In fact, the opposite is often true. Larger roofs don’t just take more time to walk—they often have more complex structures, more potential points of failure, and require a more extensive report. The higher fee directly reflects the increased labor and liability involved in certifying a larger, more valuable asset. So, when you’re planning your budget, it’s best to assume the cost will scale up with the size of your roof.

Are There Extra Fees to Expect?

The initial quote for your roof inspection covers the basics, but it’s smart to ask about potential extra charges before you commit. Certain situations can add to the final bill, and knowing what they are ahead of time helps you budget accurately and avoid surprises. From travel time to the level of detail in your final report, a few factors can influence the cost. Being prepared for these possibilities ensures a smooth process and helps you understand the full value you’re getting from a professional inspection.

Travel and Mileage Fees

If your property is located in a remote area or far from the inspector’s typical service range, you might see a travel or mileage fee on your invoice. This charge covers the inspector’s time and fuel costs to get to you. Additionally, if your roof or attic is particularly hard to reach—think steep pitches, complex architecture, or blocked access points—the inspector may add a fee for the extra time and equipment needed to perform the job safely. It’s always a good idea to mention any potential access challenges when you schedule your appointment.

Detailed Reports and Documentation

A basic inspection might come with a simple checklist, but a truly comprehensive assessment includes much more. A professional report should provide clear photos of any problem areas, detailed measurements of your roof, and specific notes on the condition and age of your roofing materials. This level of documentation is crucial for making informed decisions about repairs or replacement. Some inspectors offer different tiers of reporting, with more detailed options costing extra. Investing in a thorough report gives you a clear, actionable plan for maintaining your roof’s health and achieving a LeakFREE® roof.

The Cost of a Follow-Up

It’s important to distinguish between a free estimate and a paid professional inspection. A free estimate is usually a quick visual check aimed at selling you a new roof. A paid inspection, on the other hand, is a deep dive into the condition of your entire roofing system. While it costs more upfront, this detailed assessment can save you money by identifying issues that a quick glance would miss. The stakeholders we serve—from homeowners to real estate professionals—rely on this unbiased evaluation to make sound financial decisions. If the inspection uncovers problems, you’ll need to budget for repairs, but this follow-up work is based on a professional assessment of your roof’s needs.

Fees for Rush or Emergency Service

Life happens, and sometimes you need a roof inspection right away. Whether you’re dealing with the aftermath of a major storm or trying to meet a tight deadline for a real estate transaction, most inspection companies can accommodate urgent requests. However, this expedited service often comes at a premium. Squeezing an emergency appointment into a packed schedule or working in difficult weather conditions requires extra resources, so expect to pay a rush fee. If you can, scheduling your inspection in advance is the best way to avoid these additional costs.

How Can You Prepare to Lower the Cost?

A roof inspection is an investment in your property’s health, but that doesn’t mean you can’t be smart about the cost. While you can’t change the size or material of your roof, a little preparation can make the process smoother and more efficient for your inspector. Taking a few simple steps beforehand can help you avoid unexpected fees and ensure you get the most value out of your inspection.

Clear the Way for Easy Access

One of the biggest variables in an inspection quote is how easily the inspector can access your roof. A steep pitch, multiple stories, or landscaping obstacles can make the job more difficult and time-consuming, which often translates to a higher price. To help things go smoothly, trim back any overhanging tree branches that could block access. Clear away toys, furniture, or debris from the perimeter of your home. On inspection day, make sure any gates are unlocked and pets are safely secured inside. This helps create a safe and efficient work environment for the inspector, which is always a good thing for homeowners.

Have Your Paperwork Ready

Walking into an inspection with your roof’s history on hand helps your inspector get a complete picture right away. Gather any relevant documents you have, such as records of past repairs, the original installation date, and any existing warranty information. This paperwork provides valuable context that can speed up the assessment process. If you’re getting the inspection to sell your home or satisfy an insurance requirement, having these details ready is especially important. It helps the inspector accurately estimate your roof’s remaining lifespan and complete the necessary paperwork for a LeakFREE® roof certification.

Schedule During the Right Season

Timing is everything, and that includes scheduling your roof inspection. Demand for inspectors often spikes after major storms or during peak home-selling seasons in the spring and summer. This high demand can lead to higher prices and longer wait times. For routine maintenance inspections, try booking during the off-season, like the fall. Inspectors tend to have more availability, which can sometimes mean more competitive pricing. Planning ahead not only saves you money but also ensures you can book a trusted, certified inspector without the rush.

How Often Should You Get an Inspection?

Many homeowners mistakenly believe roof inspections are only necessary when a leak appears or shingles are visibly missing. But waiting for obvious damage is a reactive approach that often leads to more expensive repairs. A proactive schedule for roof check-ups is one of the smartest ways to protect your investment. The right frequency depends on a few key factors, including your roof’s age, recent weather events, and the time of year.

Scheduling Based on Your Roof’s Age

As a general rule, every homeowner should have their roof inspected at least once a year. However, the ideal timeline can shift depending on your roof’s age and material. For a newer roof—say, less than ten years old—an inspection every two years is often sufficient, provided it hasn’t been through a major storm. Once your roof hits the 10-year mark, it’s wise to switch to annual inspections. This is the stage where normal wear and tear can start to create vulnerabilities. For older roofs nearing the end of their lifespan, an annual check-up is non-negotiable. A certified roof inspector can spot subtle signs of aging and help you plan for eventual replacement before a catastrophic failure occurs.

Why You Need an Inspection After a Storm

Severe weather is one of your roof’s biggest enemies. After a major event involving high winds, hail, or heavy downpours, you should schedule an inspection, even if you don’t see any damage from the ground. Don’t wait for visible signs of trouble. Storms can cause hidden issues like lifted shingles, cracked seals around vents, and granule loss on asphalt shingles, all of which compromise your roof’s ability to shed water. Getting a professional assessment right away not only helps you catch these problems early but also provides essential documentation for any potential insurance claims. It’s a critical step in protecting your home and ensuring small issues don’t become major leaks.

The Best Seasons for a Roof Check-Up

While you can get your roof inspected any time of year, some seasons are better than others for routine maintenance. Fall is an excellent time for a check-up, as it allows you to identify and address any vulnerabilities before the harsh winter weather arrives. Ice dams and heavy snow can turn minor issues into significant problems. Spring is another strategic time for an inspection. A professional can assess any damage that may have occurred over the winter and ensure your roof is prepared for spring showers and summer heat. Scheduling during these milder seasons helps you stay ahead of repairs and avoid the rush that often follows a major storm, ensuring you can find a qualified NRCIA professional without a long wait.

What Are the Long-Term Savings?

Thinking of a roof inspection as just another expense is a common mistake. It’s actually one of the smartest investments you can make for your property. The initial cost is small compared to the thousands you could save by avoiding major repairs, extending your roof’s life, and ensuring your warranties remain valid. Proactive care is always more affordable than reactive repairs. By scheduling regular check-ups, you’re not just buying a service; you’re buying peace of mind and financial security for years to come. This simple step helps protect the value of your home or commercial building by keeping the structure sound from the top down.

Catch Small Problems Before They Get Big

It’s easy to ignore what you can’t see. A few cracked shingles, a small gap in the flashing, or minor granule loss might seem insignificant from the ground. But over time, these tiny issues can allow water to seep in, leading to rotted wood, damaged insulation, and even mold growth inside your walls. A professional inspector is trained to spot these subtle warning signs before they escalate into catastrophic failures. Addressing a minor repair early on is far less expensive than dealing with extensive water damage later. A certified roof inspection gives you a clear action plan to fix small problems while they’re still manageable.

Get More Life Out of Your Roof

Your roof is one of the most expensive components of your property, and you want it to last as long as possible. Many people wait until they see a leak or visible damage to call for an inspection, but by then, the roof’s lifespan may have already been shortened. Regular inspections are like routine health check-ups; they ensure your roof performs optimally year after year. An inspector can identify and address issues like poor ventilation or debris buildup that can cause premature aging. By maintaining your roof properly, you can maximize its intended service life and delay the massive expense of a full replacement, getting the most value from your initial investment.

Strengthen Insurance Claims and Protect Warranties

When a major storm hits, having a recent inspection report on file can be a game-changer. This documentation provides a clear baseline of your roof’s condition, making it much easier to prove that damage was caused by a specific event. This strengthens your insurance claim and can speed up the approval process. Furthermore, many roofing material manufacturers require proof of regular maintenance to keep your warranty valid. An annual inspection report from a certified professional serves as that proof, ensuring you’re covered if a material defect occurs. This protects your investment and makes sure you have the support you need, like the assurance that comes with a LeakFREE® roof.

How Do You Choose the Right Inspector?

Finding the right roof inspector is one of the most important steps you can take to protect your property. With so many options out there, it’s easy to feel overwhelmed, but a little homework goes a long way. The goal is to find a qualified professional who will give you an honest, thorough, and unbiased assessment of your roof’s condition. Think of it as a check-up for one of your home’s most critical systems. A great inspector doesn’t just look for problems; they provide you with a clear, detailed report that helps you understand the health of your roof and plan for the future.

This isn’t just about ticking a box for an insurance company or a real estate transaction. It’s about gaining peace of mind and making informed decisions. A quality inspection can save you thousands of dollars by catching minor issues before they become major disasters. Whether you’re buying a new home, dealing with the aftermath of a storm, or simply performing routine maintenance, the inspector you choose makes all the difference. Look for someone with proven expertise, solid credentials, and a transparent process. The following steps will help you identify a true professional you can trust.

Look for NRCIA Certification

When you’re vetting inspectors, a professional certification should be at the top of your checklist. It’s a clear indicator that the inspector has invested in their education and is committed to a high standard of practice. Specifically, look for an inspector certified by the National Roof Certification and Inspection Association (NRCIA). An NRCIA-certified inspector has completed rigorous training and is held to a strict code of ethics, ensuring you receive a consistent and reliable evaluation. This certification means they have the expertise to assess your entire roofing system accurately, giving you a complete picture of its condition and lifespan.

Verify Their Insurance and Licensing

Before an inspector gets on your roof, always ask for proof of insurance and licensing. This is a non-negotiable step that protects you from liability. A professional inspector should carry both general liability insurance, which covers any potential damage to your property, and workers’ compensation, which covers them if they are injured on the job. Without this coverage, you could be held financially responsible for accidents. Licensing requirements can vary by state or city, so it’s also a good idea to check what’s required in your area. A legitimate professional will have no problem providing you with these documents.

Red Flags to Watch Out For

Trust your instincts and be on the lookout for a few common red flags. Be cautious of anyone offering an unsolicited “free” inspection; this is often a sales tactic to pressure you into unnecessary and expensive repairs. While a low price can be tempting, don’t let it be the only factor in your decision. Always get at least three quotes to get a sense of the fair market rate for a quality inspection. Finally, be wary of any inspector who asks for the full payment upfront or is hesitant to provide a detailed, written report. A true professional will be transparent about their process and pricing from the start.

Related Articles

Contact Us Now

Frequently Asked Questions

What’s the real difference between a free estimate and a paid inspection? Think of a free estimate as a sales pitch. It’s usually offered by a roofing company whose main goal is to sell you a new roof or a major repair. A paid inspection, on the other hand, is a comprehensive, unbiased health assessment of your entire roofing system. You’re paying for a certified professional’s time and expertise to get an honest evaluation of your roof’s condition, lifespan, and any necessary maintenance, without the pressure of a sales call.

Can a roof inspection help lower my home insurance costs? While it’s not a direct guarantee, a clean bill of health from a certified inspector can certainly help. Some insurance providers offer discounts for homeowners who can prove their roof is in excellent condition, as it makes your home a lower risk to insure. A professional inspection report or a LeakFREE® certification serves as powerful proof of your roof’s integrity. It’s always a good idea to share the report with your insurance agent to see what savings you might qualify for.

How long does a typical roof inspection take? You can generally expect a thorough inspection to take anywhere from one to three hours. The exact time depends on the size, pitch, and complexity of your roof. A simple, single-story home might be on the shorter end of that range, while a larger home with multiple levels, dormers, and skylights will require more time for a detailed and careful assessment.

What kind of information will I get in the final report? A professional inspection report is much more than a simple checklist. It should be a detailed document that gives you a complete picture of your roof’s health. Expect to see clear photos of any problem areas, specific notes on the condition of your roofing materials, an evaluation of the flashing and drainage systems, and a professional estimate of your roof’s remaining lifespan. It’s your roadmap for future maintenance and repairs.

Do I need to be present for the entire inspection? You don’t need to be on the roof with the inspector, but it’s a good idea to be home for the appointment. The inspector may need access to your attic to check for signs of leaks, poor ventilation, or structural issues from the inside. Being there at the end also gives you a chance to walk through the findings with the inspector, ask questions, and get a clear understanding of their recommendations right away.

Roof Inspection Cost Calculator: A How-To Guide

Get a clear estimate with a roof inspection cost calculator. Learn what affects pricing, how to use these tools, and tips for planning your inspection budget.

Trying to budget for home maintenance can feel like you’re guessing in the dark, especially when it comes to your roof. You know an inspection is a smart move, but the potential cost is a huge question mark. This is where a good roof inspection cost calculator comes in. It’s a digital tool designed to give you a solid starting point, turning that uncertainty into a clear, data-driven estimate. By plugging in a few details about your property, you can get a ballpark figure to help you plan. This guide will walk you through how these calculators work, what factors really influence the final price, and how to use that initial estimate to find a certified professional you can trust.

Contact Us Now

Key Takeaways

  • Treat Online Calculators as a Guide, Not a Guarantee: Use an online estimator to get a general budget in mind, but remember that only a certified inspector can provide an accurate quote after seeing your roof’s specific size, material, and condition.
  • Know the Key Cost Factors to Compare Quotes: The final price is shaped by your roof’s complexity, your location, and the inspector’s qualifications. Understanding these variables helps you compare professional quotes and recognize the value behind the numbers.
  • Prioritize Professional Inspection for Long-Term Savings: A thorough inspection by a certified professional is a proactive investment. It helps you catch small issues before they become costly disasters and provides a clear strategy for maintaining your property’s most critical asset.

How Do Roof Inspection Cost Calculators Work?

Think of a roof inspection cost calculator as a helpful starting point. It’s a digital tool designed to give you a preliminary estimate of what you might pay for a professional inspection. You plug in some basic information about your property, and the calculator uses that data to generate a ballpark figure based on regional averages and common pricing factors. While it’s not a substitute for a formal quote from a certified inspector, it’s an excellent way to get a general idea of the potential cost and begin planning your budget. These tools are especially useful for homeowners, property managers, and real estate professionals who need a quick financial snapshot before scheduling a service.

What They Do and How They Estimate Costs

At its core, a roof inspection cost calculator is a simple program that analyzes the details you provide about your home. It cross-references your information—like your property’s location and roof size—with a database of current market rates for labor and services in your area. The tool’s main job is to process these variables and produce an estimated cost range for a standard inspection. It’s designed to give you a quick, data-driven answer without you having to make a dozen phone calls. This initial estimate helps you understand the potential investment required to ensure your roof is in good condition and to protect your property from future issues.

The Key Factors Calculators Use

To give you a reasonably accurate estimate, calculators rely on a few key pieces of information. The most common factors include the size and slope of your roof, the height of your home, and your geographic location. A larger, steeper roof will naturally take more time and equipment to inspect safely, which influences the cost. Your location is also critical, as labor rates and business expenses can vary significantly from one city to another. Some more advanced calculators might also ask about your roofing material, as inspecting slate tiles requires a different approach than inspecting asphalt shingles.

How the Algorithm Creates Your Estimate

The “algorithm” behind a cost calculator isn’t as complicated as it sounds. It’s a set of rules that the program follows to connect your inputs with its pricing database. When you enter your roof’s square footage and location, the algorithm pulls the average per-square-foot inspection cost for your specific area. It then adjusts that base rate using the other factors you provided, like the roof’s pitch and accessibility. The final number you see is the result of this calculation. The process is designed to walk you through the necessary steps and provide a clear result, but remember that the most accurate quote will always come from a certified inspector who can assess the roof in person.

What Really Influences Roof Inspection Costs?

While a cost calculator gives you a great ballpark figure, several key factors determine the final price of a professional roof inspection. Think of the online estimate as your starting point. The actual quote you receive will be a detailed reflection of your roof’s specific needs, the local market, and the inspector’s qualifications. Understanding these variables helps you see exactly what you’re paying for: a thorough, accurate assessment of your property’s most important shield against the elements. Let’s break down the four main elements that shape the cost.

Your Roof’s Size and Complexity

It makes sense that a larger roof takes more time and effort to inspect, which is reflected in the price. But it’s not just about square footage. The complexity of your roof’s design plays a huge role. A steep pitch, for example, requires more safety equipment and specialized skills to assess properly. Homes with multiple levels, gables, and valleys also add to the inspection time. As one industry guide notes, the price often varies based on the “size and slope of the roof, height of the home, and geographic area.” A simple, single-story ranch-style home will almost always cost less to inspect than a three-story Victorian with a turret.

Roofing Materials and Structural Details

The type of material covering your roof is another major cost factor. Inspecting standard asphalt shingles is typically straightforward, but materials like slate, tile, or metal require a specialist’s eye and different techniques. These materials can be more fragile or complex, demanding extra care from the inspector. Features like skylights, chimneys, and solar panels also add to the workload, as each one represents a potential point for leaks and requires its own detailed check. A comprehensive inspection ensures every component contributes to a LeakFREE® roof, which is why these structural details can influence the final price.

Your Location and How Accessible the Roof Is

Where you live matters. Labor costs and business expenses vary from one city to another, so an inspection in a major metropolitan area will likely cost more than one in a rural town. Beyond general market rates, physical access to your roof can also affect the price. If your home is surrounded by dense trees, is built on a steep hill, or is very close to neighboring properties, the inspector may need extra time or equipment to get the job done safely. In some areas, specific regulations like California SB 721 inspections for elevated exterior elements may also require a specialized service, which can impact the cost.

The Inspector’s Expertise and Certifications

You might be tempted to go with the cheapest quote, but an inspector’s qualifications are not the place to cut corners. A highly trained and certified professional brings a level of expertise that an uncertified handyman simply can’t match. They know exactly what to look for, from subtle signs of water damage to potential structural issues. Investing in an inspector with a proven training portfolio means you’re paying for peace of mind and a reliable assessment. Hiring someone without the right credentials can lead to missed problems, which often results in much more expensive repairs down the road.

How Much Does a Roof Inspection Actually Cost?

When you’re trying to budget for home maintenance, one of the first questions you’ll ask is, “What’s this going to cost me?” While online calculators provide a great starting point, the final price of a professional roof inspection depends on a few key variables. Think of it less like buying a product off the shelf and more like a service tailored to your specific property. The cost reflects the inspector’s time, expertise, and the level of detail required to give you a truly accurate picture of your roof’s health.

Understanding the factors that influence the price will help you interpret any estimate you receive and ensure you’re paying a fair price for a quality assessment. From the basic size and shape of your roof to your geographic location and the type of inspection you need, each element plays a role in the final quote. Let’s break down what you can expect to see and why those costs can vary.

The National Average Price Range

Across the country, a standard roof inspection typically costs between $200 and $700. This range covers a comprehensive visual check of the roof’s structure, materials, and key components like flashing and gutters. The reason for the wide range comes down to the specifics of your roof. A simple, single-story home with a low-slope roof will naturally be on the lower end of the scale. However, a larger, multi-story home with a steep pitch and complex features like dormers and valleys requires more time and safety equipment, pushing the cost toward the higher end. This average is a helpful baseline, but a quote from a certified inspector will give you the most accurate number for your property.

How Your Region Affects the Price

Where you live has a significant impact on roof inspection costs. Labor rates and the general cost of doing business can vary dramatically from a rural town to a major metropolitan area. Beyond that, regional climate and building codes play a part. For example, homes in coastal areas may require inspectors to look for specific types of storm or salt damage, while homes in snowy regions need a close check on ice dam prevention and flashing integrity. The age and common architectural styles in your area also matter—a neighborhood of historic homes with slate roofs will have different inspection needs and costs than a new development with standard asphalt shingles.

Potential Fees for Specialized Services

Sometimes, a standard inspection isn’t enough. Certain situations can add to the base cost, and it’s good to know what they are ahead of time. If your roof is particularly difficult or dangerous to access, expect a higher fee to cover the additional risk and equipment. You may also need specialized inspections to comply with local regulations or to assess unique materials like tile or metal. If the inspection is part of a larger project managed by a general contractor, their management fee can add between 13% and 22% to the total. Finally, be aware of any local permit fees or sales tax that might apply, especially if the inspection uncovers issues that require immediate repairs.

What to Look For in a Roof Inspection Cost Calculator

Not all online estimators are created equal. A good roof inspection cost calculator can give you a fantastic baseline for your budget, but you need to know what separates a helpful tool from a random number generator. The best calculators are transparent about the data they use and give you options to tailor the estimate to your specific property. Think of it as a starting point in your conversation with a professional inspector, not the final word. When you’re vetting a calculator, keep an eye out for a few key features that signal accuracy and trustworthiness.

Up-to-Date, Accurate Data

The most critical feature of any cost calculator is the quality of its data. Roofing material and labor costs fluctuate with market conditions, so a tool using outdated information won’t give you a realistic picture. Look for a calculator that clearly states it uses industry-standard methods and current cost data. This ensures the estimate you receive is grounded in reality, not based on last year’s prices. An estimate built on fresh, unbiased data is the only kind that will help you plan your budget effectively and avoid surprises down the road.

Customizable Fields for Your Property

A generic estimate is rarely helpful. A trustworthy calculator will ask for specific details about your property to create a more precise quote. At a minimum, you should be able to enter your zip code, as labor and material costs vary significantly from one region to another. The best tools will also ask for details like the roof’s approximate square footage, its slope, and the type of roofing material. The more you can customize the inputs, the more accurate your estimate will be, whether you’re a homeowner or managing a portfolio of commercial properties.

A Simple, User-Friendly Design

You shouldn’t need a degree in roofing to use a cost calculator. A well-designed tool will have a clean, intuitive interface that guides you through the process step-by-step. The questions should be straightforward, and the final report should be easy to read and understand. If a calculator is cluttered, confusing, or full of jargon, it’s more likely to cause frustration than provide clarity. The goal is to get a quick, simple, and reliable estimate without having to decipher a complicated system. A good user experience shows that the creators have considered your needs.

Connection to Local Market Rates

An effective calculator does more than just multiply square footage by a national average. It taps into local market data to account for regional price differences. Factors like the cost of living, the availability of materials, and the demand for certified inspectors all impact the final price. A calculator that considers these geographic variables will provide a much more accurate estimate. This connection to local rates is essential for understanding what you can realistically expect to pay for a professional inspection in your specific area.

Which Roof Inspection Cost Calculators Can You Trust?

When you need a quick idea of what a roof inspection might cost, online calculators can be a helpful starting point. They give you a general price range based on standard data, which is great for initial budgeting. However, these tools can’t see the unique details of your property. They provide an estimate, not a firm quote. For a truly accurate assessment, you’ll always need a professional inspector to evaluate your roof in person. Let’s look at a few common calculators and how they stack up against professional tools.

NRCIA’s Professional Inspection Tools

While online calculators offer a rough estimate, they can’t replace the precision of professional-grade resources. At NRCIA, we focus on providing inspectors with the tools they need for a thorough, accurate assessment. Our specialized inspection software guides certified professionals through a detailed process, ensuring no detail is overlooked.

A paid roof inspection report from an NRCIA Certified Roof Inspector is a complete, unbiased health check-up for your roof. It tells you the condition of every component, from the shingles down to the decking, giving you the power to make strategic decisions about maintenance and future repairs. This detailed approach provides a level of certainty that a simple online calculator just can’t match.

Homewyse

Homewyse is a popular online tool that provides cost estimates for various home maintenance projects, including roof inspections. The calculator gives you a basic cost to inspect a roof, which it estimates at around $392 to $476 per building. It allows you to adjust for your location, which helps narrow down the price.

While useful for getting a ballpark figure, remember that Homewyse’s estimate is based on standard project parameters. It doesn’t account for specific challenges like steep slopes, difficult roof access, or unique roofing materials that can impact the final price. Think of it as a good first step to understand potential costs in your area before you start contacting local professionals for detailed quotes.

Inch Calculator

Inch Calculator is another resource that provides a general price range for roof inspections, typically between $200 and $700. The site correctly points out that the final cost depends on several factors, including the roof’s size and slope, the height of the home, and your geographic area. This wide range highlights just how much prices can vary from one property to the next.

Like other online estimators, Inch Calculator is best used for preliminary research. It helps you understand the variables that inspectors consider when preparing a quote. Use the information to set a realistic budget, but don’t treat it as a final price. The unique characteristics of your roof will ultimately determine the actual cost.

How to Compare Your Options

Once you have an estimate, whether from a calculator or an inspector, you need to know if the quote is fair. To do that, you must understand what affects the cost. Key factors include the roofing materials, whether the old roof needs removal, labor rates, and any warranties included. The cheapest quote isn’t always the best deal, especially if it means cutting corners.

Look for value beyond the price tag. An inspection that leads to a LeakFREE® roof certification, for example, provides a warranty and peace of mind that a basic inspection doesn’t offer. When comparing quotes, ask about the inspector’s credentials, the scope of the inspection, and what kind of report you’ll receive.

How to Get an Accurate Estimate from a Calculator

An online calculator can be a fantastic starting point for budgeting, but its accuracy depends entirely on how you use it. Think of it as a helpful guide rather than a final quote. To get the most reliable number possible, you need to approach it with the right information and a clear understanding of what it can and can’t tell you. The goal is to get a realistic ballpark figure that empowers you to take the next step: connecting with a certified professional. By following a few key steps, you can turn a generic estimate into a powerful planning tool for your property’s maintenance.

Start with Accurate Property Information

The old saying “garbage in, garbage out” definitely applies here. The quality of your estimate is directly tied to the quality of the data you provide. To get a number that’s actually useful, you need to input precise details about your property. Be prepared to enter your roof’s approximate square footage, the primary roofing material (like asphalt shingles, metal, or tile), the pitch or slope, and your zip code. Some advanced calculators might even ask for the number of stories or the age of the roof. The more accurate you are with these details, the closer the estimate will be to what a professional might quote. This initial step helps the tool analyze your home size, location, and materials to generate a relevant estimate.

Understand the Estimate’s Limitations

It’s crucial to remember that a calculator provides an estimate, not a comprehensive diagnosis. It can’t see hidden water damage, identify improper flashing, or assess the condition of your roof’s underlying structure. These are issues that only a hands-on inspection can reveal. A calculator gives you a number, but a professional gives you context. As one expert puts it, “A proper inspection report tells you the condition of every part of your roof, giving you the power to make strategic decisions about maintenance and future repairs.” Use the calculator’s figure for initial budgeting, but don’t mistake it for the full story that a certified roof inspector can provide.

Avoid Common Myths About Inspection Pricing

When you see a low number from a calculator, it can be tempting to anchor your expectations there. However, this can set you up for surprises. Many people believe a roof inspection is a quick, simple process, but a thorough assessment takes time and expertise. Calculators often don’t account for factors like difficult roof access, complex roof designs with multiple gables and valleys, or the need for specialized equipment. These variables can impact the final cost. It’s important to clear up common myths about inspections and understand that a cheap inspection might miss critical issues, costing you more in the long run. A certified professional’s fee reflects their training, experience, and the detailed report they deliver.

Interpret Your Results Correctly

Once the calculator gives you a number, what do you do with it? The best way to use this estimate is as a baseline for your budget. Think of it as a starting point for conversations with qualified inspectors. A detailed report from a professional is like “a complete health check-up for the single most important protective layer of your home.” The calculator’s estimate helps you prepare for that check-up. Use the figure to plan financially, but rely on the detailed findings from a professional to make decisions about repairs, maintenance, or pursuing a LeakFREE® roof certification for long-term protection.

What to Do With Your Cost Estimate

Once you have a number from a roof inspection cost calculator, you have a solid starting point. Think of this estimate as your baseline—a figure that helps you prepare for the next steps. Now, you can move forward with confidence, using your estimate to find the right professional, plan your budget, and protect your property for years to come. It’s all about turning that initial number into a smart, actionable plan for your roof.

Get Quotes from Certified Inspectors

Your cost estimate is the perfect tool for vetting real-world quotes. Start by reaching out to local, certified inspectors for detailed proposals. When you compare their numbers to your initial estimate, you can spot any major differences and ask informed questions. Be on the lookout for red flags in a quote, like vague details on permit fees or the use of generic materials. A trustworthy professional will provide a clear, itemized breakdown. Most importantly, ensure you’re working with someone who has the right credentials. A certified roof inspector brings a higher level of expertise and accountability to the job, ensuring you get a thorough and reliable assessment.

Plan Your Maintenance Budget

A roof inspection is a key part of your property’s maintenance, and your cost estimate helps you budget for it effectively. Roof inspections can range from around $200 to $700, depending on your roof’s size, slope, and location. Knowing this allows you to set aside the right amount of money, so there are no surprises. For homeowners, this means planning for an annual check-up. For property managers and real estate professionals, it means incorporating inspection costs into your yearly operating budget to keep your properties in top condition and protect your investments.

Consider Warranty and Certification Options

A standard inspection tells you the current condition of your roof, but a certification can offer long-term protection. When discussing quotes with an inspector, ask about their warranty and certification options. For example, the NRCIA’s LeakFREE® Roof Certification provides a standardized warranty that protects you against leaks for a set period. While these options may come at an additional cost, they provide incredible peace of mind. Knowing your roof is covered by a solid warranty means you won’t be on the hook for unexpected and expensive repairs down the line.

Create a Long-Term Maintenance Strategy

The ultimate goal of an inspection is to give you a clear path forward. A comprehensive inspection report details the condition of every part of your roof, from the shingles down to the decking. This information is exactly what you need to make smart decisions about maintenance and future repairs. Use the report to create a long-term care strategy. You’ll know which areas need immediate attention and what to watch for in the coming years. This proactive approach helps you extend the life of your roof and prevent small issues from turning into major, costly problems.

Why a Roof Inspection Is Worth the Cost

Thinking about the cost of a roof inspection can feel like just another expense on a long list. But when you reframe it as an investment in your property’s health and your own peace of mind, the value becomes clear. A professional inspection isn’t just about checking for leaks; it’s a proactive strategy to protect your biggest asset from the top down. It helps you catch minor issues before they spiral into budget-breaking disasters, ensuring your property remains safe and secure for years to come.

Catch Problems Early to Save Money

A regular roof inspection is one of the smartest financial decisions you can make for your property. It helps you find small problems early before they become big, expensive repairs. A few cracked shingles or a small gap in the flashing might not seem like a big deal, but over time, they can let water seep in, leading to wood rot, mold, and serious structural damage. The cost of fixing that kind of widespread damage is exponentially higher than the cost of a simple repair found during an inspection. By investing a small amount now, you can save thousands on future repairs and maintain the integrity of your entire property with a LeakFREE® roof.

Why a Pro Beats a DIY Inspection

Unless you’re a professional roofer, you shouldn’t inspect your own roof. Climbing up there can be dangerous without the right safety gear and training. More importantly, you’ll likely miss subtle signs of trouble that a certified inspector is trained to spot. Professionals know how to identify everything from hail damage and improper installation to ventilation issues that could be shortening your roof’s lifespan. For important matters like insurance claims or selling a home, only a professional inspection report will do. The expertise that comes from rigorous inspector training ensures a thorough and accurate assessment you can rely on.

Protect Your Property for the Long Haul

Your roof is the first line of defense against the elements, protecting not just the structure but everything and everyone inside. Finding and fixing problems early saves you money and gives you confidence that your home and belongings are safe. A professional inspection provides a clear picture of your roof’s current condition and what to expect in the coming years. This allows you to plan for future maintenance instead of reacting to emergencies. Knowing your roof is in good shape, especially with a LeakFREE® roof certification, provides invaluable peace of mind and helps preserve your property’s value over the long term.

Related Articles

Contact Us Now

Frequently Asked Questions

Why was the quote from my inspector different from the online calculator’s estimate? Think of an online calculator as a helpful starting point that works with averages. It can’t see the unique details of your roof, like its steep pitch, the number of skylights, or that one section that’s hard to access. A professional inspector’s quote is tailored specifically to your property after they’ve assessed its size, complexity, material, and overall condition. Their price reflects the actual time and expertise required for a thorough job, which a calculator can only guess at.

Is it okay to choose an inspector based on the lowest price? While it’s tempting to go with the cheapest option, an inspector’s fee usually reflects their level of experience and the thoroughness of their work. A very low quote might mean you’re getting a quick, surface-level check instead of a detailed assessment. Investing in a certified professional means you’re paying for their training, specialized tools, and the comprehensive report you need to make smart decisions. A missed problem from a cut-rate inspection can lead to much more expensive repairs later on.

What am I actually paying for with a professional roof inspection? You’re paying for certainty and a clear action plan. A professional inspection provides a complete health check-up for your roof, identifying not just current leaks but also potential future problems. The fee covers the inspector’s time, safety equipment, and expertise in spotting subtle signs of wear or damage. The final report gives you the detailed information you need to budget for repairs, plan for maintenance, and protect your property’s value.

How can I be sure I’m getting a fair price for my inspection? The best way to feel confident in the price is to get a few quotes from different certified inspectors in your area. When you compare them, look beyond the final number. Consider each inspector’s credentials, what the inspection includes, and the level of detail in the report they provide. A fair price reflects a balance of a professional’s experience and a comprehensive service that gives you real value, like the option for a LeakFREE® certification.

Does a standard home inspection cover the roof in the same way? Not usually. A general home inspector typically performs a limited, visual check of the roof, often just from the ground or a ladder. They can spot obvious, major issues but aren’t equipped to do the deep-dive assessment that a certified roof inspector provides. A specialized roof inspection involves a much more detailed evaluation of the entire roofing system, including the materials, flashing, and underlying structure, to give you a complete picture of its condition.