Thinking about your roof’s health shouldn’t only happen when you see a leak or plan to sell. Proactive maintenance is the best way to protect your home, which is likely your biggest investment. A roof certification is like a comprehensive health check-up for this critical part of your house. It gives you a clear picture of its current condition and expected lifespan, allowing you to catch small issues before they become major problems. When you eventually decide to sell, you’ll already be a step ahead. This guide will walk you through how to get a transferable roof certification and why it’s a smart move for any homeowner.
Key Takeaways
- Build Buyer Confidence and Increase Home Value: A transferable roof certification addresses one of a buyer’s biggest fears—a costly roof replacement—by providing a professional guarantee of the roof’s condition, making your home more attractive and valuable.
- Certification Requires a Thorough Inspection: To get certified, a qualified inspector must verify your roof’s structural integrity, materials, and drainage systems. Any necessary repairs must be completed first, ensuring the roof meets a high standard of quality.
- Don’t Miss the Transfer Window: The warranty transfer isn’t automatic. You must formally complete the process, which often has a strict 30 to 60-day deadline after the sale, to ensure the new homeowner is protected.
What Is a Transferable Roof Certification?
Think of a transferable roof certification as a professional seal of approval for your roof. It’s a formal document from a certified inspector that confirms your roof is in good shape and has a specific amount of life left in it—typically between two and five years. This isn’t just a quick glance from the curb; it’s the result of a thorough, hands-on evaluation. The “transferable” part is what makes it so valuable in a real estate deal: the guarantee can be passed from you to the new owner, giving them the same confidence you have.
This certification serves as a powerful form of assurance for everyone involved in a transaction, from homeowners and buyers to real estate professionals. For sellers, it’s a proactive step to address one of a buyer’s biggest potential worries. For buyers, it provides peace of mind that they won’t be facing an expensive roof replacement right after moving in. An NRCIA LeakFREE® certification goes a step further by providing a warranty against leaks, making it a tangible asset that can significantly strengthen your position when you put your home on the market. It’s a clear statement that your roof’s condition has been verified by a trusted third party.
Why It Matters When Selling Your Home
When you’re selling your home, a transferable roof certification can be one of your strongest marketing tools. It immediately builds trust and sets your property apart from others. Potential buyers often see the roof as a major unknown expense. By providing a certification, you remove that uncertainty and show that you’ve diligently maintained your home. This confidence can directly translate into a faster sale and even a stronger offer. Buyers are often more comfortable, and may even be willing to pay more, for a home that comes with a guaranteed, well-maintained roof. It’s a clear signal that your home is a sound investment.
Certification vs. Standard Inspection: What’s the Difference?
It’s easy to confuse a roof certification with a standard roof inspection, but they serve very different purposes. A standard inspection, especially for a new roof, often just confirms that the installation meets local building codes. It’s more of a pass/fail check on the workmanship at that moment. A roof certification, on the other hand, is a comprehensive evaluation of an existing roof’s condition and its expected future performance. The inspector assesses wear and tear, the quality of materials, and any potential issues to determine how much longer the roof will last. It’s a forward-looking assessment that comes with a guarantee, not just a snapshot of its current state.
The Benefits of a Transferable Roof Certification
When you’re selling your home, a transferable roof certification is one of the most valuable assets you can have. It’s more than just a document; it’s a promise of quality and a powerful tool that simplifies the sales process for everyone involved. For sellers, it provides a distinct competitive edge, and for buyers, it offers the confidence needed to make a major investment.
This certification tells potential buyers that the roof has been thoroughly inspected by a professional and meets a high standard of quality. It often comes with a warranty, like the NRCIA’s LeakFREE® certification, which can be passed on to the new owner. This simple step can transform a major point of anxiety into a strong selling feature, making your property more attractive and streamlining the path to a successful sale. Let’s look at exactly how it benefits you.
Increase Your Home’s Value and Appeal
A transferable roof certification is a significant selling point that can directly impact your home’s market value. Think of it from a buyer’s perspective: a roof is one of the most expensive components of a house to replace. Knowing that the roof is in excellent condition and backed by a warranty removes a huge financial risk. This peace of mind is something buyers are often willing to pay more for. A certified roof signals that your home has been well-maintained, which can lead to a higher selling price and make your property stand out from others on the market.
Attract Confident Buyers and Sell Faster
In a competitive real estate market, anything that builds buyer confidence can help you sell your home more quickly. A transferable warranty acts as a safeguard against costly, unexpected roof repairs right after they move in. This assurance makes your home far more appealing, as it secures their investment and reduces the perceived risk of buying an older property. For the diverse group of people we serve, from real estate agents to new homeowners, this certification provides a clear advantage. It helps attract serious, confident buyers who are ready to make an offer without hesitation.
Prevent Future Disputes with Clear Documentation
A smooth real estate transaction depends on clear communication and transparent documentation. A formal roof certification provides exactly that. The process involves a detailed inspection report and clear warranty terms, leaving no room for ambiguity about the roof’s condition. By reviewing the original warranty documents, both you and the buyer will understand the terms of transferability, including any deadlines or fees. This clarity helps prevent misunderstandings and ensures a seamless transition of the warranty, protecting both parties from potential disputes long after the sale is complete.
How to Get a Transferable Roof Certification
Getting a transferable roof certification is a proactive step that adds significant value and peace of mind, especially when you’re planning to sell your home. The process is more straightforward than you might think and breaks down into a few key phases: finding the right professional, understanding the inspection itself, and preparing your property. By following these steps, you can ensure the certification process goes smoothly, giving you a valuable asset that assures potential buyers of your home’s quality and integrity. This certification isn’t just a piece of paper; it’s a testament to your roof’s condition, backed by a professional evaluation.
Find a Qualified Roof Inspector
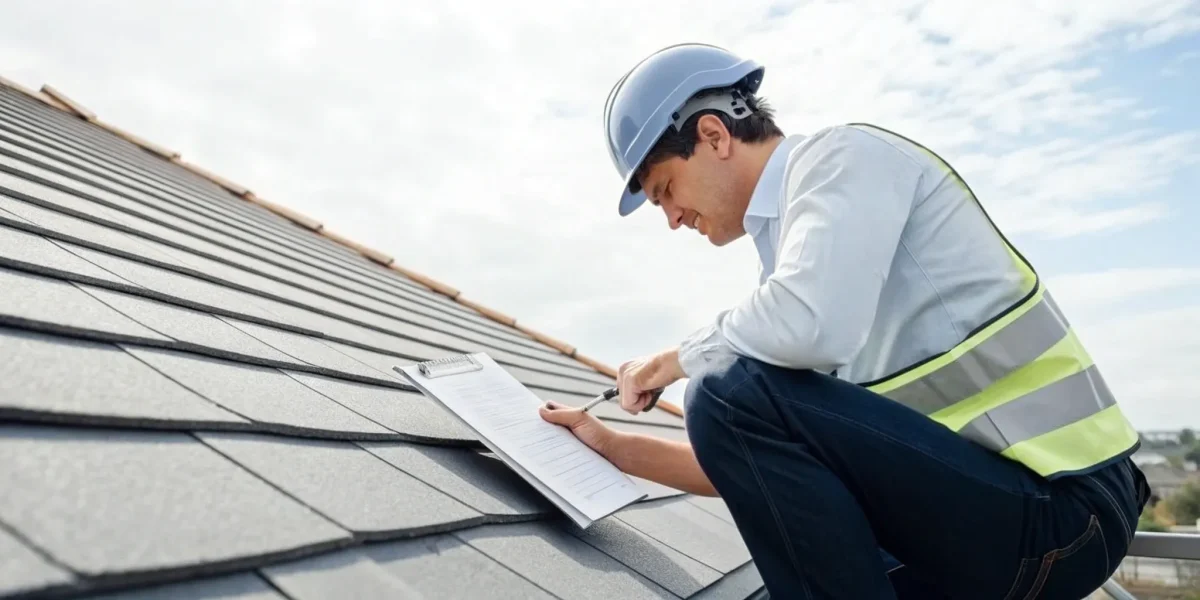
Your first and most important step is to find a certified roof inspector. This isn’t a job for a general contractor or a handyman. You need a specialist who is trained to identify subtle signs of wear, potential leak sources, and structural issues according to industry standards. A qualified inspector has the expertise to perform a thorough assessment and provide the documentation needed for a credible certification. When you work with an NRCIA-certified inspector, you can be confident they have the right training and tools to evaluate your roof accurately, ensuring the certification holds up under scrutiny.
The Inspection Process: A Step-by-Step Look
Once you’ve scheduled the inspection, the inspector will conduct a detailed examination of your roof. They’ll check everything from the condition of the shingles and flashing to the state of the underlying structure and drainage systems. If they find any issues that prevent certification, they will provide a report detailing the necessary repairs. You’ll need to have these items addressed by a qualified roofer. After the repairs are complete, the inspector will verify the work and, if everything meets the required standards, issue the LeakFREE® roof certification. This document outlines the roof’s condition and its expected lifespan, giving you and the future owner a clear understanding of its health.
How to Prepare Your Home for Inspection
A little preparation can make the inspection process much smoother. Start by ensuring there is clear and safe access to the roof and any attic or crawl spaces. Trim back overhanging tree branches that might obstruct the view or make it difficult for the inspector to move around. It’s also helpful to gather any existing documents you have about your roof, such as its age, previous repairs, or warranty information. If you’re aware of any minor issues, addressing them beforehand can speed things up. Being prepared shows you’re a proactive homeowner and helps the inspector complete their job efficiently.
What Inspectors Look for During Certification
A roof certification inspection goes far beyond a quick visual check. It’s a comprehensive evaluation of your entire roofing system, designed to assess its current condition and predict its future performance. An NRCIA-certified inspector follows a meticulous, standardized process to ensure nothing is overlooked. They aren’t just looking for obvious problems; they’re identifying potential vulnerabilities that could lead to future issues.
This detailed approach is what gives a certification its value. It provides a complete picture of the roof’s health, from the structural supports to the final layer of shingles. The goal is to confirm that the roof is in good condition and can be expected to remain functional for the duration of the certification period. This thoroughness gives both sellers and buyers confidence that the roof is sound and free from the risk of unexpected, costly leaks.
Your Roof’s Structure and Materials
First, the inspector will evaluate the foundational elements of your roof. They start by examining the overall structure, looking for any signs of sagging or unevenness in the roof planes. A sagging roof can indicate serious underlying issues with the rafters or decking, which are critical to the home’s stability. Next, they conduct a detailed assessment of the roofing materials themselves. Whether you have shingles, tiles, or metal roofing, the inspector will check for signs of wear and tear. This includes looking for cracked, curling, or missing shingles, as well as significant granule loss on asphalt shingles, which protects them from UV damage. This part of the inspection ensures the roof’s primary line of defense is strong and intact.
Spotting Leaks and Water Damage
A key focus of any certification inspection is finding evidence of leaks and water intrusion. Inspectors are trained to be detectives, searching for both active leaks and the subtle signs of past water damage that could point to a recurring problem. They will thoroughly check the interior of your home, looking for water stains on ceilings and walls, especially in the attic. Inside the attic, they’ll inspect the underside of the roof decking for discoloration, damp insulation, or mold growth. This meticulous search is essential because even a small, undiscovered leak can lead to significant structural damage over time. The entire process is designed to catch problems before they escalate, which is the core promise of our LeakFREE® certification.
Assessing Drainage and Ventilation
A healthy roof relies on more than just good materials; it needs functional support systems to manage water and air. That’s why inspectors pay close attention to your roof’s drainage and ventilation. They will examine your gutters and downspouts to ensure they are clear of debris, securely attached, and properly directing water away from your home’s foundation. They’ll also inspect the flashing around chimneys, vents, and skylights, as these are common areas for leaks to develop. Proper attic ventilation is just as important, as it helps regulate temperature and moisture, preventing heat damage in the summer and ice dams in the winter. An inspector will verify that your vents are unobstructed and providing adequate airflow, which is crucial for extending the life of your roof.
How Much Does a Transferable Roof Certification Cost?
When you’re thinking about selling your home, the cost of a roof certification is a smart investment that can pay for itself. It provides peace of mind for both you and the buyer, potentially speeding up the sale and even increasing your home’s value. While the final price tag can vary, it’s generally an affordable step in the home-selling process. The total cost is a combination of the initial inspection fee, the certification itself, and a small fee to transfer it to the new owner. Think of it as a small price to pay for the confidence that comes with a LeakFREE® certified roof.
Breaking Down Inspection and Certification Fees
So, what can you expect to pay upfront? Generally, a roof certification costs between $75 and $400. This fee covers the certified inspector’s time to perform a thorough evaluation of your entire roofing system, from the materials and structure to the drainage and flashing. If your roof meets the required standards, this fee also includes the official certification document. It’s a straightforward cost that bundles the expert assessment and the valuable paperwork you’ll need for the real estate transaction. This single document can prevent last-minute negotiations and show potential buyers that your home has been well-maintained and is ready for its new owner.
Factoring in Transfer and Maintenance Costs
Once your roof is certified, the next step is transferring it to the new homeowner. This is a simple but crucial part of the process. The cost to transfer ownership of an NRCIA certification is typically around $50 and is handled through escrow during the home’s closing. This ensures the new owner is officially covered under the warranty. It’s important to know that after this first transfer, the roof will need a new inspection for any future transfers to subsequent owners. This policy ensures the roof’s condition is consistently monitored and upheld, maintaining the integrity of the certification for years to come.
What Influences the Final Price?
Several factors can influence the final cost of your roof inspection and certification. The price isn’t one-size-fits-all because every roof is different. Key variables include your geographic location, as market rates vary across the country. The size, pitch, and complexity of your roof also play a big role—a larger or steeper roof simply takes more time and effort to inspect thoroughly. The type of roofing material and the age of the roof can also affect the price. Because NRCIA inspectors set their own pricing based on their local market, it’s always a good idea to get a direct quote from a certified professional in your area.
Understanding Your Roof Warranty
A roof warranty is more than just a piece of paper; it’s a promise that your roof will perform as expected. When you’re selling your home, this promise can be a powerful selling point, but only if the new owner can inherit it. Understanding the type of coverage you have is the first step. Not all warranties are created equal, and some are much easier to pass on than others.
Think of it this way: a transferable warranty tells a potential buyer that the roof has been well-maintained and is backed by a professional guarantee. This can ease their concerns and make your home stand out. Before you can highlight this benefit, you need to get clear on what your warranty covers, who issued it, and what the process is for handing it over. Let’s break down the key types of roof coverage you might encounter.
The NRCIA LeakFREE® Certification Explained
The NRCIA offers a unique type of protection called the LeakFREE® Certification. Unlike standard warranties that might only cover specific materials or the roofer’s labor, this certification guarantees the entire roof system against leaks. It’s a comprehensive plan that covers issues with both the materials and the installation, giving you and the future homeowner complete peace of mind.
What really sets it apart is its transferability. The LeakFREE® Certification is tied to the property itself, not to you as the owner. This design makes the transfer process incredibly simple when you sell your home. There’s no complicated paperwork or hoops for the new owner to jump through, making it a straightforward and valuable asset during a real estate transaction.
Manufacturer vs. Workmanship Warranties
Most roofing protection falls into two main categories: manufacturer and workmanship warranties. A manufacturer warranty comes directly from the company that produced your roofing materials, like the shingles or tiles. It covers defects in the materials themselves. These warranties are generally easier to transfer to a new owner, though you’ll still need to follow the manufacturer’s specific process.
A workmanship warranty, on the other hand, is provided by the roofing contractor who installed your roof. This covers errors made during the installation process. These can be trickier to transfer, and if the roofing company goes out of business, the warranty often becomes void. Understanding which type of warranty you have helps you set clear expectations for potential buyers and ensures you’re representing your home’s value accurately.
How to Transfer Your Warranty to the New Owner
If you have a traditional manufacturer or workmanship warranty, transferring it requires a few proactive steps. First, dig out your original warranty documents and read the fine print. Look for any clauses about transferability, fees, and deadlines. Most warranties have a strict time limit for the new owner to complete the transfer, often just 30 to 60 days after the sale closes. Missing this window can void the warranty completely.
Once you know the rules, you’ll need to formally notify both the roofing company and the material manufacturer of the change in ownership. This usually involves filling out a form and sometimes paying a small administrative fee. By handling this process promptly, you ensure the new homeowner receives the full benefit of the warranty you invested in.
How Long Does the Certification Last?
A roof certification isn’t a “one and done” deal—it has a lifespan. Understanding how long your certification is valid and what happens when you sell your home is key to getting the most out of it. The length of a certification can vary, but most are designed to provide peace of mind for a set period, often between one to five years, depending on the provider and the condition of the roof. This validity period ensures that the roof’s condition is regularly assessed and remains up to standard. For homeowners looking to sell, however, the real focus should be on the transfer process. A LeakFREE® roof certification not only assures potential buyers of the roof’s quality but also comes with a warranty that can be passed on, adding significant value to your property. This is a powerful tool in a competitive real estate market. But this transfer isn’t automatic. There are specific timelines and paperwork involved to ensure the new owner is covered, and missing these steps can unfortunately void the protection you worked to secure. Think of it as part of the final handover of your home. Just as you’d leave the new owners the keys and garage door opener, you also need to properly hand over the roof’s documentation. Let’s walk through what you need to know to keep that valuable certification active for the next homeowner.
Understanding Validity Periods and Transfer Windows
Think of a transferable warranty like a relay race—you have to pass the baton correctly for the next runner to keep going. Most roof warranties have a specific transfer window, which is a short period after the home sale (often 30 to 60 days) for the new owner to complete the transfer. If you miss this deadline, the warranty can become void, leaving the new owner without coverage. This is why communication during the home-selling process is so important. A transferable roof warranty is a huge selling point, giving buyers confidence and helping your home stand out. Making sure they understand the timeline and what’s required of them ensures that this valuable feature doesn’t get lost in the shuffle of closing.
Essential Paperwork for the New Homeowner
To make the warranty transfer smooth, organization is your best friend. Before you even list your home, gather all the important documents in one place. This includes the original warranty certificate, the installation invoice from the roofer, and your home closing documents. The new homeowner will need these to prove ownership and initiate the transfer. It’s also a good idea to notify both your roofing company and the material manufacturer about the change in ownership. A quick phone call or email can get the ball rolling and prevent any confusion. By preparing this paperwork ahead of time, you provide a seamless experience for all the people involved in the sale and ensure the new owner can easily maintain the roof’s protection.
How to Keep Your Certification Valid
Getting your roof certified is a fantastic step, but it’s not a one-and-done task. To ensure your certification stays valid—especially when you’re preparing to sell your home—you’ll need to perform some simple, routine upkeep. Think of it like regular maintenance for your car; a little attention goes a long way in preserving its value and performance.
Maintaining your certification protects your investment and ensures the peace of mind that comes with it can be passed on to the next homeowner. It involves staying on top of inspections, addressing repairs promptly, and keeping your paperwork organized. Following these steps will make the transfer process seamless and keep your roof in top condition.
Your Annual Maintenance Checklist
Think of your roof certification as a professional’s promise that your roof is in great shape and expected to last for a specific period, usually between two and five years. To uphold that promise, an annual inspection is your best friend. This yearly check-up is the key to catching small issues before they become major headaches. You can perform a visual inspection from the ground, looking for obvious signs of damage like missing shingles or clogged gutters. Creating a simple checklist to run through each year helps you stay consistent and ensures nothing gets overlooked. This proactive approach is fundamental to maintaining a LeakFREE® certified roof and keeping your warranty intact.
When to Call a Professional for Upkeep
If your annual check-up reveals anything concerning—a loose shingle, signs of a leak in the attic, or debris buildup—it’s time to call in a professional. Don’t wait. Addressing issues right away is crucial for keeping your certification valid. Prompt repairs not only satisfy the terms of your warranty but also prevent minor damage from escalating into a costly, complex problem. A certified inspector can assess the situation and recommend the right course of action. The NRCIA serves a wide range of property stakeholders, connecting them with qualified experts who can handle these necessary repairs, ensuring your roof remains protected and your certification secure.
Keeping Your Records in Order
Good record-keeping is essential, especially when it’s time to sell your home and transfer the certification. Gather all your important roof-related documents and keep them in a safe, accessible place. This includes the original warranty certificate, the installation invoice, and any repair records. When you sell your home, you’ll need to notify your roofing company and the material manufacturer about the change in ownership. This formal step ensures the warranty is properly transferred to the new owner. Having these documents organized makes the process smooth and demonstrates to buyers that the roof has been well-maintained.
Common Roadblocks to Certification Approval
Getting a roof certification is a straightforward process, but it’s not a guaranteed pass. The whole point of the inspection is to verify that the roof is in solid condition and can reliably protect the home. If an inspector finds issues, they’ll need to be addressed before the certification can be issued. Think of it less as a roadblock and more as a necessary pit stop. Catching these problems early not only helps you secure the certification but also prevents minor issues from turning into costly, catastrophic failures down the road.
An inspector’s job is to be thorough. They’re looking at the roof from every angle to ensure it meets the high standards required for a LeakFREE® certification. This protects you, the future homeowner, and everyone involved in the transaction. Understanding the most common reasons a roof might not pass the first time can help you prepare. Most of the time, these are fixable issues that, once resolved, will clear the path for your certification and give you peace of mind that your roof is in excellent shape.
Structural Problems and Material Defects
First and foremost, an inspector will assess the roof’s structural integrity. This means looking for any signs of sagging, which could indicate a problem with the underlying framework. They’ll also examine the condition of the roofing materials themselves. This includes checking for cracked or missing shingles, broken tiles, or significant wear and tear that compromises the roof’s ability to shed water. These aren’t just cosmetic flaws; they are weak points that can lead to leaks and further damage. If the inspector finds any of these structural or material defects, they will need to be repaired before a certification can be approved.
Poor Drainage and Ventilation Issues
A roof is more than just shingles; it’s a complete system. Proper drainage and ventilation are critical components of that system. The inspector will check your gutters and downspouts to ensure they are clear of debris and effectively channeling water away from the house. Clogged or damaged gutters can cause water to back up under the shingles, leading to rot and water damage. Similarly, they’ll assess the roof’s ventilation. A poorly ventilated attic can trap heat and moisture, which can bake shingles from below in the summer and cause ice dams in the winter, drastically shortening your roof’s lifespan.
Repairs You Might Need to Make First
If your inspection report comes back with a list of required repairs, don’t panic. This is actually a good thing—it gives you a clear, actionable plan to get your roof into certifiable condition. The report will detail exactly what needs to be fixed, from replacing a few shingles to clearing out the gutters. Addressing these items promptly is key. Not only does it get you closer to your certification, but it also protects your home’s value and prevents small problems from escalating. Once the repairs are completed by a qualified professional, the inspector can return to verify the work and issue the certification.
Get Ready for Your Certification
Once you’ve decided to get a transferable roof certification, the process is pretty straightforward. It’s all about being prepared, understanding your paperwork, and acting promptly. By taking a few key steps, you can ensure the entire experience is smooth for you, your inspector, and the future owner of your home. Think of it as setting the stage for a successful and stress-free home sale where everyone feels confident and protected.
What to Expect: Timeline and Prep Steps
Getting your roof certified starts with one crucial step: hiring a qualified professional. You’ll want to find a licensed inspector who specializes in roof systems and understands exactly what to look for. An NRCIA-certified inspector, for example, has completed a comprehensive training portfolio and is equipped to perform a detailed evaluation. During the inspection, they will examine every component of your roof, from the shingles and flashing to the underlayment and structural integrity. The timeline is usually quick, often just a few hours for the inspection itself, with a report delivered shortly after. To prepare, simply ensure the inspector has safe and clear access to the roof and any attic spaces.
Know the Terms of Your Warranty
A common mistake is assuming a roof warranty automatically transfers to a new owner. In most cases, you have to take specific steps to make it happen. Before you do anything else, pull out your original warranty paperwork and read it carefully. Look for a clause on transferability. The document should tell you if it’s possible, what the rules are, and if there are any associated fees or deadlines. This is where a standardized certification shines. For instance, the NRCIA’s LeakFREE® certification is designed with clear terms, removing the guesswork for both sellers and buyers and ensuring everyone understands the protection being provided.
Why Acting Quickly Matters for a Smooth Transfer
When it comes to transferring a roof warranty, the clock is ticking. Most manufacturers and roofing companies give you a very short window—often just 30 to 60 days after the home sale—to complete the transfer process. If you miss this deadline, the warranty could become void, leaving the new owner without the protection they were expecting. To avoid this, be proactive. As soon as you have a closing date, notify both your original roofing company and the material manufacturer about the change in ownership. Providing them with the new owner’s information promptly ensures a seamless handover and keeps the warranty intact for years to come.
Related Articles
- LeakFREE® Roof Certifications for Lasting Protection | NRCIA
- LeakFREE® Roofs – NRCIA
- LeakFREE® Roof Certifications
- Certified Roof Leaks: What if a Leak Occurs? | NRCIA
Frequently Asked Questions
What’s the main difference between a roof certification and a standard home inspection? Think of a standard home inspection as a general check-up for the entire house, where the roof is just one of many items on a long list. A roof certification, however, is a specialized deep dive performed by a dedicated roof inspector. It goes beyond a simple visual check to provide a professional guarantee on the roof’s condition and expected lifespan, often including a warranty against leaks.
Do I have to get my roof certified to sell my home? No, it’s not a legal requirement. However, choosing to get a transferable certification is a smart strategic move. It removes a major point of worry for potential buyers, which can help your home sell faster and for a better price. It shows you’ve been a proactive homeowner and gives buyers the confidence they need to make a strong offer without hesitating over the roof’s condition.
What happens if my roof doesn’t pass the inspection on the first try? This is actually quite common and nothing to worry about. If the inspector finds issues that prevent certification, they will provide you with a detailed report outlining exactly what needs to be fixed. This gives you a clear action plan. Once you have a qualified roofer complete the necessary repairs, the inspector will return to verify the work and then issue the certification.
How long does the certification process usually take from start to finish? The inspection itself is fairly quick, usually taking just a few hours. If your roof is in great shape and passes immediately, you can have the certification in hand very quickly. If repairs are needed, the total timeline will depend on how long it takes to schedule and complete that work. The key is to start the process early so you have plenty of time before you list your home.
Is the certification fee the only cost I should expect? The initial fee typically covers both the inspection and the certification document itself. However, you should also budget for two other potential costs. The first is the cost of any repairs that might be required to bring your roof up to standard. The second is a small administrative fee, usually handled during closing, to officially transfer the certification to the new homeowner.