Watch a video walkthrough
Publishing a report is the last step of the process. Inspection Reports are the cornerstone of increasing the reliability, transparency, and credibility of roof inspectors. It is important to be timely and detailed in your reporting. The NRCIA will provide its full support so that you can publish amazing reports for you clients.
If you need 1 on 1 guidance, let us know. We often help members get used to the reporting process through 1 to 1 online workshops, where we complete actual reports together. Contact us today to get your workshop set up!
Follow the steps below to learn how to publish an inspection report.
Go to “Reports” on the Inspection Menu
This can be found on the left-hand menu of the inspection home page.

Tip: Remember to preview the report before publishing!
Complete Answer Section
Select the “Answer Section” icon to complete this pre-publishing activity.
The questions asked in this section are to ensure inspectors are completing the necessary inspection procedures. Some inspection types, like a maintenance inspection, do not require you to inspect all zones. You can select N/A, Not Inspected, or Skip for areas not inspected.
Save your answers.
Complete Scope of Inspection
Select the “Scope of Inspection” icon to complete this pre-publishing activity.
You are not required to change anything, but you must confirm the scope of inspection before publishing the report. You can edit either the default scope of inspection or create your own from scratch on the modified tab.
After confirming the scope, select okay as revised.
Publish Report
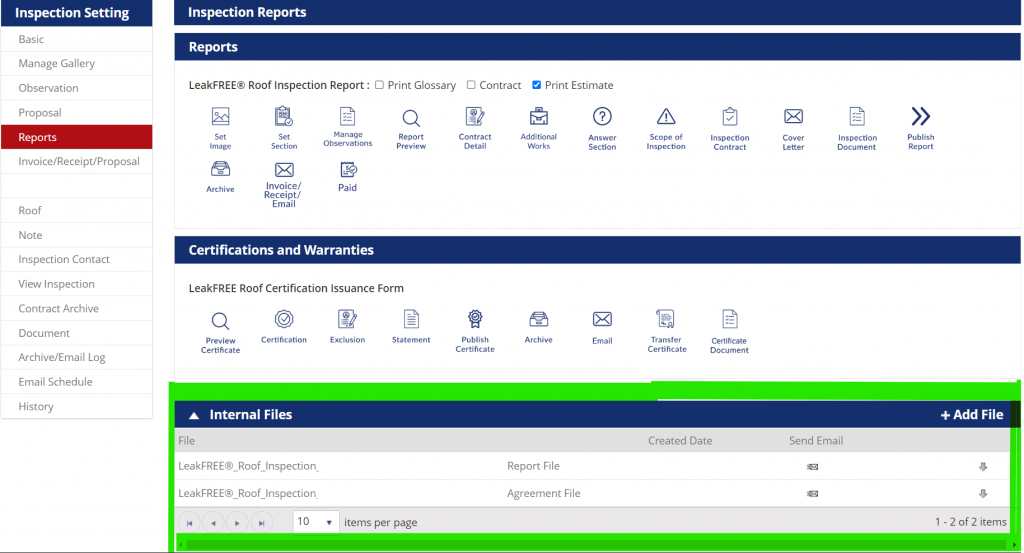
Once, you’ve completed the pre-publish activities, select the “Publish Report” icon
Depending on your computer browser, you may get a pop-up asking to confirm if you really want to publish. If this happens click ok.
The system will then double-check with you that you are okay with the Answer Section and Scope of Inspection.

If you do not want to make additional changes, simply click the “X” for each item. After X-ing out each question, you will be navigated to the final publishing window.
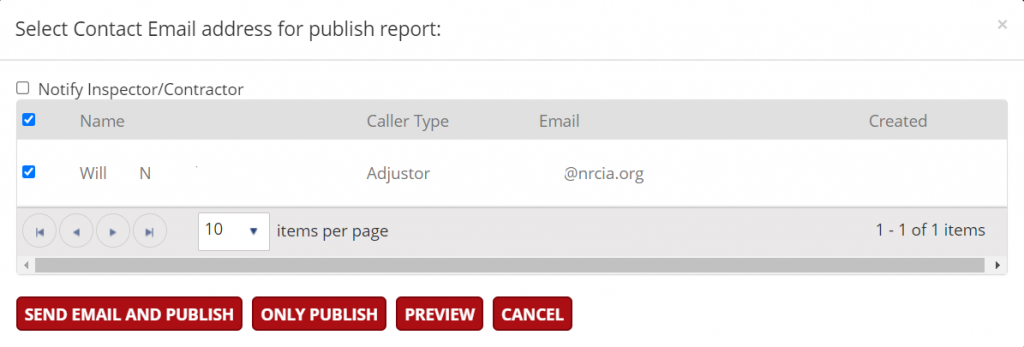
From this window, you have two publishing option
- Send Email & Publish – This will immediately send the report to your contacts selected.
- Only Publish – This will publish the report and save it to the internal files. You can then download the report to your computer.
File Storage
All reports, pre-inspection agreements, and other files will be stored in the internal files sections of the “Reports” tab. You can download or resend any documents using the send email feature.
Tips & Final Notes
Set up your payment gateway so that you can send payment links to your clients. These links require clients to pay to access reports and help reduce friction in the payment process.
You can add additional documents like marketing flyers, material brochures, or other items to any reports. Click here to learn how to add documents to an inspection reports or here to learn how to create company-wide documents.