A roof warranty looks great on paper, but its real value depends entirely on the condition of the roof it covers. If the previous owner made unapproved repairs or if the initial installation was flawed, that warranty might already be worthless. Simply inheriting the paperwork doesn’t mean you’ve inherited the protection. To make sure the coverage is valid and will transfer to you properly, you need a professional assessment. This isn’t a job for a generalist; it requires a specialist who understands roofing systems inside and out. A certified roof inspector for warranty transfer provides the objective, detailed evaluation needed to confirm the roof meets the manufacturer’s strict standards, ensuring your investment is secure from day one.
Key Takeaways
- Warranty transfers aren’t automatic: Don’t assume a roof warranty simply carries over with the sale. You must actively manage the process by submitting specific paperwork, paying any required fees, and meeting strict deadlines—usually within 30-60 days of closing—to keep the coverage valid.
- A certified inspection is your key to approval: Most manufacturers mandate a professional inspection to confirm the roof is still in good condition. This assessment is crucial for identifying hidden installation flaws, unauthorized repairs, or damage that could otherwise void the warranty and leave you unprotected.
- Know what voids your coverage: Simple neglect, like failing to clean gutters, or making unapproved modifications, such as installing a satellite dish, can invalidate your warranty. A professional inspection helps identify these issues before the transfer, ensuring the roof meets the manufacturer’s standards for continued protection.
Why You Need a Certified Inspector for a Roof Warranty Transfer
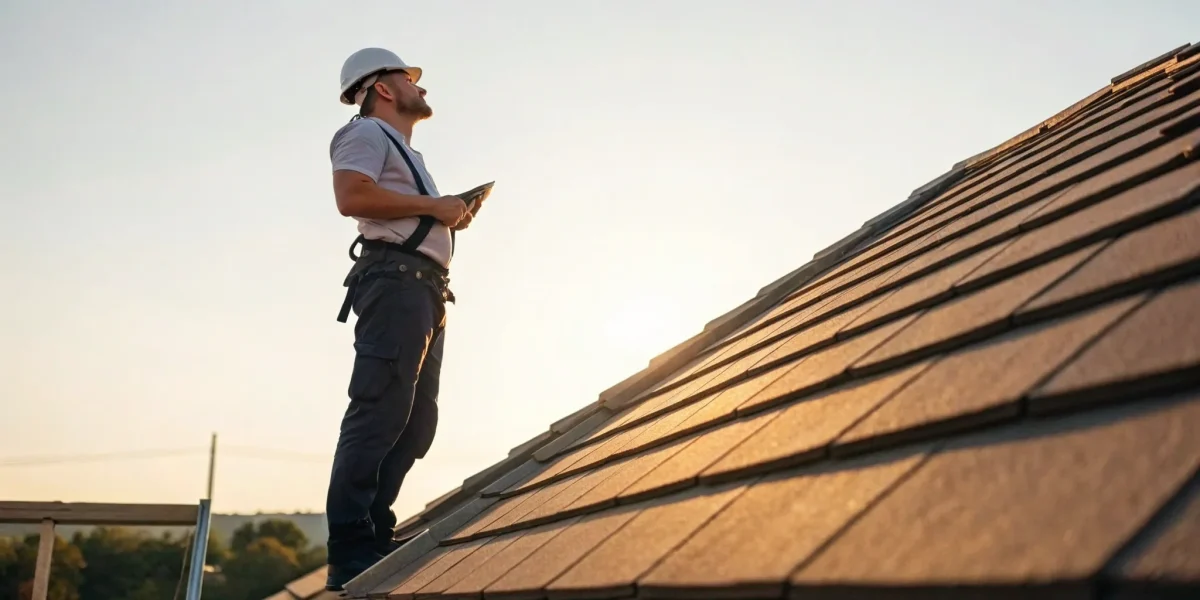
Buying a home with a roof warranty feels like a major win, but that coverage isn’t automatically yours. To make sure the warranty transfers properly, most manufacturers and contractors require a professional inspection. This isn’t just a formality; it’s a critical step to confirm the roof is still in warrantable condition. A certified inspector acts as your expert verifier, ensuring the roof you’re inheriting is as solid as the paper the warranty is printed on. Let’s break down why this professional assessment is so important.
What is a certified roof inspector?
So, what makes an inspector “certified”? A certified roof inspector isn’t just someone with a ladder and a good eye. They have completed specialized training and education to gain a deep understanding of all types of roofing systems, materials, and installation standards. Think of them as a specialist for the most important part of your home’s structure. Their job is to provide a completely objective and accurate assessment of the roof’s condition. This professional evaluation results in a roof certification, which is a formal document confirming that the roof has been thoroughly inspected and meets the strict standards required for warranty eligibility.
How inspections protect your warranty’s validity
A professional inspection is your best defense for keeping a roof warranty intact during a transfer. The inspector’s main job is to verify that the roof meets all the original warranty requirements. They check for proper installation, quality materials, and any damage or unauthorized repairs that could void the coverage. This process protects you, the new owner, from inheriting a warranty that’s already invalid. The final inspection report and certification are often mandatory pieces of documentation you’ll need to submit to the manufacturer. By getting a LeakFREE® certified inspection, you get peace of mind knowing your investment is truly protected and the warranty transfer will go smoothly.
The Warranty Transfer Inspection: A Step-by-Step Look
A warranty transfer inspection isn’t just a quick look from the curb. It’s a detailed, methodical process that ensures the roof is in solid condition and meets the manufacturer’s or contractor’s standards. A certified inspector follows a clear set of steps to give you a complete picture of the roof’s health, protecting both the new homeowner and the integrity of the warranty. Think of it as a full physical for your roof, where every detail matters. Let’s walk through what you can expect from a professional inspection.
Step 1: Reviewing the paperwork
Before an inspector ever sets foot on a ladder, they start with the paperwork. This initial review is crucial because it sets the standard for the entire inspection. The inspector will go over the existing roof warranty documents to understand the specific terms, conditions, and coverage details. They’ll also look at any past inspection reports, maintenance records, and receipts for repairs. This step helps them know exactly what to look for during the physical assessment. A LeakFREE® certification, for example, comes with its own set of standards and documentation that provides a clear history of the roof’s condition and upkeep.
Step 2: Evaluating the entire roof system
Next comes the hands-on evaluation of the roof itself. This is where a certified inspector’s expertise is essential. They don’t just check for a few loose shingles; they assess the entire roofing system. This includes examining the condition of the roofing material (shingles, tiles, metal), the flashing around chimneys and vents, the state of the underlayment, and the functionality of the gutters and drainage. An inspector with specialized training knows how to spot subtle signs of wear, hidden moisture damage, and potential structural problems that an untrained eye would easily miss, giving you an accurate assessment of the roof’s true condition.
Step 3: Verifying materials and installation quality
A roof warranty is only valid if the right materials were used and installed correctly. During this step, the inspector verifies that the materials on the roof match what’s documented in the warranty paperwork. More importantly, they scrutinize the quality of the original installation. Many warranty claims are denied because of installation errors, like improper nailing, inadequate shingle overlap, or poorly sealed flashing. The inspector checks these critical details to ensure the roof was built to last and complies with the manufacturer’s specifications, which is a key requirement for a successful warranty transfer.
Step 4: Delivering the final report and certification
After the physical inspection is complete, the inspector compiles all their findings into a comprehensive report. This isn’t just a simple pass/fail checklist. A professional report, often generated with specialized inspection software, includes detailed descriptions, photographs of any problem areas, and clear recommendations for necessary repairs. If the roof meets all the required standards, the inspector will issue a professional certification. This document confirms the roof is in good condition and is the final piece of evidence you need to officially transfer the warranty to the new owner, providing peace of mind for years to come.
What’s Required to Transfer a Roof Warranty?
Transferring a roof warranty to a new homeowner isn’t automatic—it’s a process with specific steps you need to follow to keep the coverage active. Think of it as officially passing the torch of protection from one owner to the next. Getting it right involves meeting deadlines, gathering the right paperwork, and ensuring the roof is in good shape. Let’s walk through exactly what you’ll need to make sure the transfer goes smoothly and the warranty remains valid for years to come.
Key deadlines you can’t miss
Time is of the essence when it comes to transferring a roof warranty. Most manufacturers and contractors give you a very specific, and often short, window to complete the process after a property sale closes. Typically, you’ll have between 30 and 60 days to submit all the required information. If you miss this deadline, the warranty could become void, leaving the new owner without coverage. It’s one of the first things you should look into after closing. Mark the date on your calendar and treat it as a non-negotiable task. Acting quickly ensures you don’t accidentally lose out on valuable protection.
The essential documentation you’ll need
Before you can do anything else, you need to gather your paperwork. The most important document is the original warranty itself. This paper holds all the answers: it will tell you if the warranty is transferable, what the specific requirements are, and who you need to contact. Along with the warranty, you’ll likely need to provide proof of the property transfer, such as a copy of the deed or closing documents. Some companies may also ask for the original installation contract or proof of purchase. Having all these documents organized and ready to go will make the submission process much easier and prevent unnecessary delays.
Why a certified inspection is mandatory
Many warranty providers require a professional roof inspection as a condition of the transfer. This isn’t just a formality; it’s a crucial step to verify that the roof has been properly maintained and is still in good condition. A manufacturer needs to know that the system they’re warranting hasn’t been damaged or altered in a way that would compromise its integrity. Using an inspector who has undergone specialized training ensures an accurate assessment. This inspection protects the new owner from inheriting hidden problems and assures the warranty provider that the roof meets their standards, making something like a LeakFREE® certification possible.
The Risks of Skipping a Certified Inspection
It can be tempting to cut corners during a real estate transaction, especially when the finish line is in sight. But skipping a certified roof inspection is a gamble you don’t want to take. A roof warranty might look like a solid safety net on paper, but its protection is only as good as the conditions it comes with. Without a professional eye to verify the roof’s condition and the warranty’s validity, you could be inheriting a massive liability instead of a protected asset. Many buyers and even real estate agents underestimate what’s at stake. They see a recent roof and assume everything is fine, but hidden issues like improper installation or minor, unaddressed damage can turn into major financial headaches later. Think of it this way: a certified inspection isn’t just another item on a checklist; it’s the crucial step that confirms your new roof is sound and your warranty is ready to protect you from day one. The small investment in an inspection provides invaluable peace of mind and can save you from tens of thousands of dollars in unexpected repairs. Overlooking this can lead to some serious financial and logistical nightmares down the road.
How you could accidentally void your warranty
A roof warranty isn’t a blank check. It comes with specific terms and conditions that must be met to keep it active, and many homeowners void their coverage without even realizing it. For instance, if the original installation was done incorrectly, the manufacturer may not honor the warranty. The same goes for unapproved repairs or modifications—that quick fix from a local handyman could end up costing you your entire warranty. Even something as simple as neglecting regular maintenance, like cleaning out the gutters, can be grounds for a voided claim. A certified roof inspector knows exactly what to look for, ensuring the roof meets the manufacturer’s standards and that you understand your maintenance obligations.
Facing unexpected repair costs
The whole point of a warranty is to protect you from costly, unforeseen repairs. But if you skip the inspection and the warranty transfer isn’t handled correctly, you lose that protection. Imagine discovering a slow leak or structural issue a few months after moving in, only to find out your warranty isn’t valid. Suddenly, you’re on the hook for thousands of dollars in repairs that should have been covered. A certified inspection acts as your financial safeguard. It identifies potential problems with materials or past installation work before you finalize the deal, giving you a clear picture of the roof’s health and preventing you from inheriting expensive issues.
Complications with future insurance claims
When a storm hits and you need to file a claim, the last thing you want is a dispute over your roof’s warranty. Many people assume the warranty just carries over from the previous owner, but the transfer process is rarely automatic. It often involves specific paperwork and deadlines that are easy to miss. If you can’t prove the warranty was properly transferred, your insurance company might deny or complicate your claim, leaving you in a tough spot. A certified inspection provides the official documentation needed to prove the roof’s condition at the time of sale, smoothing out both the warranty transfer and any future insurance claims.
How to Choose the Right Certified Roof Inspector
Finding the right inspector for your roof warranty transfer feels like a big deal, because it is. This isn’t just about getting a piece of paper; it’s about trusting a professional to accurately assess one of the most critical parts of your property. The inspector you choose can mean the difference between a seamless warranty transfer and a voided one, leaving you on the hook for thousands in unexpected repairs.
But don’t worry—finding a qualified expert isn’t complicated when you know what to look for. A great inspector does more than just climb a ladder; they provide the detailed analysis and documentation needed to protect your investment for years to come. By focusing on a few key qualifications, you can confidently select an inspector who will get the job done right and ensure your warranty remains intact. It all comes down to checking for the right credentials, a solid track record, and proper professional coverage.
Look for NRCIA certification and credentials
The first thing you should look for on an inspector’s resume is an NRCIA certification. This isn’t just another industry badge; it’s a mark of excellence that proves they have met the highest national standards. An inspector with an NRCIA certification has completed a rigorous training portfolio and has a deep understanding of complex roofing systems. They know exactly what to look for to ensure a roof meets warranty requirements.
When you hire an NRCIA-certified inspector, you’re not just hiring an individual—you’re gaining access to a standardized process designed to protect you. This certification ensures the inspection is thorough, consistent, and focused on maintaining the integrity of your roof and its warranty.
Check their experience and track record
Once you’ve confirmed an inspector is certified, the next step is to look at their experience. How long have they been inspecting roofs, and more specifically, have they handled warranty transfers for your type of roofing material before? An inspector who primarily works with asphalt shingles might not be the best fit if you have a slate or metal roof. Don’t be shy about asking for references or looking up online reviews from past clients.
A seasoned inspector will have a clear process and be able to walk you through what they’ll be looking for. They should also be familiar with the specific requirements of different manufacturers’ warranties. A great question to ask is, “Have you worked with this manufacturer’s warranty transfer process before?” Their answer will tell you a lot about their expertise.
Verify their insurance and professional license
Finally, never work with an inspector who can’t provide proof of insurance and a professional license. These documents are your safety net. A license confirms they are legally permitted to work in your area, while insurance protects you from liability if an accident happens on your property. Ask to see a certificate of both general liability and professional liability (also known as errors and omissions) insurance.
This step is non-negotiable. A true professional understands the importance of being properly insured and will gladly provide their documentation. This protects not only their business but also you as the property owner. Choosing a fully licensed and insured inspector is a fundamental part of ensuring your LeakFREE® roof stays protected.
Common Issues That Can Derail a Warranty Transfer
When you’re handling a property transaction, the roof warranty can feel like a golden ticket—a promise of security and protection against future problems. But that ticket is only valid if the roof is in good shape. Several common, often hidden, issues can pop up during an inspection and put the entire warranty transfer at risk. These aren’t just minor cosmetic flaws; they’re red flags that can signal bigger problems and give a manufacturer reason to void the coverage.
From shoddy installation work that was never caught to years of neglected maintenance, these problems can lurk just out of sight. An untrained eye might miss them completely, leaving the new owner with a worthless piece of paper and a ticking time bomb of potential repair costs. This is precisely why a certified inspection is so critical. A trained professional knows exactly what to look for, identifying the deal-breakers that could invalidate your warranty and leave you unprotected. Let’s walk through the most common culprits that can derail a smooth warranty transfer.
Installation mistakes and shortcuts
A roof warranty is only as good as the initial installation. If the contractor who put the roof on cut corners, used the wrong materials, or failed to follow the manufacturer’s exact specifications, the warranty could be void from the start. These mistakes aren’t always obvious and can include improper nailing, inadequate flashing around chimneys, or poor ventilation. A certified inspector has undergone specialized training and has a deep understanding of roofing systems. They can provide you with an accurate assessment of the installation quality, ensuring the roof was built to last—and to the manufacturer’s standards.
Hidden structural damage or signs of leaks
What you can’t see can definitely hurt you. Small, slow leaks can go undetected for years, causing rot, mold, and structural damage to the roof deck and the home’s frame. A standard home inspection might not catch these issues, but a specialized roof inspection will. A roof certification inspection provides a professional, written assessment of your roof’s current condition and its expected lifespan. An inspector will check the attic for signs of water intrusion, examine the decking for soft spots, and identify any potential vulnerabilities. This detailed evaluation gives you a clear picture of the roof’s health and the assurance that no hidden problems will surface after the papers are signed.
Neglected maintenance and debris buildup
Just like a car, a roof needs regular upkeep to perform its best. Unfortunately, many homeowners forget about their roof until there’s a problem. You can accidentally void a warranty by not doing regular maintenance. Simple tasks like cleaning gutters, removing debris, and trimming overhanging branches are often required by the manufacturer. When gutters clog and leaves pile up, they trap moisture against the roof surface, which can accelerate wear and tear on the shingles and even lead to rot. A certified inspector will document the roof’s current condition, noting any signs of neglect that could jeopardize the warranty transfer.
Unauthorized repairs or modifications
Making changes to your roof without the manufacturer’s approval is one of the fastest ways to void a warranty. Be aware of actions that can cancel your coverage, such as improper repairs, adding hardware like satellite dishes or solar panels, or pressure washing the shingles. If a previous owner hired an uncertified handyman to patch a leak or installed a skylight without following proper procedures, the warranty is likely invalid. A certified inspector can identify these unauthorized modifications and determine if they have compromised the integrity of the roofing system, protecting you from inheriting someone else’s mistake.
Know Your Warranty: A Guide to Transfer Policies
When you’re dealing with a roof warranty, the details are everything. A warranty is more than just a piece of paper; it’s a contract that outlines who is responsible for what if something goes wrong. But not all warranties are created equal, and understanding the fine print is essential, especially when a property changes hands. Knowing the type of coverage you have and its transfer policy can save you from major headaches and unexpected costs down the road. It’s the key to ensuring that a valuable asset—your roof’s protection—doesn’t get lost in the shuffle of a real estate transaction.
Manufacturer vs. contractor warranties
First things first, let’s clear up who your warranty is actually with. You typically have two types: one from the manufacturer and one from the contractor. The manufacturer’s warranty covers the physical materials—the shingles, underlayment, and other components. It’s a promise that their products will hold up for a certain period. The contractor’s warranty, on the other hand, covers the workmanship. It’s the installer’s guarantee that they did the job correctly and followed the manufacturer’s specifications. This distinction is critical because each type has its own set of rules, conditions, and, most importantly, transfer procedures.
Is your coverage transferable?
Many homeowners assume their roof warranty automatically passes to the new owner when they sell their house, but that’s rarely the case. Most manufacturers allow for a one-time transfer, but it isn’t automatic. The process is often buried in the fine print and usually involves specific steps, fees, and strict deadlines that must be met shortly after the property sale. If you miss a step or a deadline, the warranty could become void. Before you assume you’re covered, you need to read the original warranty documents carefully to understand exactly what’s required to keep the coverage active.
The advantage of a LeakFREE® certification
If navigating a traditional warranty transfer sounds complicated, that’s because it often is. This is where a third-party certification offers a much simpler path. An NRCIA LeakFREE® roof certification comes with a standardized warranty that is designed from the start to be easily transferable. Unlike manufacturer warranties that are tied to the original owner, our certification is tied to the property itself. This provides a clear, straightforward guarantee for both the seller and the buyer, ensuring the roof’s protection continues without any confusing paperwork or hidden deadlines. It’s peace of mind that stays with the home.
Don’t Fall for These Warranty Transfer Myths
When you’re buying a home, the roof warranty can feel like a safety net. But there’s a lot of confusion about how these warranties actually work, especially when a property changes hands. Let’s clear up some of the most common myths so you can protect your investment and avoid any unwelcome surprises.
Myth: The warranty transfers automatically
Many homeowners assume a roof warranty just carries over with the house keys, but that’s rarely the case. The transfer process is often filled with specific requirements and deadlines set by the manufacturer or contractor. Simply assuming you’re covered because the previous owner was is a risky move. Most warranties require the new owner to formally request the transfer, pay a fee, and submit documentation within a specific timeframe after the sale closes. Failing to follow these steps can leave you without any coverage. This is why a standardized warranty, like the one included with a LeakFREE® certification, is so valuable—it removes the guesswork.
Myth: Inspections are only for old roofs
It’s easy to think a newer roof is in perfect condition and doesn’t need a professional look-over. However, one of the most common roofing myths is that a new roof doesn’t need an inspection. Even recently installed roofs can have hidden issues from improper installation, subpar materials, or storm damage that isn’t visible from the ground. Many manufacturers actually require a certified inspection to verify the roof is in good condition before they will approve a warranty transfer. An inspector ensures the roof was installed to the manufacturer’s specifications, a critical step in keeping the warranty valid for its full term. This protects everyone involved, from homeowners to real estate professionals.
Myth: The paperwork isn’t a big deal
Don’t underestimate the importance of the fine print. To transfer a roof warranty effectively, you need to carefully read the terms, notify the right people, and provide all the necessary documentation. This isn’t just a formality; it’s a contractual process. Missing a single form or deadline could void the transfer entirely. The paperwork often includes the original proof of purchase, installation details, and a formal transfer request. A certified inspector who has completed extensive training and education can be a huge help here. They understand what manufacturers look for and can help you gather the correct documents to ensure a smooth and successful transfer process.
How Much Does a Warranty Transfer Inspection Cost?
When you’re buying a home or managing a property, budgeting is everything. So, it’s natural to wonder what a warranty transfer inspection will add to your list of expenses. Think of this cost not as just another fee, but as an investment in securing a valuable, long-term asset: your roof’s warranty. The price for this service isn’t one-size-fits-all, as it depends on the specifics of your roof and the professional you hire.
A certified inspection is a critical step in the warranty transfer process, ensuring the roof is in good condition and meets the manufacturer’s standards. While the fee might seem like an extra step, it’s a small price to pay for the peace of mind that comes with a protected roof. Let’s break down what you can expect to pay and the factors that shape the final price tag.
Typical price ranges for inspections
So, what’s the bottom line? While prices vary by location and the scope of the inspection, you can generally expect a standard roof inspection to cost between $125 and $600. Some reports show that the average cost lands around $250, but this can shift based on your specific needs. A warranty transfer inspection requires a detailed look at the roof system to verify its condition, so it’s important to hire someone who knows exactly what to look for.
This fee covers a professional inspector’s time, tools, and expertise. They are trained to identify subtle signs of damage, improper installation, or wear and tear that could void your warranty if left unaddressed. Paying for a quality inspection up front ensures you get an accurate assessment, which is essential for keeping your warranty coverage intact for years to come.
Factors that influence the final cost
The price range for an inspection is broad because every roof is different. Several key factors will influence the final quote you receive from a certified roof inspector. The size and pitch of your roof are major considerations; a larger, steeper roof requires more time and safety precautions, which increases the labor cost. The roofing material also plays a role, as materials like slate or tile demand more specialized knowledge to inspect without causing damage.
Your geographic location matters, too. Labor rates differ from city to city, and the local climate can impact the type of wear and tear an inspector needs to look for. Finally, the inspector’s credentials and experience are a factor. While it might be tempting to go with the lowest bidder, a thorough inspection from a highly qualified professional is essential for a successful warranty transfer. Their expertise ensures nothing is missed, protecting you from future headaches and unexpected costs.
Your Guide to a Smooth Inspection Process
The idea of a roof inspection can feel a bit daunting, but it doesn’t have to be. With a little preparation, you can make the entire process straightforward and stress-free. Think of it as a team effort between you and your inspector to ensure your roof is in top shape for the warranty transfer. A smooth inspection gives everyone involved—from homeowners and buyers to real estate agents and insurers—the confidence that the property is well-protected. The key is knowing what to expect and how to act on the information you receive. This guide will walk you through preparing for the visit, understanding the final report, and turning recommendations into action.
How to prepare for the inspection
To get the most out of your inspection, a little prep work goes a long way. Start by ensuring the inspector has clear and safe access to the roof and any interior spaces like attics or crawl spaces. It’s also helpful to gather any documents you have related to the roof, such as the original warranty or invoices from past repairs. If you’re aware of any leaks or specific problem areas, make a quick list to share. A certified inspector has completed specialized training and has a deep understanding of roofing systems, so providing them with this information helps them give you the most accurate assessment possible.
How to read your inspection report
Once the inspection is complete, you’ll receive a detailed report. Don’t be intimidated by it; this document is your guide to the roof’s current health. It will typically include photos, a description of the roofing materials, an outline of the roof’s overall condition, and a list of any identified issues. A roof certification is a professional report stating that a roof is in good condition and should last for a specific period. Think of it as the official record that supports a LeakFREE® certification, giving you a clear picture of its integrity and what, if anything, needs attention.
What to do with the inspector’s recommendations
The recommendations section of your report is your action plan. It outlines the exact steps needed to get the roof in shape for the warranty transfer and ensure its long-term performance. It’s essential to address any required repairs promptly using a qualified contractor. Following through on these recommendations isn’t just about fixing minor issues; it’s a critical step in protecting your warranty’s validity. By working with a certified roof inspector and completing the suggested work, you demonstrate a commitment to proper maintenance, which is exactly what warranty providers want to see. This proactive approach keeps your coverage intact and prevents small problems from becoming costly headaches later.
Related Articles
- Is Your Roof Warranty Transferable to a New Owner?
- How Does a Roof Warranty Transfer? A Simple Guide
- Is a Roof Warranty Transferable? A Complete Guide
Frequently Asked Questions
Why can’t I just rely on my general home inspector for this? While a general home inspector provides a great overview of the entire property, they are generalists by trade. A certified roof inspector is a specialist who has completed extensive training focused solely on roofing systems. They understand the specific installation techniques, material requirements, and maintenance standards that manufacturers demand, which is crucial for a warranty transfer. Think of it like seeing a cardiologist for a heart issue instead of your family doctor—you want the expert who lives and breathes that specific field.
What happens if the inspection uncovers problems with the roof? Finding issues doesn’t automatically mean the warranty transfer is off the table. In fact, it’s one of the most valuable outcomes of an inspection. The inspector’s report will give you a clear, actionable list of necessary repairs. Addressing these items with a qualified contractor often brings the roof back up to the required standard. This process ensures the new owner inherits a sound roof and allows the warranty transfer to proceed, protecting you from future surprises.
I’m selling my home. Is it my responsibility to arrange the inspection, or the buyer’s? This can often be a point of negotiation in a real estate transaction. However, as the seller, arranging for a pre-listing inspection and certification can be a powerful move. It shows transparency and gives potential buyers confidence that the roof is in excellent condition. Providing a LeakFREE® certification upfront can make your property more attractive and help streamline the closing process by removing a potential hurdle before it even comes up.
How is an NRCIA LeakFREE® certification different from a standard manufacturer’s warranty? A manufacturer’s warranty typically covers defects in the roofing materials, while a contractor’s warranty covers workmanship. An NRCIA LeakFREE® certification is a separate, standardized warranty that guarantees the roof will not leak for the duration of the certification period. It’s tied to the property, not the owner, which makes it easily transferable without the complicated paperwork and deadlines common with manufacturer warranties. It acts as an added layer of protection that complements the original warranties.
My roof is only a few years old. Is an inspection for the warranty transfer still necessary? Yes, it absolutely is. Age isn’t the only factor that determines a roof’s condition. Improper installation is a leading cause of premature roof failure and can void a warranty from day one, even on a brand-new roof. A certified inspection verifies that the installation was done correctly and that no hidden damage has occurred from storms or other events. It’s a necessary step to confirm the roof meets the manufacturer’s standards, regardless of how new it is.