What you can’t see can definitely hurt you, especially when it comes to your roof. From the ground, everything might look perfectly fine, but hidden damage like granule loss, cracked flashing, or poor attic ventilation could be silently compromising your home’s integrity. A quick glance isn’t enough to catch these subtle but serious issues. You need a systematic guide to ensure you’re looking in all the right places. That’s why a detailed roof inspection checklist PDF is such a valuable tool. It serves as your roadmap, guiding you through a thorough evaluation of every component to uncover problems before they lead to leaks.
Key Takeaways
- Adopt a proactive inspection schedule to save money: Using a checklist to regularly examine your roof helps you find and fix small problems before they become expensive, widespread damage.
- A systematic approach ensures a complete assessment: Following a checklist methodically guarantees you cover every critical area, from gutters and flashing to attic ventilation, creating a consistent and reliable record of your roof’s health.
- Know when to call a certified professional for safety and expertise: For steep roofs, complex issues, or simply for peace of mind, an expert can safely identify hidden damage and provide a complete, unbiased assessment.
What Is a Roof Inspection Checklist?
A roof inspection checklist is your roadmap for thoroughly evaluating a roof’s condition. Think of it as a systematic guide that helps you spot potential issues before they turn into major headaches. Using a checklist ensures you cover all the bases, from the shingles and flashing to the gutters and interior attic space. Regular inspections are one of the best ways to protect a property investment, as they can uncover hidden damage, developing leaks, and other vulnerabilities that might otherwise go unnoticed.
An annual inspection can help you prevent a host of problems, from worn-out roofing materials to water intrusion that can compromise the building’s structure. Whether you’re a homeowner trying to stay on top of maintenance or a professional inspector preparing a report, a checklist brings structure and consistency to the process. It transforms a casual look-over into a detailed, recordable assessment, which is exactly what you need to maintain a healthy, long-lasting roof. The goal is to create a clear, actionable record of the roof’s health, making it easier to plan for repairs or routine upkeep.
Why a Systematic Approach Is Key
When it comes to roof inspections, winging it just doesn’t cut it. A systematic approach is essential for a truly thorough evaluation. Following a checklist ensures that no area is overlooked, from the smallest sealant crack to the overall structural integrity. This methodical process helps you document every finding consistently, which is crucial for tracking the roof’s condition over time. For professionals, this detailed examination helps clients understand the value of your work and the specific issues you’ve identified.
A structured inspection also builds trust. When a property owner sees a detailed report, they know you’ve done your due diligence. Using professional inspection software can take this a step further, allowing you to integrate photos and notes directly into your checklist for a comprehensive, easy-to-understand final report. It’s about moving beyond a simple glance and providing a close, detailed visual examination that leaves no stone unturned.
How Early Detection Saves You Money
Catching roofing issues early is one of the smartest financial decisions a property owner can make. Small problems like a cracked shingle or peeling sealant are typically inexpensive and quick to fix. But if left unaddressed, they can lead to widespread water damage, mold growth, and costly structural repairs. Regular inspections help you find these problems before they escalate into budget-breaking emergencies.
The savings are significant. Some experts estimate that for every dollar spent on preventive maintenance, you can avoid about four dollars in future repair costs. By identifying vulnerabilities early, you not only save on repairs but also protect the interior of the building from leaks that could ruin ceilings, walls, and personal belongings. This proactive approach is the foundation of programs designed to deliver LeakFREE® roofs, which focus on preventing problems before they ever start.
Common Myths About Roof Inspections
Several common myths about roof inspections can lead property owners to neglect this critical maintenance task. One of the most prevalent is the belief that if a roof isn’t actively leaking, it doesn’t need an inspection. This couldn’t be further from the truth. Many serious issues, like granule loss on shingles, damaged flashing, or poor ventilation, don’t cause immediate leaks but can lead to premature roof failure.
Another myth is that a quick visual inspection from the ground is sufficient. While you might spot an obviously missing shingle, a ground-level view won’t reveal all damage. Issues with flashing, sealants around vents, and the subtle signs of hail damage require a much closer look. Dispelling these myths is important for everyone we serve, from homeowners to real estate agents, as it highlights the true value of a comprehensive, professional inspection.
What to Check on the Outside of Your Roof
Your exterior roof inspection is your first line of defense against costly repairs. This is where you’ll spot the most obvious signs of wear and tear. You can do a thorough visual check from the ground with a good pair of binoculars, so don’t feel like you need to climb a ladder just yet. Walk around the entire perimeter of your home, taking your time to look at each section of the roof from different angles. A systematic approach ensures you don’t miss anything. Pay close attention to areas with valleys, peaks, and anywhere the roof meets a wall. These spots are often the first to show signs of trouble.
Assess Your Roofing Material
Start with the main surface of your roof. What you’re looking for will depend on your roofing material. For asphalt shingles, check for any that are cracked, curling at the edges, or missing entirely. Also, look for dark streaks or patches of moss and algae, which can trap moisture. If you have a tile or slate roof, scan for cracked or broken tiles. For metal roofs, keep an eye out for any signs of rust, dents, or panels that seem loose. The goal is to identify any weak spots where water could potentially get in. Maintaining the integrity of your roofing material is the first step toward a LeakFREE® roof.
Inspect Flashing and Sealants
Flashing is the thin metal material installed where your roof meets a vertical surface, like a chimney or wall, and in the valleys of your roof. Its job is to direct water away from these vulnerable areas. Carefully examine all flashing for signs of rust, cracks, or separation from the roof. The sealant used around flashing can also dry out and crack over time, creating a direct path for water. Make sure the caulking is intact and doesn’t have any gaps. These seemingly small details are critical for preventing leaks, which is why they are a major focus for any certified roof inspector.
Examine Gutters and Downspouts
Your gutters are an essential part of your roofing system. When they get clogged with leaves, twigs, and other debris, water can’t drain properly. Instead, it backs up and can seep under the edge of your roof, potentially rotting the wood of your eaves and fascia. Check to see that your gutters are clear and securely attached to the house. A great tip is to look inside your gutters for an excessive amount of shingle granules. A few granules are normal, but a large accumulation can mean your shingles are aging and losing their protective outer layer, signaling it might be time for a replacement.
Check Vents, Chimneys, and Skylights
Anything that penetrates your roof—like vents, chimneys, or skylights—is a potential spot for a leak. Inspect the area around each of these features carefully. Look at the boots or seals around plumbing vents to ensure they aren’t cracked or deteriorating. For chimneys, check the masonry for any cracks or crumbling mortar and ensure the flashing around the base is secure. If you have skylights, look for any cracks in the glass or signs of condensation between the panes, which could indicate a failed seal. These complex areas often require an expert eye, which is why they are a key part of our inspector training.
What to Look for Inside Your Home
A thorough roof inspection goes beyond the exterior. Some of the most telling signs of a problem are hiding inside your house, particularly in the attic. What happens on your roof directly impacts the space below it, so grabbing a flashlight and heading upstairs is a crucial step. Catching issues from the inside helps you pinpoint the source of a problem before it causes widespread damage to your ceilings and walls. It’s the best way to get a full picture of your roof’s health.
Inspect the Attic
Your attic is the first line of defense after the roof itself. Start by turning off the lights and looking for any daylight peeking through the roof boards—a sure sign of a hole. Next, check for moisture. Look for dark stains, water tracks on the wood, or damp spots, especially around chimneys and vents. Also, check for brittle or cracked sealant around these penetrations. A healthy attic is key to a LeakFREE® roof, and spotting these issues early can save you from major headaches down the road.
Spot the Signs of Water Damage
You don’t always need to be in the attic to find evidence of a leak. Water has a way of making its presence known throughout your home. Keep an eye on your ceilings and walls, especially on the top floor, for signs of water damage. Look for yellowish stains, peeling paint, or bubbling drywall. You might also notice mold growth or a persistent musty smell. Don’t dismiss a small spot; it could indicate that water is pooling and slowly damaging your home’s structure. Addressing it quickly is the best way to prevent a small drip from turning into a costly repair.
Check Insulation and Ventilation
Proper insulation and ventilation are the unsung heroes of a healthy roof. In the attic, inspect your insulation to ensure it’s dry. If it’s damp or compacted, it won’t work effectively and points to a moisture problem. At the same time, check for adequate ventilation. Your attic needs to breathe to prevent moisture buildup, which can lead to wood rot and ice dams. Make sure soffit and ridge vents aren’t blocked. A well-ventilated attic helps regulate temperature and extend the life of your shingles. This is a key area that our certified inspectors are trained to assess.
Your Guide to Seasonal Roof Inspections
Your roof is your home’s first line of defense against the elements, and its needs change right along with the seasons. A small issue in the fall can become a major leak by the time the spring thaw arrives. That’s why a proactive approach to roof maintenance is so important. By scheduling regular checks, you can catch potential problems before they turn into costly repairs.
Think of it like a regular health check-up for your roof. Experts generally recommend inspecting your roof at least twice a year—once in the spring and again in the fall. These biannual inspections help you address any damage from the previous season and prepare for the one ahead. Of course, you should also plan to check things out after any major storm. This simple rhythm of seasonal inspections is one of the best ways to extend the life of your roof and ensure it’s always ready to protect your home. A well-maintained roof is the foundation of a LeakFREE® home, giving you peace of mind year-round.
Spring: Checking for Winter Damage
Once the snow melts and the days get longer, it’s the perfect time to assess how your roof held up against winter’s chill. Harsh weather, from heavy snow and ice dams to strong winds, can take a toll. A thorough spring inspection helps you spot and fix any issues before the heavy rains of April and May arrive. Regular inspections can uncover problems with your roof before they make you vulnerable to leaking or damage.
Start by looking for shingles that are cracked, curled, or missing altogether. Check the flashing around chimneys, vents, and skylights for any signs of lifting or cracking. You’ll also want to clear out gutters and downspouts, which are often clogged with debris left over from winter. This “spring cleaning” for your roof ensures it’s in top shape for the warmer months.
Fall: Preparing for Cold Weather
As the leaves begin to change, your focus should shift to getting your roof ready for the cold, wet weather ahead. A fall inspection is all about proactive maintenance. Finding and fixing small problems now can prevent them from becoming major headaches once snow and ice make repairs difficult, if not impossible. This is the time to ensure your roof is sealed tight and ready to handle whatever winter brings.
Clear your gutters of fallen leaves and twigs to prevent ice dams, which can cause water to back up and seep under your shingles. Examine the seals around vents and pipes, as these can contract and crack in the cold. It’s also a good idea to check for any loose shingles that could be vulnerable to winter winds. Taking these steps helps ensure your home stays warm and dry all season long.
After a Storm: Assessing the Impact
While seasonal checks are essential, some inspections can’t be planned. After a major weather event like a hailstorm, hurricane, or severe windstorm, you should check your roof for damage as soon as it’s safe to do so. High winds can lift or tear off shingles, while hail can leave dents and cracks that compromise your roof’s integrity. Even heavy rain can expose existing weaknesses.
Look for obvious signs of trouble like missing shingles, large branches, or visible damage to vents and flashing. Inside, check your attic and ceilings for new water stains. A post-storm inspection should assess for things like roof deck damage, compromised underlayment, and sealant deterioration. If you see anything that concerns you, it’s best to call a certified roof inspector to get a professional assessment.
How Often Should You Inspect Your Roof?
One of the most common questions property owners ask is how often they should inspect their roof. While there’s no single answer that fits every situation, a consistent inspection schedule is the best way to protect your investment. Think of it as preventative care for your home or building. Regular inspections help you find problems early, before they turn into big, expensive repairs or cause leaks that damage your property.
The right frequency depends on three main factors: your roof’s material, your local climate, and its age. A brand-new metal roof in a mild climate has very different needs than a 15-year-old asphalt shingle roof in an area known for severe storms. By understanding these variables, you can create a smart, proactive maintenance plan that saves you money and gives you peace of mind.
Inspection Frequency by Roof Type
Different roofing materials have unique vulnerabilities and lifespans, which dictates how often you should check on them. For example, asphalt shingles, the most common residential roofing material, should be inspected at least once a year. You’ll want to look for things like curling, cracking, or missing granules. On the other hand, more durable materials like metal, slate, or tile might require less frequent checks, but you’ll still need to inspect seams and flashing for any signs of failure. The goal is always to catch minor issues before they escalate. A proactive approach is key to maintaining a healthy roof and is a core principle behind our LeakFREE® roof certifications.
When Weather Should Prompt an Inspection
Your routine schedule is your baseline, but severe weather should always trigger an immediate inspection. It’s critical to check your roof after any major weather event, even if you don’t see any obvious damage from the ground. High winds can lift shingles, hail can create dents and cracks, and heavy snow can put immense stress on the structure. After a storm passes and it’s safe to do so, walk your property to look for fallen debris or missing roofing materials. Then, perform a more thorough check using a checklist. This post-storm inspection is one of the most important things you can do to prevent a small, weather-related issue from becoming a major leak.
Adjusting Your Schedule as Your Roof Ages
Just like anything else, roofs require more attention as they get older. While an annual inspection is a good starting point for a newer roof, you should increase that frequency as it ages. For roofs over 10 years old, it’s wise to conduct inspections at least twice a year, typically in the spring and fall. This allows you to assess any damage from winter storms and prepare the roof for the cold months ahead. Older materials are more brittle and susceptible to damage, and sealants can degrade over time. By keeping a closer eye on an aging roof, you can extend its life and better plan for its eventual replacement, a crucial task for all types of property stakeholders.
Common Roof Inspection Mistakes to Avoid
Even the most seasoned professional can make a mistake, but when it comes to a roof, small oversights can lead to big problems. A thorough inspection is your best defense against future headaches and costly repairs. Knowing what to watch out for helps you perform a more accurate assessment every time.
The most common errors fall into three categories: missing what you can’t easily see, cutting corners on safety, and failing to keep a good record. By being mindful of these potential pitfalls, you can ensure your inspection is comprehensive and valuable. Whether you’re a homeowner checking on your property or a contractor serving a client, avoiding these mistakes will help you protect the investment under your roof. Let’s walk through what to look out for.
Overlooking Hidden Damage
It’s easy to focus on the obvious, like missing shingles, but some of the most serious issues aren’t immediately visible. One of the biggest mistakes is neglecting to check for hidden damage in places like the fascias. These boards along the roofline play a key role in your roof’s structure, and any deterioration can signal deeper problems. It’s also a common myth that if your roof isn’t actively leaking, it doesn’t need an inspection. Damage can exist for months or even years without a single drop of water appearing on your ceiling. That’s why a proactive approach is so important for maintaining a LeakFREE® roof.
Ignoring Safety Precautions
Your safety, or the safety of your inspector, should always come first. Climbing onto a roof is inherently risky, and skipping safety protocols is a mistake you can’t afford to make. A frequent oversight is the failure to wear appropriate safety gear, such as a harness, gloves, and proper non-slip footwear. Taking the time to set up a sturdy ladder and ensuring the roof is safe to walk on can prevent a life-altering accident. Proper inspector training always emphasizes a safety-first approach, because no inspection is worth an injury. Never compromise on safety measures, no matter how quick the job seems.
Forgetting to Document Your Findings
An inspection is only as good as its report. If you don’t document your findings clearly, you lose valuable information and create confusion. Failing to take visual records, like photos or diagrams, makes it difficult to explain the roof’s condition to a homeowner or client. Visuals provide clear evidence of any issues you identify and serve as a crucial reference point for future inspections. Using a standardized system, like NRCIA’s inspection software, ensures that you capture all the necessary details in a professional format. Good documentation builds trust and makes it easier to plan for necessary repairs.
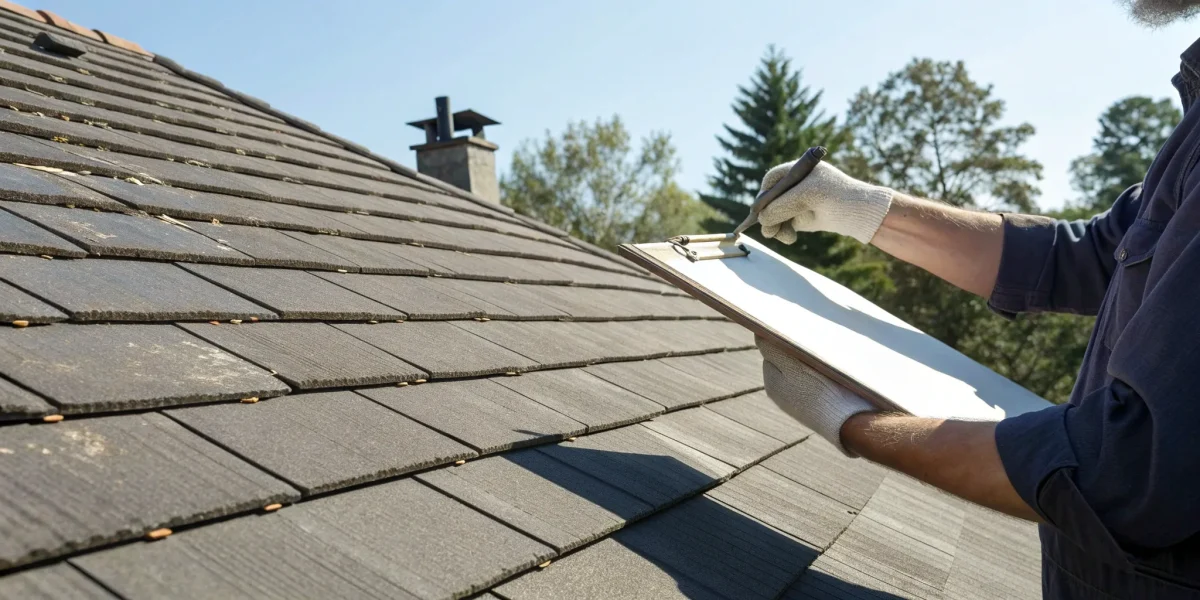
Why a PDF Checklist Is Your Best Tool
When you’re on a roof, the last thing you want to juggle is a flimsy piece of paper and a pen. And relying on memory alone is a surefire way to miss something important. A PDF checklist is the perfect middle ground—structured, professional, and always available on your phone or tablet. It ensures you conduct every inspection with the same level of detail, creating a consistent and reliable process every single time. This simple tool transforms your inspections from a guessing game into a systematic evaluation, giving you, your clients, or your family peace of mind. Let’s look at a few reasons why a digital checklist is an inspector’s best friend.
Easy to Access and Use Anywhere
One of the biggest advantages of a PDF checklist is its portability. You can download it to your phone or tablet and have it ready to go wherever the job takes you—no internet connection required. This is a huge plus when you’re in an attic with spotty service or on a new construction site without Wi-Fi. Digital tools ensure you collect all the critical information, from photos to signatures, without interruption. For professionals looking for an even more integrated solution, specialized inspection software can streamline this process further by automatically generating reports that are easy to share with clients and insurance companies.
Add Photos and Notes with Ease
A picture is worth a thousand words, especially in a roof inspection report. A PDF on your device makes it simple to snap photos of potential issues—like cracked shingles or damaged flashing—and organize them with your findings. This visual documentation provides clear, undeniable evidence of your observations, which is incredibly helpful when explaining repairs to a homeowner or filing an insurance claim. Instead of just describing a problem, you can show it. This adds a layer of credibility and clarity to your work, ensuring everyone is on the same page about the roof’s condition.
Keep a Professional Record of Your Inspections
Every inspection you complete adds to the story of a roof’s life. Saving your completed PDF checklists creates a clean, professional, and chronological record of its condition. This history is invaluable for tracking wear and tear over time, scheduling preventative maintenance, and justifying future work. For homeowners, it’s a detailed log of their home’s upkeep. For professionals, it’s a portfolio of your meticulous work. This level of documentation is fundamental for maintaining a LeakFREE® roof certification and demonstrates a commitment to quality and long-term care that clients truly appreciate.
How to Use Your Roof Inspection Checklist
Having a checklist is the first step, but knowing how to use it effectively is what separates a quick glance from a thorough inspection. A great checklist provides structure, ensuring you don’t miss a single detail from the ground to the ridge cap. Think of it as your roadmap to a comprehensive roof assessment. By following a consistent process, you can confidently track your roof’s condition, catch issues before they become costly disasters, and maintain a detailed record for future reference. For professionals, this systematic approach is the foundation of every reliable inspection and is a core component of our specialized inspection software. Whether you’re a homeowner doing a seasonal check or a contractor performing a client inspection, these steps will help you get the most out of your checklist.
Step 1: Get Prepared
Before you even think about getting on the ladder, take a moment to get everything in order. Proper preparation is about more than just safety; it’s about setting yourself up for an efficient and effective inspection. Start by gathering your tools: the checklist, a camera or smartphone for photos, a notepad, and any necessary safety equipment. Performing an annual inspection helps you prevent a host of problems, from minor material damage to major leaks, so treat this preparation phase as the critical first step in protecting the property. Having everything you need on hand means you can focus entirely on the task without interruptions.
Step 2: Follow a System
To ensure nothing gets overlooked, work through your checklist methodically every single time. A consistent system is the key to a thorough inspection. Don’t just wander around looking for obvious problems. Instead, follow the checklist section by section. For example, you might start with a ground-level assessment, then move to the roof itself to check the materials, flashing, and vents, and finally, inspect the interior spaces like the attic. This structured approach guarantees that you cover all critical areas, from the gutters to the insulation. For inspectors looking to refine their process, our training portfolio offers in-depth guidance on developing a professional, repeatable system.
Step 3: Document and Track Everything
Your inspection isn’t complete until you’ve documented your findings. This record is crucial for tracking your roof’s condition over time and identifying patterns or recurring issues. Don’t just rely on memory. Take plenty of photos, especially of any areas that show wear, damage, or potential concern. Get wide shots for context and close-ups to capture specific details. Add notes to your checklist describing what you see. This visual and written record is invaluable for planning repairs, filing insurance claims, or providing a history to a future buyer. It’s this level of detailed tracking that forms the basis of our industry-leading LeakFREE® roof certifications.
When to Call a Professional
A DIY roof inspection is a great first step, but it’s not a substitute for a professional assessment. While our checklist helps you spot obvious issues, some problems require a trained eye and specialized equipment. Knowing when to hand things over to an expert is key to protecting your home and your wallet. A professional can provide a detailed report that’s essential for insurance claims, real estate transactions, or simply getting a complete picture of your roof’s health.
Think of it this way: you can take your own temperature, but you see a doctor for a full diagnosis. Your roof deserves the same level of care. If your inspection uncovers anything that makes you uncertain, or if you simply want the peace of mind that comes with an expert opinion, it’s time to make the call.
For Your Safety
Your personal safety is the top priority. Getting on a roof is inherently risky, especially if it has a steep pitch or if you’re dealing with wet or icy conditions. Professionals have the right equipment and training to work safely at heights. This includes essentials like harnesses, non-slip footwear, and an understanding of how to move around without causing damage or risking a fall. If you don’t have the proper safety gear or feel even slightly uncomfortable with the height, it’s not worth the risk. A trip to the emergency room is far more expensive than a professional inspection fee.
When You Need an Expert Eye
One of the most common myths is that a roof is fine as long as it isn’t actively leaking. The truth is that many serious issues, like granule loss, subtle hail damage, or compromised flashing, aren’t obvious to the untrained eye. A professional inspector knows exactly what to look for. They can identify potential problems long before they lead to a leak inside your home. This expert assessment helps you catch minor issues before they become major, costly repairs, ensuring you get the full lifespan out of your roof and maintain its protective integrity.
The Value of an NRCIA Certified Inspector
Not all inspectors are created equal. When you hire an NRCIA certified inspector, you’re getting a professional who has completed specialized training and adheres to the industry’s highest standards. They provide an unbiased, thorough evaluation of your roof’s condition, giving you a clear and accurate report. This expertise is invaluable, saving you from future repairs and enhancing your home’s value. Investing in a certified inspection ensures your roof is in optimal condition, giving you confidence and the ultimate peace of mind that comes with our LeakFREE® roof protection.
Get Your Free Roof Inspection Checklist
Taking a proactive approach to roof maintenance is the smartest way to protect your property investment. Small issues like a cracked shingle or clogged gutter can quickly escalate into major problems, leading to water damage, structural issues, and expensive repairs. A regular, systematic inspection is your first line of defense. To help you get started, we’ve created a comprehensive checklist that walks you through a professional-grade inspection, step by step. This tool is perfect for homeowners who want to stay on top of seasonal upkeep and for industry professionals looking to standardize their evaluation process. It takes the guesswork out of the equation, ensuring you cover all your bases every single time. Think of it as your roadmap to a thorough and effective roof assessment. By following a consistent checklist, you create a valuable record of your roof’s condition over time, making it easier to plan for future maintenance and budget for eventual replacement. It empowers you to understand your roof’s health, communicate more effectively with contractors, and make informed decisions that will extend the life of your roof and safeguard your home or building. This isn’t just about finding problems; it’s about building confidence in the integrity of your property’s most critical shield against the elements.
Built on the NRCIA Standard
This isn’t just a generic list of things to look at. Our checklist is designed around the same high standards required of every NRCIA certified inspector. It provides a systematic framework for identifying potential issues before they turn into costly, time-consuming repairs. A consistent and thorough inspection process is the foundation of a healthy, long-lasting roof. By using this guide, you can spot subtle signs of wear and tear, address vulnerabilities, and maintain the integrity of your roof. This ensures it provides the reliable protection you depend on, season after season. It’s about applying a professional methodology to your own maintenance routine.
What’s Inside the Checklist
Our downloadable PDF is your step-by-step guide to a complete roof assessment. It covers every critical area, so you can be confident that nothing important is overlooked. We’ve organized it to be clear and easy to follow, whether you’re on the ground or on the roof. Here’s a quick look at what you’ll be examining:
- Roof Materials: Assess the condition of shingles, tiles, or membranes to ensure they are secure and intact.
- Water Problems: Identify signs of leaks, moisture, or pooling water that could lead to significant damage.
- Pests and Debris: Check for nests, insect infestations, or debris buildup that can compromise your roofing system.
- Structural Components: Inspect flashing, sealants, chimneys, and vents to confirm they are sound and properly sealed.
- Interior Spaces: Look for signs of water damage or poor ventilation in your attic and on interior ceilings.
Download your free checklist from our resource library and start inspecting your roof with confidence.
Related Articles
- Roof Inspection Archives – NRCIA
- Roofing Safety Standards: Ensuring Your Inspection Runs Smoothly – NRCIA
- Inspection Process Archives – NRCIA
- Inspection Report Archives – NRCIA
- roof inspection Archives – NRCIA
Frequently Asked Questions
Do I really need to get on my roof for an inspection? Your safety should always come first, so you should never get on a roof unless you have the proper safety equipment and training. The good news is that you can spot many common issues from the ground with a good pair of binoculars. A careful walk around the property can reveal missing shingles, clogged gutters, and other obvious problems. For a closer look at things like flashing, sealants, and subtle hail damage, it’s always best to call a professional who knows how to work safely at heights.
What should I do if I find a problem during my inspection? The first step is to document what you see. Take clear photos of the issue from a few different angles to have a good record. Unless you have significant roofing experience, it’s best to avoid attempting a DIY repair, as you could unintentionally make the problem worse. Your best course of action is to contact a certified inspector or a reputable roofing contractor. They can properly diagnose the severity of the issue and recommend the most effective solution.
Is a roof inspection the same thing as a LeakFREE® roof certification? That’s a great question. Think of a standard inspection as a snapshot in time—it tells you the roof’s condition on that specific day. A LeakFREE® roof certification is a more comprehensive process. It starts with a thorough inspection, includes any necessary minor repairs to ensure the roof is sound, and is backed by a warranty against leaks for a set period. The inspection is the first step, while the certification is the ongoing peace of mind.
How long should a thorough roof inspection take? The time it takes can vary based on the roof’s size, complexity, and age. If you’re a homeowner doing a seasonal check-up, you can likely complete a solid visual inspection from the ground in about 30 to 60 minutes. A professional inspection, however, is much more detailed and typically takes between one and three hours. A certified inspector is meticulously examining and documenting every component of the roofing system to create a complete and accurate report.
My roof is brand new. Do I still need to inspect it? Yes, it’s still a very good idea. An annual inspection on a new roof helps ensure it was installed correctly and allows you to catch any potential defects in the materials while they’re still under the manufacturer’s warranty. Storms and falling debris can also cause damage at any time, regardless of a roof’s age. Getting into the habit of regular inspections from the beginning is the best way to protect your investment for the long haul.