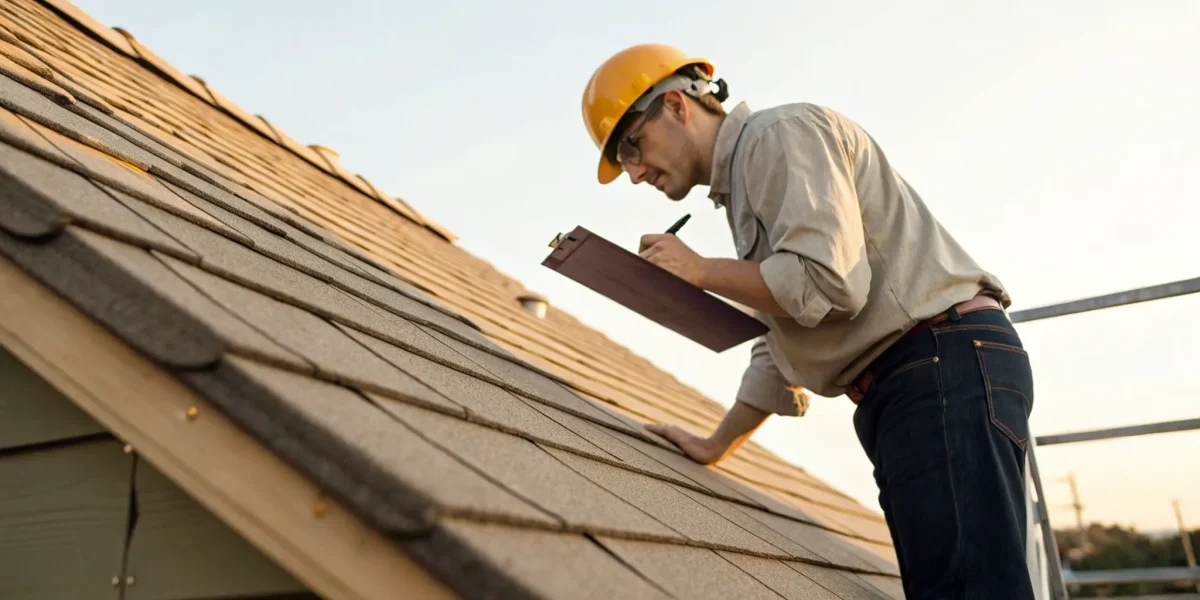
Every roof tells a story, but you need the right tools to read it correctly. A roof inspection template is that tool. It’s a structured guide that ensures you assess every component methodically, from the overall structure and materials down to the flashing and drainage systems. This isn’t just about ticking boxes; it’s about creating a consistent, reliable record of the roof’s condition. This document becomes invaluable for tracking wear over time, prioritizing repairs, and communicating findings clearly to a client, real estate agent, or insurance adjuster. If you’re ready to make your inspections more effective, we’ll show you how to use a free printable roof inspection template to capture the details that matter most.
Key Takeaways
- A template creates consistency and professionalism: Use a structured template to guide your inspection, ensuring you document everything from client details and roof materials to specific damage and clear, actionable repair recommendations.
- Focus on the most vulnerable areas: A thorough inspection goes beyond the surface. Pay close attention to the entire system, including drainage, flashing around penetrations, and attic ventilation, as these are the most common sources of failure.
- Pair your checklist with expertise: A template is a powerful tool, but professional training and modern software are what set you apart. This combination helps you spot subtle issues, create clear reports, and build lasting client confidence.
What’s a Roof Inspection Template (And Why You Need One)
Think of a roof inspection template as your roadmap for checking a roof’s health. It’s a structured checklist that guides you through every component, from the shingles and flashing down to the gutters and vents. Using a template ensures you don’t miss a single detail and provides a consistent way to document your findings every time.
Whether you’re a homeowner trying to stay on top of maintenance or a professional inspector building a business, a template is a fundamental tool. It transforms a complex task into a methodical process, helping you spot minor issues before they become major, expensive problems. It also creates a clear, professional record that’s easy for anyone—a client, a real estate agent, or an insurance adjuster—to understand. This simple document is the key to a thorough and effective roof assessment.
For Homeowners
As a homeowner, you know your roof is your home’s first line of defense, but figuring out how to maintain it can feel overwhelming. A roof inspection template gives you a clear, step-by-step guide for conducting your own visual checks. Regular inspections are one of the best ways to protect your investment and avoid surprise repairs. A template helps you spot potential trouble, like curled shingles or clogged gutters, so you can address it early. This proactive approach is essential for maintaining a LeakFREE® roof and extending its lifespan, giving you peace of mind through every season.
For Contractors & Inspectors
For roofing professionals, a template is about more than just being thorough—it’s about building a reputable business. A standardized template streamlines your workflow, ensuring every inspection you perform is consistent and comprehensive. This level of detail helps you create clear, professional reports that build trust and impress clients. When you present a detailed assessment, you demonstrate your expertise and give property owners the confidence to move forward with your recommendations. Using a dedicated inspection software can take this a step further, organizing your findings and solidifying your professional image.
What to Include in Your Roof Inspection Template
A great roof inspection template does more than just guide your assessment—it creates a clear, professional record for you and your client. Think of it as the foundation for a thorough and trustworthy inspection. Whether you’re a seasoned contractor or a homeowner trying to stay on top of maintenance, a well-organized template ensures every critical detail is captured. It standardizes your process, making sure nothing gets missed from one job to the next.
A comprehensive template should cover everything from basic client information to specific repair recommendations. By breaking it down into logical sections, you can build a document that is easy to follow and provides real value. Let’s walk through the essential components that every effective roof inspection template needs.
Client & Property Details
Before you even think about getting on the ladder, the first section of your template should lock down the basics. This is all about clear record-keeping and communication. Include fields for the client’s name and contact information, the property address, and the date of the inspection. It’s also smart to note the name of the inspector conducting the assessment and the weather conditions on that day, as factors like rain or high winds can impact the inspection. This foundational information provides context for your findings and ensures your final report is professional and complete.
Roof Specifications & Materials
Every roof has its own unique makeup, and your template needs a place to capture these specifics. This section should detail the type of roofing material, whether it’s asphalt shingles, metal, tile, or something else. You’ll also want to note the roof’s age, pitch, and overall design. Don’t forget to document other components that interact with the roof, like skylights, chimneys, exhaust vents, or HVAC units. Understanding the roof’s specific structure and materials is the first step in identifying potential vulnerabilities and tailoring your inspection to its unique needs, which is key to providing a LeakFREE® roof.
A Detailed Inspection Checklist
This is the heart of your template. A detailed checklist is your roadmap for a thorough evaluation, ensuring you assess every component systematically. It prevents you from overlooking critical areas and helps maintain consistency across all your inspections. Your checklist should prompt you to examine the roof surface, drainage systems like gutters and downspouts, and all flashing. Breaking it down by area—like eaves, ridges, and valleys—can make the process more manageable. This structured approach is a hallmark of a true professional and is a core part of the curriculum in our inspector training.
Damage Assessment & Severity
Once you start identifying issues, you need a dedicated section to document them clearly. This part of the template is for recording any signs of damage or wear, from missing shingles and cracked tiles to signs of leaks or structural sagging. For each issue you find, it’s crucial to note its location and severity. Is it a minor cosmetic issue or a critical problem that needs immediate attention? Using a simple rating system (e.g., low, moderate, severe) can help you and your client prioritize repairs and understand the urgency of the situation.
Repair Recommendations & Priorities
A good inspection doesn’t just point out problems—it offers solutions. The final section of your template should translate your findings into clear, actionable advice. Based on your damage assessment, list the necessary repairs or maintenance tasks. It’s incredibly helpful for the property owner if you prioritize these recommendations. For example, you might label a task as “Urgent,” “Recommended,” or “Monitor.” This guidance empowers your client to make informed decisions, budget for repairs, and take the right steps to protect their investment and extend the life of their roof.
Where to Find Free Roof Inspection Templates
You don’t need to build your roof inspection template from the ground up. Plenty of excellent, professional resources are available for free if you know where to look. Using a pre-made template saves you time and ensures you don’t miss any critical details during an inspection. From industry authorities like us here at NRCIA to other trade groups, these templates are designed to make your job easier and your reports more professional. Let’s walk through the best places to find one that fits your needs.
NRCIA’s Professional Resources
When you want a template built on expertise, your first stop should be with us. We offer a comprehensive free roof inspection report template designed specifically for professionals who want to deliver clear, thorough, and impressive reports to their clients. Our template isn’t just a simple checklist; it’s a detailed guide that helps you document every aspect of the roof system accurately. Using a resource developed by the industry’s leading authority ensures you’re following best practices. This level of professionalism not only builds trust with homeowners and real estate agents but also helps you stand out from the competition and grow your business with confidence.
Industry Associations
Beyond NRCIA, many other trade and industry associations offer valuable resources for their members and the public. These organizations are dedicated to supporting roofing and inspection professionals, so they often provide templates, checklists, and guides to uphold quality standards across the industry. You can find templates that cater to different roofing types or regional requirements. These resources often include step-by-step guides that walk you through creating an effective report from start to finish. Tapping into these materials is a smart way to enhance the quality of your inspections and improve how you communicate your findings to clients, ensuring everyone is on the same page.
Government & Regulatory Agencies
In some cases, government or regulatory agencies provide inspection guidelines, particularly for compliance purposes like commercial building codes or specific state requirements. While they might not always offer a downloadable template, their publications are an essential resource for ensuring your inspections meet legal standards. Additionally, many digital platforms and software companies offer a digital roof inspection report template designed to streamline your workflow. These tools can save you a significant amount of time in the field by allowing you to capture photos, make notes, and generate a report all from a tablet or phone, increasing both your accuracy and efficiency on the job.
Key Areas Your Inspection Template Must Cover
A great roof inspection template does more than list items to check off; it guides you through a systematic review of the entire roofing system. Think of it as a roadmap that ensures no critical component is overlooked. Whether you’re a contractor aiming for consistency or a homeowner trying to understand your roof’s condition, focusing on the right areas is essential. A thorough inspection can be broken down into four primary zones: the core structure and materials, the water drainage system, the seals and penetrations, and any rooftop equipment or debris. By methodically working through these categories, you create a comprehensive picture of the roof’s health and can confidently identify any issues. This standardized approach is the foundation of a reliable assessment and is a core principle of any professional roof inspector training. A detailed template helps you document everything accurately, leading to clear, actionable reports for your clients or your own maintenance plans.
Structure & Roofing Materials
First, look at the big picture. Your inspection should start with the roof’s overall structure, checking for any signs of sagging, unevenness, or stress on the decking and trusses. These can indicate serious underlying issues. Next, turn your attention to the roofing materials themselves. Whether you’re looking at asphalt shingles, clay tiles, metal panels, or a flat membrane, check for cracks, missing pieces, granule loss, or rust. It’s also critical to consider the environment. Failing to align the material with the local climate can significantly reduce the roof’s lifespan and efficiency. A material that works well in a dry climate might fail quickly in an area with heavy rain and humidity.
Drainage Systems
Water is a roof’s biggest enemy, which makes the drainage system one of the most important areas to inspect. Your template must include a detailed check of all gutters, downspouts, and scuppers. Look for blockages from leaves or other debris, as well as any signs of sagging, leaks, or improper attachment. Regular gutter cleaning is imperative to prevent significant water damage not just to the roof, but to the home’s foundation as well. Remember that ignoring small leaks or visible damage can quickly lead to bigger problems and much higher repair costs down the road. A functional drainage system is essential for achieving a truly LeakFREE® roof.
Flashing, Seals & Penetrations
The most vulnerable spots on any roof are the areas where the surface is penetrated. This includes chimneys, vents, skylights, and pipes. These penetrations are sealed with flashing—typically thin pieces of metal—and caulk. Your template should prompt a close examination of these areas. Overlooking small signs of damage or failing to inspect flashing and seals properly can compromise the entire roof. Check for rusted or bent flashing and look for cracked, shrinking, or peeling sealant. These seemingly minor flaws are often the primary entry points for water, making them a top priority during any inspection.
Vents, HVAC Units & Debris
Proper attic ventilation plays a huge role in a roof’s longevity. Your checklist should include an inspection of all intake and exhaust vents to ensure they are clear and functioning correctly. Proper airflow and insulation in your attic help keep your roof safe from damage caused by heat and moisture. While on the roof, inspect any HVAC units or other equipment. Check for mold on any rooftop surfaces or on HVAC parts, and ensure the unit’s base is properly sealed. Finally, scan the entire roof for debris like fallen branches, leaves, and dirt, which can trap moisture and promote algae or moss growth.
How to Use a Roof Inspection Template Effectively
Having a great template is the first step, but knowing how to use it is what truly makes a difference. A template isn’t just a checklist to rush through; it’s a guide for a methodical and thorough examination of one of the most critical parts of a property. When used correctly, it ensures you don’t miss a single detail, from the smallest crack in a seal to the overall structural integrity.
Think of your template as the framework for your investigation. It helps you organize your thoughts, document your findings consistently, and ultimately, create a report that is clear, credible, and actionable. Whether you’re a seasoned contractor or a diligent homeowner, following a structured process will help you catch potential issues before they become costly problems. The goal is to move from simply looking at the roof to truly understanding its condition. Let’s walk through the four key steps to make your roof inspection template work for you.
Prepare for the Inspection & Prioritize Safety
Before you even think about stepping on a ladder, a successful inspection begins with preparation. One of the biggest mistakes property owners make is ignoring regular inspections until a problem becomes obvious. Being proactive is your best defense. Start by gathering your tools: a sturdy ladder, safety gear like a harness and non-slip shoes, a camera or smartphone, and of course, your template. Always check the weather forecast—a wet, icy, or windy roof is a serious hazard. Safety should always be your top priority. If you feel unsafe for any reason, it’s time to call a professional. A proper inspection is a safe one, and preparing ahead of time ensures you can focus on the task without unnecessary risks.
Conduct a Systematic Assessment
Once you’re ready, avoid the temptation to wander around the roof looking for obvious issues. A systematic approach is far more effective. Your template is designed to guide you, so use it to create a logical path. A good method is to start at one corner and move in a consistent pattern, like a “Z” or an “S,” across each roof plane. This ensures you cover every square foot. The inspection should cover the roof itself, but don’t forget the other elements. Pay close attention to things on the roof like HVAC units, exhaust vents, and skylights. A methodical assessment guarantees a comprehensive overview and helps you build a complete picture of the roof’s health, which is the foundation of a LeakFREE® roof certification.
Document Findings with Photos & Notes
As you move through your inspection, documentation is your best friend. A picture is worth a thousand words, especially when it comes to roof damage. Make sure to take clear, well-lit photos of any areas of concern, as they provide crucial visual evidence for your report. Your notes should be just as clear. Instead of writing something vague like “shingle damage,” be specific: “Five cracked asphalt shingles on the south-facing slope near the chimney.” The more detail you include, the more valuable your report will be. Using specialized inspection software can help you organize photos and notes seamlessly, linking them directly to checklist items.
Create Clear, Actionable Recommendations
The final step is to translate your findings into a clear plan. An inspection report that only lists problems isn’t very helpful. The real value comes from providing actionable recommendations. Organize your suggestions by priority: what needs immediate repair to prevent further damage, what should be addressed soon, and what can be monitored over time. Write your recommendations in plain language that anyone can understand, avoiding technical jargon whenever possible. By providing a clear path forward, you empower the property owner to protect their investment and maintain a durable, healthy roof. This skill is a cornerstone of the professional training offered by the NRCIA.
Digital vs. Paper: Which Template is Right for You?
Choosing between a digital and a paper roof inspection template feels like a classic head-to-head battle: tradition versus technology. But the truth is, there’s no single winner. The right choice depends entirely on how you run your business, what your clients expect, and what makes your workflow smoother. A solo inspector might find a simple paper checklist perfectly adequate for their needs, while a growing contracting business could see huge benefits from a streamlined digital system that supports multiple team members and a higher volume of jobs.
Digital tools offer incredible efficiency, allowing you to create custom forms, store everything in the cloud, and generate professional reports in minutes. This can save you significant administrative time and help you present a more polished image to your clients. On the other hand, paper has a straightforward simplicity that can be appealing, especially when you’re on a roof with spotty internet service or working with clients who prefer a physical document in hand. Before you commit to one format, think about your daily operations. Consider factors like team collaboration, the need for report customization, and how you deliver final assessments to clients. This will help you find the method that not only works but helps your business thrive.
The Advantages of Digital Tools
Going digital with your inspection reports can completely change your workflow for the better. Modern software makes inspection tasks easier and far more organized. Instead of juggling clipboards and pens, you can use a mobile app on your phone or tablet to fill out custom checklists right on the job site. All the information, including photos and notes, is saved instantly and stored online. This means anyone on your team can find what they need without digging through filing cabinets. This approach also reduces errors from illegible handwriting and ensures you never lose important paperwork. Plus, the professional, branded reports you can generate will leave a lasting impression on your clients.
When Paper Still Makes Sense
Despite the clear benefits of technology, paper templates still have their place. For some inspectors, a simple, printable form is all that’s needed to get the job done efficiently. If you prefer a straightforward process without relying on batteries or an internet connection, paper can be a reliable choice. However, it’s important to be aware of the downsides, like messy handwriting that can be hard to read, the hassle of scanning and emailing reports, and the risk of misplacing the final document. A good middle ground can be a fillable PDF, which you can complete on a computer and then print or email as needed.
Key Factors: Accessibility & Customization
When you’re weighing your options, accessibility and customization should be at the top of your list. Think about how you and your clients will access the final report. Digital templates make sharing effortless—you can email a PDF, send a link to a secure portal, or save it to a cloud drive. This is a huge plus for clients who want instant access. Customization is another key area where digital shines. With the right inspection software, you can easily add your company branding, modify checklists for different roof types, and create a truly tailored experience. While paper can be customized, it often requires more upfront design work.
Best Practices for Documenting Your Findings
A good template provides the structure, but the quality of your documentation is what makes an inspection truly valuable. Clear, thorough, and consistent notes transform a simple checklist into a powerful tool for homeowners, buyers, and contractors. By following a few best practices, you can ensure your findings are easy to understand and lead to clear, actionable steps for maintaining or repairing the roof. It’s about creating a reliable record that protects the property and everyone involved.
Schedule Inspections at the Right Time
The timing of your inspection can significantly impact what you find. While an annual inspection is a great rule of thumb for preventative maintenance, it’s also wise to schedule one after a major weather event like a hailstorm or hurricane. Conducting the inspection during daylight hours and in clear, dry weather is essential for both safety and accuracy. Good lighting makes it easier to spot subtle issues like hairline cracks or minor granule loss on shingles. Proactive inspections are the best way to catch small problems before they escalate into costly leaks, which is the core principle behind maintaining a LeakFREE® certified roof.
Capture Visual Evidence & Use Diagrams
Photos are your best friend during a roof inspection. They provide undeniable proof of your findings and help property owners visualize the issues without having to climb on the roof themselves. Take pictures of everything: areas with damage, spots in good condition for comparison, and close-ups of specific components like flashing and seals. Don’t just document the problems; document the entire system. For added clarity, you can use diagrams or mark up photos to pinpoint the exact location of a concern. Modern inspection software often includes tools that make annotating images simple, creating a professional and easy-to-understand report for your client.
Document Every Component Thoroughly
A roof is a complex system, and a thorough inspection leaves no stone unturned. Your template should guide you, but it’s your job to be methodical. Go through each component—from the main roofing material and underlayment to the gutters, vents, and flashing—and document its condition. Even if an area looks perfect, make a note of it. This creates a comprehensive baseline that will be invaluable for future inspections, allowing you to track wear and tear over time. This systematic approach is a hallmark of a true professional and is a key focus in our inspector training programs, ensuring that every inspection is consistent and complete.
Record Observations Clearly & Consistently
Your notes should be clear enough for anyone to understand, whether it’s the homeowner, a real estate agent, or another contractor. Avoid overly technical jargon whenever possible, and describe what you see in simple, direct terms. For example, instead of “fascia delamination,” you might write “the board along the roof edge is peeling apart.” Consistency is also crucial. Use the same terminology and format in all your reports. This makes it easy to compare inspections over time and track the roof’s health. A well-organized, clearly written report builds trust and demonstrates your professionalism, showing clients you’re a reliable expert.
Common Roof Inspection Mistakes to Avoid
A good template is your roadmap, but even the best map can’t prevent you from hitting a pothole. A thorough inspection goes beyond just checking boxes; it’s about understanding what you’re looking at and recognizing the subtle signs of trouble. Some mistakes are incredibly common, even for seasoned professionals, but avoiding them is what ensures a truly accurate and valuable assessment. From tiny cracks to clogged gutters, these oversights can lead to costly repairs down the road for the property owner. Let’s walk through the most frequent missteps so you can keep your inspections sharp and reliable.
Overlooking Minor Damage
This one seems obvious, but it happens all the time. You’re looking for the big, glaring problems, and a few cracked shingles or a small water stain on the ceiling seems trivial. However, overlooking these small signs of damage can lead to much bigger issues. Water is persistent; it will find a way through the tiniest crack, leading to rot, mold, and structural decay over time. A small leak that’s ignored can escalate into a significant problem that compromises the entire roof system. Documenting every little flaw is crucial. It not only provides a complete picture of the roof’s current condition but is also the first step in maintaining a long-lasting, LeakFREE® roof.
Ignoring Ventilation & Flashing
A roof is more than just shingles—it’s a complete system. Two of the most critical, and often ignored, components are ventilation and flashing. Proper attic ventilation is essential for regulating temperature and moisture. Without it, heat and condensation can build up, cooking your shingles from below and leading to premature aging and rot. Likewise, flashing—the metal strips around chimneys, vents, and skylights—is your roof’s primary defense in its most vulnerable areas. Failing to inspect flashing and seals properly can completely compromise the roof’s integrity. Always give these areas extra attention, checking for rust, gaps, or dried-out sealant, as they are often the source of the most persistent leaks.
Being Unprepared with Tools or Training
Showing up to an inspection without the right gear or knowledge is a recipe for an incomplete assessment. A quick look from the ground or a ladder isn’t enough. Professional inspectors use specific tools and, more importantly, experience to find problems a homeowner or untrained contractor might easily miss. Attempting a DIY inspection without the proper background can lead to missed issues or even cause further damage. This is where professional training makes all the difference. It equips you with a systematic approach and the expertise to identify subtle clues, understand how different roofing systems work, and make accurate recommendations. An inspection is only as good as the person performing it.
Skipping Debris & Drainage Checks
It’s easy to focus on the roof surface and forget about the system designed to get water off of it. Your inspection isn’t complete without a thorough check of the gutters and downspouts. Clogged or damaged gutters prevent water from draining properly, causing it to pool on the roof or overflow down the side of the house. This can lead to significant water damage to the roof deck, fascia boards, and even the home’s foundation. Make sure to check for debris like leaves and branches, inspect for sagging or disconnected sections, and ensure downspouts are clear and directing water away from the property. A functional drainage system is a non-negotiable part of a healthy roof.
What a Good Template Helps You Find
A roof inspection template is more than just a piece of paper; it’s a strategic tool that transforms a casual look-over into a thorough, systematic evaluation. Without a structured guide, it’s easy to miss subtle signs of trouble that can escalate into major headaches. A good template directs your attention to critical areas, ensuring you check every component from the shingles and flashing down to the gutters and ventilation. This methodical approach helps you build a complete picture of the roof’s health.
For professionals, a detailed template standardizes your process, guaranteeing consistent quality across every job. It also serves as a professional record to share with clients, clearly outlining your findings and recommendations. For homeowners, it demystifies the process, helping you understand what to look for and ask the right questions. By following a comprehensive checklist, you can confidently identify issues early, long before they lead to costly repairs. Ultimately, a template helps you spot the specific vulnerabilities that could compromise a roof’s ability to protect the property, which is the first step toward securing a LeakFREE® roof certification.
Water Damage & Potential Leaks
The most obvious job of a roof is to keep water out, but leaks often start small and go unnoticed until significant damage is done. A quality inspection template guides you to identify the earliest signs of water intrusion. It prompts you to look beyond a simple drip and check for subtle clues like water stains on ceilings, damp spots in the attic, peeling paint near the roofline, or patches of mold and mildew. Regular inspections using a template can uncover these problems before they make your property vulnerable to leaks. By catching these issues early, you can address the root cause—like a cracked seal or a loose shingle—and prevent widespread, expensive interior damage.
Structural Wear & Tear
Over time, every roof experiences wear and tear from sun, wind, and rain. A comprehensive inspection template allows you to document and address small signs of damage that can lead to bigger problems if overlooked. Your checklist should include items like checking for cracked, curled, or missing shingles, granule loss on asphalt shingles, and any signs of sagging in the roof deck. It also ensures you don’t forget to examine flashing around chimneys, vents, and skylights for cracks or gaps. Systematically documenting these minor issues creates a detailed history of the roof’s condition, helping you prioritize repairs and extend the roof’s lifespan, ultimately saving money and preventing premature replacement.
Drainage & Ventilation Flaws
A roof is a complete system, and proper drainage and ventilation are just as important as the shingles. A thorough roof inspection checklist should include checks for both. Clogged gutters or improperly installed downspouts can cause water to pool on the roof or overflow down walls, leading to rot and foundation damage. Many people also overlook the importance of proper roofing ventilation. An attic that can’t breathe traps heat and moisture, which can cook shingles from below and cause the roof deck to warp and rot. Your template should prompt you to inspect gutters for debris, check for adequate attic intake and exhaust vents, and ensure nothing is blocked.
Safety & Environmental Hazards
Beyond leaks and structural issues, a roof inspection can uncover potential safety and environmental hazards. An effective template will guide you to check for things that might otherwise be missed, like loose debris, overhanging tree limbs that could fall and cause damage, or signs of pests making a home in your attic. It will also help you ensure proper airflow and insulation in your attic, which are crucial for preventing moisture buildup that can lead to mold. These elements are not just about protecting the roof itself; they contribute to the overall safety, energy efficiency, and air quality of the entire building.
Take Your Inspections to the Next Level with Professional Training
A solid template is your starting point, but it’s your expertise that truly sets you apart. While a checklist ensures you cover all the bases, professional training and the right tools transform your service from a simple check-up to a comprehensive diagnostic. Investing in your skills is the best way to build client trust, deliver superior value, and grow a reputation for excellence. If you’re ready to move beyond the basics, focusing on certification, technology, and ongoing education will give you the professional edge you need to succeed.
Standardize Your Process with NRCIA Certification
Anyone can download a checklist, but earning a certification shows you’re committed to a higher standard. Becoming an NRCIA-certified inspector provides you with a proven, standardized process that brings consistency and credibility to every job. This isn’t just about adding a logo to your truck; it’s about adopting a system that streamlines your workflow, from the moment you step on the ladder to when you deliver the final report. Following a nationally recognized standard ensures your inspections are thorough and your findings are clear, giving clients confidence in your work and helping you build a trusted, professional brand.
Leverage Specialized Software & Tools
If you’re still relying on a clipboard and a pen, you’re leaving efficiency on the table. Modern inspection software is designed to make your job easier, faster, and more accurate. Digital tools allow you to seamlessly integrate photos, notes, and checklist items into one cohesive report that looks clean and professional. The NRCIA provides its members with specialized inspection software built for this very purpose. While there might be a small learning curve, the time you save and the accuracy you gain are well worth it. A polished, detailed digital report makes a much stronger impression on clients than a handwritten form ever could.
Stay Sharp with Continuing Education
The roofing industry doesn’t stand still, and neither should your knowledge. New materials, installation techniques, and building codes emerge all the time. Committing to continuing education ensures you stay current and can confidently assess any roof, no matter the age or style. Training sharpens your eye for detail, helping you spot subtle signs of wear or improper installation that others might miss. It also teaches you how to best document your findings with clear photos and concise notes, which helps homeowners fully understand the condition of their roof. This dedication to learning demonstrates a true mastery of your craft and builds lasting trust with your clients.
Related Articles
- Free Roof Inspection Report for Insurance PDF Template
- The Ultimate Commercial Roof Inspection Checklist PDF
- The Best Roof Inspection Report Template Free for 2025
- Free Roof Damage Inspection Report Template & Guide
- How to Find Insurance Approved Roof Inspection Companies
Frequently Asked Questions
Why can’t I just use a generic checklist I found online? You certainly can, but a professional-grade template is designed to be far more thorough. Many generic checklists are too basic and might cause you to overlook critical system components like proper ventilation or specific types of flashing. A comprehensive template, like the ones developed by industry authorities, guides you through a systematic process that ensures nothing gets missed and helps you create a clear, professional record of your findings.
I’m a homeowner. Is it safe for me to inspect my own roof? Using a template for a visual check from the ground or a secure ladder can be a great way to spot obvious issues like clogged gutters or missing shingles. However, your safety should always come first. Walking on a roof, especially one that is steep or wet, requires proper safety equipment and experience. If you feel at all unsure or unsafe, the best and smartest move is to call a certified professional to handle the inspection for you.
What are the most commonly missed problems during a roof inspection? It’s easy to get so focused on the shingles that you forget the roof is an entire system. The most frequent oversights happen in the less obvious places. People often forget to thoroughly check the flashing around chimneys and vents, which is where many leaks begin. Another commonly ignored area is the drainage system—clogged gutters can cause serious water damage. Finally, poor attic ventilation is a silent roof killer that often gets missed, as it causes damage from the inside out.
Does a roof inspection template help if I’m buying or selling a house? Absolutely. For real estate professionals and their clients, a structured inspection report provides a clear and objective assessment of the roof’s condition. It moves the conversation beyond a simple “pass/fail” and documents specific issues, their severity, and recommended actions. This creates transparency for both the buyer and seller, helps in negotiations, and gives everyone the confidence that they fully understand the state of one of the most important parts of the property.
My roof isn’t leaking. Why do I need an inspection? Waiting for a leak to appear is like waiting for the check engine light to come on before changing your oil—by then, the damage has already started. Proactive inspections are about catching small, inexpensive issues before they become major, costly disasters. A thorough check can uncover subtle problems like cracked seals, minor granule loss, or early signs of wear that are invisible from the ground. Addressing these early is the key to extending your roof’s life and preventing surprise repairs down the road.