That dark, spreading stain on your ceiling is more than just an eyesore; it’s a sign that your home’s primary defense has been breached. The moment you spot a leak, a flood of questions follows: Where is the water coming from? How much damage is it causing? And what should I do right now? This guide is your calm in the storm. We’ll walk you through everything from identifying the common culprits behind a leaky roof to performing safe, temporary fixes that can prevent further damage. You’ll learn how to trace the source, what to document for insurance, and when to call in a professional for a permanent roof leak repair.
Key Takeaways
- Proactive care is the best protection: Regular professional inspections and clean gutters are the simplest ways to stop leaks before they start, saving you significant stress and money down the road.
- Address leaks immediately and safely: While temporary fixes like tarps can control initial water damage, call a certified professional for complex issues like multiple leaks or structural sagging to ensure a proper, long-term repair.
- Keep detailed records for claims and repairs: Taking clear photos, noting a timeline of events, and getting a professional inspection report are crucial steps for a successful insurance claim and for receiving accurate quotes from contractors.
Why Is My Roof Leaking?
That dreaded water stain on your ceiling is a clear sign something is wrong, but the cause isn’t always obvious. Roof leaks often start small and can be traced back to a few common culprits. Understanding what causes a leak is the first step toward a fast and effective fix.
Spotting Damaged Shingles
Your shingles are the armor for your home, and any chink in that armor can let water in. Look for any shingles that are cracked, curling, or completely missing, especially after a heavy storm. Wind and hail are notorious for lifting or breaking shingles, creating a direct path for rainwater to seep into the layers below. Even a single damaged shingle is enough to start a slow, persistent leak that can cause significant damage over time.
Checking for Cracked Flashing
Flashing consists of thin pieces of metal installed around areas where your roof meets a vertical surface, like a chimney, vent pipe, or skylight. Its job is to direct water away from these seams. Over time, flashing can corrode, crack, or come loose from exposure to the elements. When flashing fails, it creates a prime entry point for water, making it one of the most frequent sources of roof leaks. A thorough check of these areas is essential when you’re hunting down a leak.
The Problem with Clogged Gutters
It’s easy to overlook your gutters, but they play a critical role in protecting your roof. When gutters get clogged with leaves and other debris, rainwater can’t drain properly. Instead, it backs up and pools along the edge of your roofline. This standing water can easily work its way underneath your shingles and into the roof decking, leading to rot and interior leaks. Keeping your gutters clean is a simple but vital piece of routine roof maintenance.
When Your Roof Shows Its Age
Every roofing material has a limited lifespan. As your roof gets older, its defenses weaken. Asphalt shingles can lose their protective granules and become brittle, and sealants can dry out and crack. This natural aging process makes your roof far more susceptible to leaks. It’s important to remember that damage from old age or a lack of maintenance is often not covered by homeowners insurance, which makes proactive inspections and professional certifications so valuable for protecting your investment.
How to Find the Source of a Roof Leak
Finding the source of a roof leak can feel like a bit of detective work. The drip you see on your ceiling is often just the final stop for water that has traveled from a completely different entry point. Water is sneaky; it can run along rafters, behind walls, and through insulation before it makes itself known. To find the real culprit, you need to trace the water back to its origin. This process requires a careful eye and a methodical approach, starting from the inside and working your way out.
Start Your Search in the Attic
Your attic is the best place to begin your investigation. Grab a powerful flashlight and, if it’s safe, head up there on a dry day. You’re looking for evidence of water intrusion, which can appear as dark stains, water marks, or even mold on the wooden rafters and the underside of the roof decking. These water trails are your best clues. Follow them upward to find the highest point of the discoloration. This spot is likely very close to where water is getting in. Pay extra attention to the areas around anything that penetrates the roof, like vents, pipes, or a chimney.
Follow the Water Trail
It’s a common mistake to think the drip in your living room is directly below the leak. Water follows the path of least resistance, meaning it can travel a long way from its entry point. It might run down a rafter, travel along a seam in the plywood, or soak into insulation before it finally finds a place to drip through your ceiling. This is why simply patching the interior damage won’t fix the underlying issue. You have to be a detective and follow that water trail all the way back to its source to make a lasting repair.
Look for Blisters and Low Spots
Once you have an idea of the general area, it’s time to look at the roof’s exterior. On flat or low-slope roofs, check for any low spots where water might be ponding after it rains. Standing water puts constant pressure on roofing materials and will eventually find a way through. You should also look for small bubbles or “blisters” in the roofing material. These blisters are a clear sign that moisture is trapped underneath the surface, which weakens the roof’s protective layer and can lead to leaks over time. Catching these issues early is key.
Inspect the Exterior Hotspots
Most roof leaks happen at predictable trouble spots where the roof’s surface is interrupted. When you or a professional inspect the exterior, pay close attention to these areas. Look for cracked or deteriorating flashing around chimneys, vents, and skylights. Check for any shingles that are missing, curled, or cracked. Clogged gutters are another major culprit, as they can force water to back up under the roof’s edge. A thorough roof inspection will systematically check all these potential hotspots to pinpoint the exact cause of your leak.
Quick Fixes: How to Temporarily Stop a Leak
When you spot a leak, the immediate goal is damage control. These quick fixes are designed to be temporary solutions to protect your home until a professional can assess the situation and perform a permanent repair. Think of them as first aid for your roof. While they can prevent a small problem from becoming a catastrophe, they aren’t a substitute for a proper fix from a qualified contractor. Remember, these steps are about minimizing water damage inside your home and buying you some time before the real work begins. The key is to act quickly but safely, addressing both the exterior source and the interior symptoms.
It’s always a good idea to have a plan in place for when you need professional help. Knowing what to do in the first few hours can make a huge difference in the final repair bill and the amount of stress you have to deal with. Understanding what a certified roof inspector looks for can also help you know what to expect when you make that call. They will perform a thorough assessment that goes far beyond what a temporary patch can address. For now, let’s focus on what you can do right away to manage the leak safely and effectively.
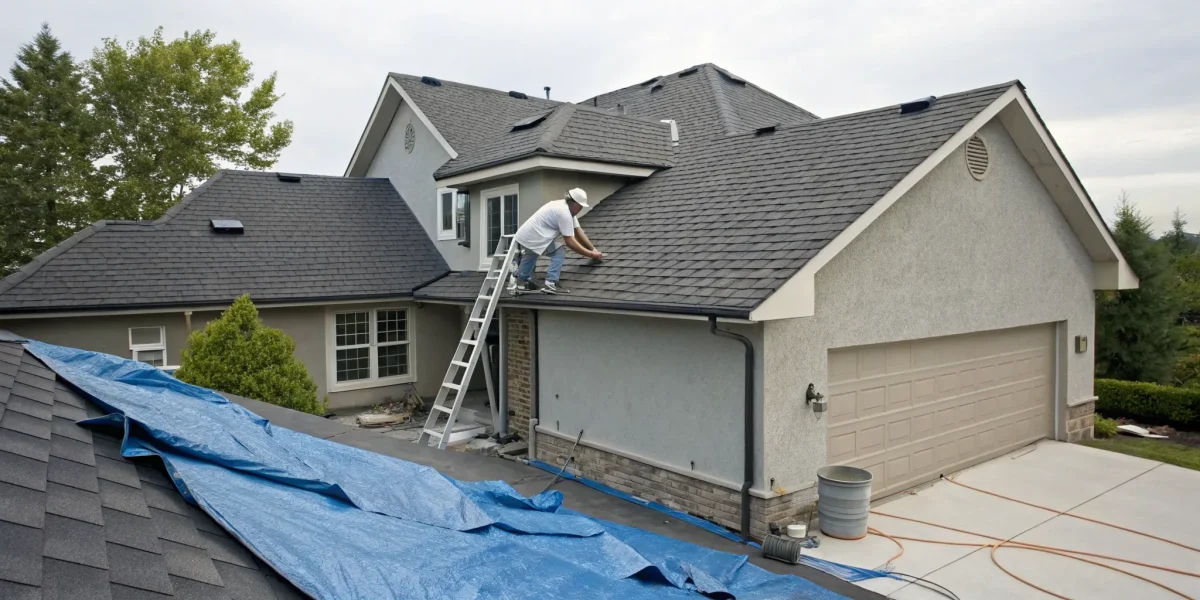
Use a Tarp for Emergency Coverage
One of the fastest ways to stop water from entering your home is to cover the affected area on the roof with a heavy-duty plastic tarp. Choose a tarp that is large enough to extend several feet past the leak on all sides. Lay it flat over the damaged spot and secure it tightly to prevent wind from getting underneath it. You can use heavy wooden planks or even large staples to hold the edges down firmly. This creates a temporary barrier that will redirect rainwater away from the vulnerable area, keeping the interior of your home dry until help arrives.
Apply Roofing Cement and Waterproof Tape
For smaller, more manageable leaks, you might be able to apply a patch yourself. If you can safely access the area and have identified a specific crack or hole, waterproof roof repair tape can be applied directly over it for an instant seal. For small gaps around flashing or vents, a thick application of roofing cement or caulk can also work wonders. You can find these materials at most hardware stores. Just make sure the surface is clean and dry before you apply anything, as this will ensure the strongest possible bond and give your temporary patch the best chance of holding up.
Control Interior Water Damage
While you’re addressing the source of the leak on the roof, don’t forget to manage the water that’s already inside. Place a large bucket or another container directly under any drips to catch the water and protect your floors, furniture, and belongings. If you notice a bulge or bubble forming on your ceiling, the water is pooling there. To prevent the ceiling from collapsing, you can carefully puncture the center of the bubble with a small nail to release the water in a controlled stream into your bucket. This simple step can save you from a much bigger and more expensive interior repair job.
Stay Safe During DIY Repairs
Your safety should always be your top priority. If you decide to attempt a temporary fix yourself, please take every precaution. Always use a sturdy, well-placed ladder and wear non-slip shoes to ensure you have good footing. It’s also smart to wear gloves to protect your hands and safety goggles to shield your eyes. Most importantly, never get on your roof during a storm or in wet, icy, or windy conditions. No temporary repair is worth risking a serious injury. If you have any doubts about your ability to work safely, it’s always best to wait for a professional.
Know When to Call a Professional
While a quick DIY patch can be a lifesaver, it’s important to know your limits. Some roofing issues are more than skin-deep, pointing to complex problems that a bucket of tar can’t fix. Ignoring these signs can lead to more extensive and expensive damage down the road. Calling a professional isn’t admitting defeat; it’s making a smart, strategic decision to protect your home. A certified inspector can give you a clear picture of what’s happening and what it will take to fix it right the first time.
You See Signs of Structural Damage
If you notice a sagging ceiling, discolored spots on your walls, or large puddles in your attic, it’s time to put down the tools and pick up the phone. These are red flags for significant structural issues. A persistent leak can saturate the wooden frame of your roof, causing rafters and joists to weaken or rot. This compromises the integrity of your entire roof system. A professional roof inspection is the only way to safely assess the extent of the damage and determine if structural repairs are needed to keep your home safe and secure.
You’re Dealing with Multiple Leaks
Finding one leak is frustrating, but discovering several at once is a clear signal of a larger problem. When water is getting in through multiple spots, it often means there’s a systemic issue at play. This could be widespread shingle failure, improperly installed flashing across the entire roof, or simply an indication that the roof has reached the end of its functional life. Patching each drip is like playing whack-a-mole; you’ll fix one spot just as another appears. An expert can identify the root cause and recommend a comprehensive solution that addresses the entire system.
Your DIY Fix Didn’t Hold Up
You gave it your best shot. You found the leak, applied a patch, and felt a sense of accomplishment, but a few weeks later, the drip is back. Don’t be discouraged. A persistent leak that reappears after a DIY repair often means the source of the water entry is more complex than it seems. The water you see might be traveling from a different entry point along a rafter or behind a wall. Professionals have the specialized training and tools to trace these tricky leaks back to their origin and provide a permanent fix, saving you from repeated repairs and growing frustration.
Your Roof Is Nearing Its End of Life
Every roof has a lifespan, whether it’s 15 years for asphalt shingles or 50+ for slate or metal. If your roof is getting old and you’re dealing with frequent leaks, it might be more cost-effective to consider a replacement instead of another repair. Pouring money into constant patches on a failing roof is often a losing battle. A certified inspector can perform a thorough evaluation to help you weigh the costs and benefits. They can tell you how much life your roof has left and help you decide if a targeted repair or a full replacement is the better long-term investment.
How to Document Damage for an Insurance Claim
Filing an insurance claim for a roof leak can feel overwhelming, but having solid documentation makes the process much smoother. Think of it as building a case for your claim. The more clear and detailed evidence you provide, the better your chances of getting the coverage you need for repairs. Proper documentation can be the difference between a fully covered repair and an out-of-pocket expense that costs you thousands. It helps your insurance company understand the extent of the damage and confirms that it was caused by a covered event, not neglect. Here’s how to gather the proof you need.
Take Detailed Photos and Create a Timeline
Your smartphone is your best tool right after you spot a leak. Take more photos and videos than you think you’ll need, capturing the damage from every possible angle. Get wide shots of the entire roof, then zoom in on specific areas with missing shingles, dents, or cracks. Inside, document any water stains on ceilings or walls, as well as damage to your belongings. Strong documentation establishes a clear timeline connecting a storm or specific event to your roof damage. Note the date and time you first noticed the leak and match your photos to recent weather events, like a hailstorm or heavy winds. This creates a clear story for your insurance provider.
Get a Professional Inspection Report
While your photos are essential, a report from a certified inspector is your expert testimony. Insurance adjusters look for damage across your entire roofing system, not just the shingles, and a professional knows exactly what to find. An inspector will provide a detailed, unbiased assessment of the damage, complete with technical descriptions and repair estimates that insurance companies require. This formal report adds significant credibility to your claim. Having a professional evaluate your roof ensures you don’t miss any hidden issues that could cause problems later. This is a key step in securing a LeakFREE® roof for the long term.
Understand Your Policy’s Limits
Before you even call your insurance company, take a few minutes to review your homeowner’s policy. Insurance generally covers sudden and accidental damage, but not issues caused by long-term neglect or lack of maintenance. If your roof is old and hasn’t been properly cared for, your claim might be denied. Find the section on roofing and look for specific exclusions, coverage limits, and the amount of your deductible. Understanding these details upfront helps you manage your expectations and prepares you for your conversation with the insurance agent. Knowing your policy empowers you to have a more productive discussion about what is and isn’t covered.
Know How to Work with an Adjuster
When the insurance adjuster schedules a visit, try to be home to meet them. Have all your documentation, including your photos, timeline, and professional inspection report, organized and ready to share. Walk them through the damage you’ve found and explain the timeline of events. A calm and organized approach helps make the process smoother. Some homeowners even ask their roofing inspector to be present during the adjuster’s visit. This ensures a professional is there to point out specific types of damage and answer technical questions, making sure nothing gets overlooked. The NRCIA serves a wide range of property stakeholders by providing these expert assessments.
What to Expect: The Cost of Professional Repairs
When you discover a roof leak, one of the first questions that comes to mind is, “How much is this going to cost?” The answer depends on several factors, including the size and location of the leak, the type of roofing material you have, and the extent of any underlying water damage. While a small, straightforward fix might only set you back a few hundred dollars, a more complex problem can quickly run into the thousands.
Understanding the potential costs helps you budget accordingly and ensures you’re getting a fair price from your contractor. It’s always a good idea to get a few quotes from certified professionals who can provide a detailed breakdown of the work needed. A thorough roof inspection is the best first step to getting an accurate estimate and preventing any surprises down the line. This initial assessment will clarify whether you’re dealing with a minor patch job or a symptom of a much larger issue that needs immediate attention.
Breaking Down Minor Repair Costs
For a simple leak, like one caused by a few missing shingles or cracked flashing around a vent, the cost is usually manageable. Most homeowners can expect to pay between a few hundred to over a thousand dollars for a minor roof leak repair. This price typically covers fixing the immediate problem and replacing any compromised materials in that small area. The final cost will depend on the accessibility of the leak and the specific materials your roof uses, as slate or metal can be more expensive to repair than standard asphalt shingles. Think of this as a necessary investment to stop a small problem from turning into a major headache.
Factoring in Labor and Timelines
When you get a quote for roof repair, you might be surprised to see that a large portion of the bill is for labor. In many cases, labor can account for 70% or more of the total cost. This isn’t just for the time a roofer spends on your roof; it also covers their expertise, insurance, and the risk involved in working at heights. A skilled professional can identify and fix a leak efficiently, saving you from future damage. Most minor repairs can be completed within a few hours, but if the roofer discovers more extensive issues, the timeline and labor costs will increase accordingly.
Budgeting for Major Repairs or Replacement
Sometimes, a leak is a sign that your roof is nearing the end of its life. If you’re dealing with frequent leaks, widespread damage, or structural issues, it might be more cost-effective in the long run to replace the entire roof rather than continue with temporary fixes. A professional inspection is crucial here, as it can reveal problems that aren’t visible from the ground. While a full replacement is a significant expense, it provides peace of mind and protects your home’s value. Investing in a new roof with a LeakFREE® certification can also prevent costly repairs for years to come.
How Insurance Affects Your Final Cost
Many homeowners hope their insurance will cover the cost of a roof leak, but coverage isn’t always guaranteed. Most homeowners insurance policies will help with repairs if the leak was caused by a sudden, covered event like a hailstorm or a tree falling on your house. However, policies typically don’t cover leaks resulting from old age, general wear and tear, or a lack of maintenance. If your roof has been slowly deteriorating for years, you’ll likely have to pay for the repairs out of pocket. This is why documenting damage immediately and keeping up with regular maintenance is so important.
Stay Dry: How to Prevent Future Roof Leaks
After dealing with a leak, the last thing you want is a repeat performance. The good news is that you can take control with a proactive approach. Staying ahead of potential problems is far less stressful and expensive than reacting to an emergency. By putting a solid maintenance plan in place, you can protect your home and your peace of mind, ensuring your roof remains a reliable shield against the elements. Here are a few key strategies to keep your roof in top condition and prevent future leaks.
Schedule Regular Inspections and Maintenance
Regular inspections are your first line of defense. It’s a good practice to have a professional check your roof at least twice a year, ideally in the spring and fall, and always after a major storm. This allows an expert to catch small issues like a loose shingle or a small crack in the flashing before they turn into significant leaks. A trained inspector knows exactly what to look for and can spot subtle signs of wear and tear that are easy to miss. Finding a certified roof inspector ensures you get a thorough assessment, giving you a clear picture of your roof’s health and a plan for any necessary upkeep.
Invest in a Professional Certification and Warranty
When you need repairs or a new roof, working with a qualified professional is non-negotiable. But you can take your protection a step further by investing in a roof certification. Think of it as a health certificate for your roof. A certification confirms that your roof has been inspected by a professional and meets specific standards for performance and condition. The best programs also come with a warranty. For ultimate assurance, an NRCIA LeakFREE® roof certification provides the only standardized roof warranty in the industry, giving you guaranteed protection against future leaks and costly surprises.
Prepare Your Roof for Every Season
Your roof faces different challenges with each changing season, so a little year-round prep goes a long way. Start by keeping your gutters clean and free of debris. When gutters get clogged, water can pool and seep under the edges of your roof, leading to rot and leaks. It’s also smart to trim back any tree branches hanging over your house. This prevents them from scraping off shingle granules or breaking and falling onto the roof during a storm. In colder climates, watch for ice dams in the winter, and ensure your attic has proper ventilation to handle summer heat.
Related Articles
- Your Guide to a Roof Leak Cause Analysis Report
- 5 Steps for Roof Leak Cause Determination
- What Causes a Roof to Leak? 8 Common Culprits
Frequently Asked Questions
How often should I have my roof professionally inspected? Think of a roof inspection like a routine check-up. It’s best to have a professional look at your roof twice a year, once in the spring and again in the fall. This helps you prepare for the harshest weather of summer and winter. You should also always schedule an inspection after any major weather event, like a hailstorm or severe windstorm, just to make sure no hidden damage was left behind.
My leak only shows up during heavy, driving rain. Can I ignore it otherwise? Even a small leak that only appears occasionally is a sign that your roof’s defenses have been breached. Water is getting in, and every time it does, it can soak into your roof decking, insulation, and wooden frame. This can lead to wood rot and mold growth over time, even if you don’t see a constant drip. It’s best to treat any leak as an urgent warning sign that needs a professional assessment.
Will my homeowners insurance always cover the cost of a roof leak repair? Not always. Insurance policies are designed to cover sudden and accidental damage, such as a tree branch falling on your roof or shingles being torn off in a windstorm. They generally do not cover leaks that result from old age, wear and tear, or a lack of regular maintenance. This is why documenting damage right after a storm and keeping up with inspections is so important for a successful claim.
What’s the real benefit of a roof certification over just a standard inspection? A standard inspection gives you a report on your roof’s condition at a single point in time, which is very useful. A roof certification, however, takes it a step further. It confirms that your roof meets a specific set of quality and performance standards. An NRCIA LeakFREE® certification also comes with a warranty, which provides you with guaranteed protection against leaks for a set period. It’s the difference between getting a report and getting a promise.
I used a temporary patch on a leak. How long can I wait before getting a professional repair? A temporary patch is a great first-aid measure, but it is not a permanent solution. It’s designed to protect your home from further damage for a very short time, ideally just a few days, until a professional can arrive. You should call for a proper repair as soon as possible. Waiting too long risks the patch failing during the next storm or allows moisture that is already trapped to cause more serious problems.