Filing an insurance claim can feel like you’re playing a game where you don’t know the rules. A simple mistake in your initial report can lead to delays, disputes, or a lower settlement than you need. The most common pitfalls are often the easiest to avoid with a little preparation. A detailed roof damage report for your insurance claim is your best defense against a frustrating process. It sets a professional tone and shows your insurer you are serious and organized. This article will cover the essential steps for creating a powerful report, helping you sidestep common errors and confidently manage your claim from start to finish.
Key Takeaways
- Document Everything Immediately: A strong insurance claim starts with solid proof. Create a detailed record with clear photos, a timeline of events, and specific notes on all damage to build a case your insurer can’t ignore.
- Get an Expert Opinion Before You File: Don’t rely solely on your own assessment. A report from a certified inspector provides credible, unbiased evidence that identifies all damage—even hidden issues—and gives your claim the professional backing it needs.
- Advocate for a Fair Settlement: Your job isn’t over once you file the claim. Be present for the adjuster’s visit, use your documentation to support your case, and be prepared to negotiate for a settlement that truly covers the full cost of repairs.
What Is a Roof Damage Report and Why Do You Need One?
A roof damage report is a detailed document that outlines the condition of your roof, usually after a storm or another damaging event. Think of it as the official story of what happened to your roof and the evidence to back it up. This report is absolutely essential when you need to file an insurance claim. It provides your insurance company with a clear, comprehensive picture of the damage, which is the first step toward getting the funds you need for repairs. It’s the foundation of a successful claim.
Without a thorough report, you’re essentially asking your insurer to take your word for it, which can lead to delays, disputes, or a lower settlement than you deserve. A well-prepared report, on the other hand, sets a professional tone and shows you’re serious about your claim. It serves as your primary tool for communicating the extent of the damage, ensuring that nothing is overlooked. Whether you’re a homeowner facing unexpected repairs or a contractor helping a client, understanding how to create and use this document is key to a smooth and successful claims process. It’s your best defense against a drawn-out, frustrating experience and the best way to ensure your property is restored correctly.
Protect Your Investment with Solid Documentation
Your home is one of your biggest investments, and your roof is its first line of defense. When it’s damaged, protecting that investment starts with solid documentation. A detailed report is how you can get the money you need from your insurance company to make things right. This means going beyond a few quick photos. You should capture everything you can right after the storm, including pictures and videos from multiple angles. It’s also smart to keep detailed notes about the weather event, jot down any temporary fixes you make to prevent further damage, and hang on to all your receipts. This level of detail strengthens your claim and shows you’ve done your due diligence.
How a Strong Report Influences Your Claim
A strong, detailed report does more than just list damages; it can significantly influence the outcome of your claim. When you present a thorough file, you’re less likely to face pushback from your insurance company. Being meticulous with your documentation can help prevent arguments and speed up your claim. It shows the adjuster you have a clear and organized case. Plus, if the initial settlement offer seems too low, your comprehensive report—along with estimates from a trusted contractor—becomes your most powerful negotiation tool. It gives you the concrete evidence needed to advocate for a fair amount that truly covers the cost of repairs.
What to Include in Your Roof Damage Report
Think of your roof damage report as the foundation of your insurance claim. A strong, detailed report tells a clear story, leaving no room for doubt or misinterpretation. It’s your primary tool for showing the insurance adjuster exactly what happened, the extent of the damage, and why a full repair or replacement is necessary. Without it, you’re relying on memory and hoping the adjuster sees things the same way you do. A thorough report puts you in control of the narrative.
Putting together a comprehensive file isn’t just about listing what’s broken. It’s about building a solid case backed by indisputable evidence. This includes everything from the specific weather event that caused the damage to high-quality photos and a detailed timeline of every action you’ve taken since. A well-organized report makes the claims process smoother for everyone involved and significantly improves your chances of getting a fair settlement without unnecessary delays. For the roofing professionals and property stakeholders we work with, a meticulous report is the mark of a true professional.
Key Damage Details and Measurements
When you start documenting, get as specific as possible. Your goal is to paint a vivid picture of the damage for someone who isn’t there to see it in person. Go beyond general statements and note the exact issues you find. Be sure to “look for cracked or missing shingles, water stains (leaks), sagging roof parts (structural damage), or broken gutters.” Don’t just say “shingles are damaged”; instead, write “12 cracked shingles and 5 missing shingles on the north-facing slope.” Measure the size of dents in flashing or gutters. If there are water stains on your ceiling, measure their dimensions. This level of detail removes ambiguity and provides concrete data for the adjuster to work with.
Document the Weather Event
Context is everything. Your insurance company needs to connect the damage to a specific, covered event. Start by noting the exact date and time the storm occurred. Was it a hailstorm, a windstorm, or a blizzard? Check local weather archives to find specifics like the reported wind speed or the size of the hail. It’s also a good time to review your policy. As experts at Payne Law note, “you need to understand what your insurance policy covers and what it doesn’t, including your deductible and any special rules for wind or hail damage.” Documenting the weather event helps confirm that the damage falls under your coverage.
Capture Clear Photographic Evidence
Photos are your most powerful evidence. A clear visual record can make or break your claim. As the team at Frontline Roofing advises, “Take clear photos: Use a good camera or phone. Take pictures from different angles. Get both close-up shots of specific damage and wide shots to show the overall area.” Make sure your photos are in focus and well-lit. For scale, place a ruler or coin next to hail dents or cracks. Remember to enable the date and time stamp on your camera or phone. This simple step validates when the photos were taken, adding another layer of credibility to your report.
Note All Dates and Create a Timeline
From the moment the damage occurs, start a log. This timeline will become the backbone of your claim, organizing every detail into a clear, chronological story. “Keep detailed notes about the storm, any temporary fixes, and all receipts. Also, write down dates and key points from conversations with insurance adjusters or contractors.” Document every phone call: who you spoke to, the date, and what was discussed. This detailed record prevents confusion and ensures all parties are held accountable. Using professional inspection software can also help you keep all your notes, photos, and documents organized in one place.
How to Assess and Document Roof Damage: A Step-by-Step Guide
After a storm or incident, figuring out where to start can feel overwhelming. But creating a clear record of the damage is one of the most important things you can do for your insurance claim. Think of yourself as a detective gathering evidence. A thorough, well-documented report makes the entire process smoother for both you and your insurance adjuster. We’ll walk through exactly how to assess and document the damage, one step at a time.
Step 1: Prioritize Safety Before You Start
Your safety is non-negotiable. Never climb onto a roof you suspect is damaged, as it could be structurally unstable. You can get a surprisingly detailed view from the ground using a pair of binoculars or even a drone if you have one. Look for obvious signs of trouble like missing shingles or large holes. If you absolutely must use a ladder, make sure it’s secure and have someone spot you. Remember, no photo is worth an injury. A professional roof inspector has the training and equipment to perform a close-up inspection safely.
Step 2: Assess Damage from the Inside
Your assessment should actually begin inside your home, particularly in the attic if it’s accessible. Grab a flashlight and look for signs of water intrusion. This could be damp insulation, dark stains on the wood, or visible drips. Check the ceilings in the rooms below for water spots, discoloration, or peeling paint, as these are classic signs of a leak. Documenting these interior issues is crucial because it directly connects the exterior roof damage to problems inside your home, strengthening your claim. It’s important to identify these signs early to prevent further damage like mold growth.
Step 3: Inspect the Exterior of Your Roof
Once you’ve checked the interior, move outside to examine the roof’s exterior from the ground. Walk around the entire perimeter of your property. Look for shingles that are missing, cracked, curled, or bruised from hail. Check your gutters and downspouts for an accumulation of asphalt granules—a sign of significant shingle wear. Also, inspect flashing around chimneys, vents, and skylights for any signs of damage or separation, as these are common failure points. Taking note of every little detail helps build a complete picture of the storm’s impact on your property.
Step 4: Take Effective Photos from Every Angle
Clear, comprehensive photos are the backbone of your report. Use your smartphone or a camera to document everything you found, both inside and out. For the exterior, take wide shots of each side of the roof to provide context, then zoom in for close-ups of specific damage points like dented flashing or lifted shingles. Place a ruler or coin next to smaller impacts for scale. Inside, photograph any water stains or damage to ceilings and walls. Good lighting is key, so open curtains or use a flash to ensure your photos are clear and detailed. This visual evidence is invaluable when you file your claim.
4 Common Mistakes to Avoid When Reporting Roof Damage
Filing an insurance claim for roof damage can feel overwhelming, but knowing what not to do is just as important as knowing what to do. A few simple missteps can delay your claim, reduce your settlement, or even lead to a denial. Let’s walk through the most common mistakes homeowners make so you can handle your claim with confidence and get the funds you need for repairs. By avoiding these pitfalls, you put yourself in the best position for a smooth and successful claims process.
Mistake #1: Incomplete Documentation
Think of your insurance claim as a case you need to prove, and your documentation is the evidence. Good documentation is essential to getting the money you need from your insurance company to fix your roof. It’s critical to document all damage early and accurately with photos, videos, and detailed written notes. A weak or incomplete report leaves room for your insurer to question the extent of the damage or its cause. Be thorough from the very beginning. Take more photos than you think you need and write down every detail, no matter how small it seems.
Mistake #2: Waiting Too Long to File
When you discover roof damage, time is not on your side. The sooner you file your claim, the better. Most insurance policies have specific timelines for reporting damage, and missing that window could result in an automatic denial. Waiting too long can also make it harder to prove a specific storm caused the damage. Worse, any secondary issues that arise from the delay, like water damage or mold growth inside your home, might not be covered. As soon as it’s safe, assess the damage and contact your insurance provider to start the claims process.
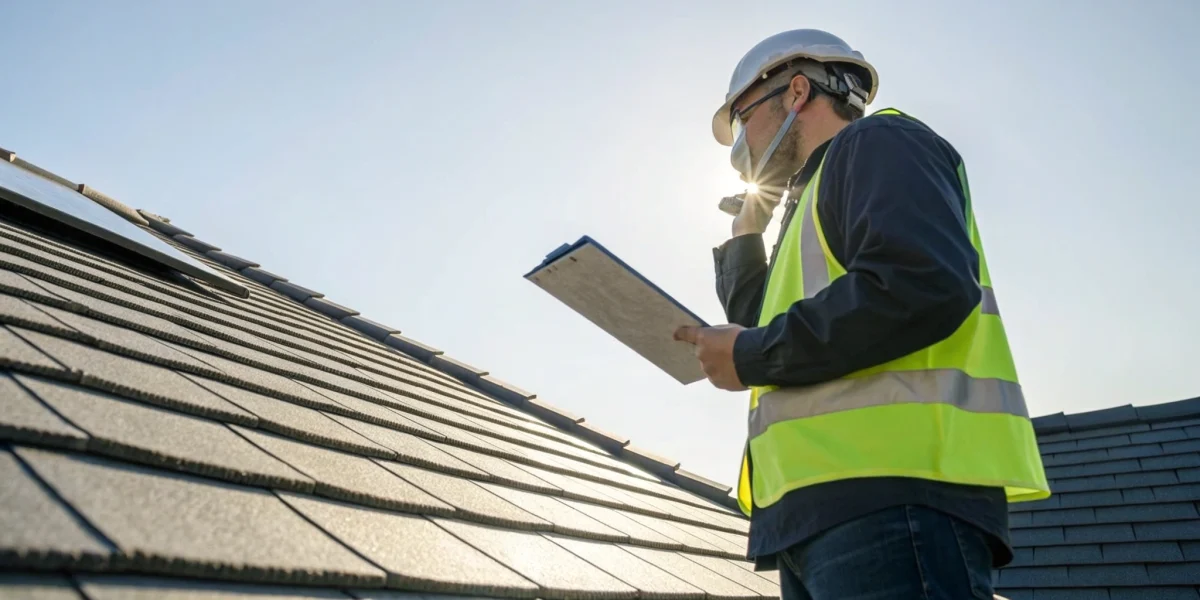
Mistake #3: Skipping a Professional Inspection
It’s tempting to call your insurance company immediately after a storm, but it’s wise to pause and call a professional first. Before filing a claim, get an inspection from a qualified roofing expert. A professional can provide you with an unbiased assessment, photos, a repair estimate, and a formal report. This step helps you understand if the damage is significant enough to warrant a claim and gives you valuable proof to present to your insurance adjuster. An NRCIA Certified Inspector provides a standardized, detailed report that holds up under scrutiny, giving you a clear and credible foundation for your claim.
Mistake #4: Communicating Poorly with Your Insurer
How you interact with your insurance company can directly impact your settlement. Don’t be a passive observer in your own claim. When the insurance adjuster schedules a visit to inspect your roof, make sure you are there. Walk the property with them, point out all the areas of damage you’ve documented, and ask questions. If the insurance company’s initial offer seems too low, don’t just accept it. Use your detailed documentation and the estimates from your roofing contractor to negotiate for a fair amount. Clear, proactive communication is your best tool for ensuring you receive a settlement that fully covers your repairs.
How to Organize and Present Your Roof Damage Report
A well-organized report is your most powerful tool in the insurance claim process. It transforms a collection of notes and photos into a clear, professional narrative that an insurance adjuster can easily understand and act on. Think of it as building a solid case for your claim—the more organized and thorough you are, the smoother the process will be. Presenting your information logically helps prevent misunderstandings, reduces back-and-forth communication, and sets a professional tone from the start. This preparation demonstrates that you’ve done your homework and are serious about getting a fair assessment of the damages.
Create a Clear Timeline of Events
Your report should tell a story, and every good story has a clear beginning, middle, and end. A timeline of events provides crucial context for the insurance adjuster. Start with the date and time of the weather event that caused the damage. Then, log the date you first discovered the issue, any steps you took for temporary repairs (like placing a tarp), and the dates of all communication with your insurance company. It’s vital to document all damage early and accurately. This chronological record helps eliminate confusion and shows exactly how the situation has unfolded, making it easier for the adjuster to connect the dots.
Structure Your Written Report for Clarity
An adjuster reviews dozens of claims, so make yours easy to digest. Start with a cover page that includes your name, address, and policy number. Inside, use clear headings to break up the information, like “Interior Water Damage” or “Damage to North Roof Slope.” For each section, write detailed descriptions explaining exactly where the damage is and how severe it appears. Note the weather conditions when the damage occurred and what you believe caused it. Using bullet points to list specific issues, like missing shingles or dented flashing, can make your report scannable and straightforward.
Organize Your Photos and Evidence
Visual evidence is undeniable. Your photos and videos should support every point you make in your written report. Take clear, well-lit pictures from various angles—get close-ups to show specific damage and wider shots to provide context for the location. It’s a great practice to enable the date and time stamp on your camera or phone. To keep things organized, create digital folders that correspond to the sections in your report. Label each photo file with a descriptive name (e.g., “Living_Room_Ceiling_Stain.jpg”). This simple step makes it easy for you and the adjuster to match the visual proof to your written descriptions.
Prepare for the Insurance Adjuster’s Visit
Your preparation culminates in the adjuster’s on-site inspection. Make every effort to be present for this visit. It’s your opportunity to be a guide, not just a bystander. Have a printed copy of your report and photos ready to hand them. Walk the property with the adjuster, pointing out the specific areas of damage you documented. This ensures nothing is overlooked and allows you to answer questions on the spot. Being there shows you are an active participant in the process and helps build a productive relationship with the person evaluating your claim. This is a key step for all the people we serve, from homeowners to property managers.
When to Hire a Professional Roof Inspector for Your Claim
While your own documentation is a great starting point, there are times when calling in a professional is the smartest move you can make for your insurance claim. An expert assessment can be the difference between a quick approval and a lengthy dispute. Insurance adjusters deal with claims all day, and they can spot an amateur report from a mile away. Bringing in a certified inspector levels the playing field, providing your claim with the credibility it needs.
A professional report isn’t just a list of damages; it’s a comprehensive analysis that includes the cause of the damage, the scope of necessary repairs, and cost estimates backed by industry knowledge. This detailed documentation is exactly what insurance companies need to see to process your claim efficiently and fairly. Think of it as an investment in getting the full settlement you’re entitled to, ensuring your home is properly repaired without cutting corners. For many homeowners and property managers, this step provides invaluable peace of mind during a stressful time.
When the Damage Is Complex or Unclear
If you’re looking at your roof and can’t tell where the damage begins or ends, it’s time to call a professional. Subtle issues like hail bruising, compromised seals, or wind-lifted shingles aren’t always obvious to the untrained eye but can lead to major leaks down the road. The same goes for safety. If you can’t safely get on your roof to inspect it, a professional is your best bet for getting a thorough and accurate assessment. Their written report will give you a clear picture of the situation, which is exactly what you need to build a strong insurance claim.
The Advantage of an NRCIA Certified Inspector
Not all inspections are created equal. When you work with an NRCIA certified inspector, you’re getting more than just a roofer’s opinion. You’re getting an expert who has undergone rigorous, standardized training to assess roof conditions accurately and without bias. An NRCIA inspector provides a detailed report and a precise estimate for repairs, which adds significant weight to your claim. Insurance companies recognize the credibility of our certifications, making the entire process smoother. This professional backing shows you’ve done your due diligence and are serious about restoring your property correctly.
Gain Professional Documentation and Warranty Protection
The ultimate goal of your report is to secure the funds needed to fix your roof, and solid documentation is the key. A professional inspection report from an NRCIA member provides the clear, evidence-based information your insurer needs to approve your claim. But the benefits don’t stop there. After the repairs are done, you can get a LeakFREE® roof certification, the only standardized roof warranty in the industry. This gives you lasting protection and peace of mind long after the storm has passed and the claim is closed. It’s also a valuable asset if you ever decide to sell your property.
How to Communicate Effectively with Your Insurance Company
Once your roof damage report is complete, the next step is communicating with your insurance company. This process can feel intimidating, but with your detailed documentation in hand, you’re in a strong position. Think of your report as your script—it has all the facts and evidence you need to have a productive conversation and advocate for a fair outcome. The key is to be organized, clear, and persistent. Let’s walk through how to handle these crucial conversations, from the initial adjuster meeting to handling any disputes that might come up.
Tips for a Productive Adjuster Meeting
When the insurance adjuster schedules a visit, try your best to be there. Your presence is invaluable. You can walk them through the damage you’ve documented, point out specific areas of concern they might otherwise miss, and answer their questions on the spot. This isn’t about being confrontational; it’s about being a helpful resource. Have your report, photos, and any contractor estimates ready for them to review. Providing the adjuster with a complete package of information makes their job easier and shows that you’ve done your homework. This simple act of preparation can set a positive and collaborative tone for the entire claims process.
Use Your Report to Negotiate a Fair Settlement
After the adjuster’s inspection, you’ll receive a settlement offer. If it aligns with your contractor’s estimates and covers the damage, that’s great. However, if the offer seems too low, don’t panic. This is where your detailed report becomes your most powerful negotiation tool. Refer back to your photos, measurements, and professional estimates to build a fact-based case for a higher amount. Present your evidence clearly and calmly, explaining why the initial offer is insufficient to cover the necessary repairs. A thorough report from a certified roof inspector can add significant weight to your position, demonstrating that your assessment is based on a professional evaluation.
How to Follow Up and Handle Disputes
If your claim is denied or the settlement offer remains too low after your initial negotiation, you still have options. You have the right to dispute the decision. Start by asking the insurance company for a detailed written explanation of their reasoning. Sometimes, a simple follow-up with additional information can resolve the issue. If you disagree with the adjuster’s findings, consider getting a second opinion. An NRCIA inspector can provide an unbiased assessment that can be used in an appeal. Remember to keep a record of every conversation, including dates, times, and the names of people you speak with, to maintain a clear and organized file for your dispute.
Tools and Resources to Simplify Your Roof Damage Report
Putting together a roof damage report can feel like a huge task, but you don’t have to do it alone. Several tools—some you already own and others used by professionals—can make the process much smoother. Using the right resources helps you build a clear, comprehensive report that gives your insurance claim the best chance of success.
Your Smartphone: A Powerful Reporting Tool
The most valuable tool for documenting roof damage is probably already in your pocket. Your smartphone is perfect for capturing the high-quality photo and video evidence your insurer needs to see. When you take pictures, be sure to get a mix of wide shots to show the overall context of the damage and close-ups to highlight specific issues like missing shingles or hail dents. It’s also a great idea to turn on the date and time stamp feature in your camera settings. This automatically adds a layer of credibility to your documentation, proving when the photos were taken. Take more photos and videos than you think you’ll need—it’s always better to have too much evidence than not enough.
The Benefits of Professional Inspection Software
While your phone is great for initial documentation, professional-grade tools take your report to the next level. Certified inspectors use specialized inspection software to create detailed, standardized reports that insurance companies understand and trust. This software guides the inspector through a comprehensive checklist, ensuring no detail is overlooked. The result is an objective, data-backed report that clearly outlines the extent of the damage with consistent formatting. For homeowners, hiring an inspector who uses this technology means you get a credible, professional assessment that can significantly strengthen your claim and streamline the approval process. It removes the guesswork and presents the facts in a clear, undeniable way.
Checklists and Tools to Keep You Organized
Staying organized is one of the most important parts of the insurance claim process. Start by creating a dedicated folder, either physical or digital, to store everything related to your claim. Create a simple checklist of items to gather: photos and videos, receipts for any temporary repairs like tarps or plywood, and a written timeline of the storm and when you discovered the damage. It’s also helpful to include any past invoices or maintenance records for your roof, as this provides a clear history of its condition before the damage occurred. Keeping all your documents in one place makes it easy to find what you need when you’re talking to your insurance adjuster and helps you present a complete, well-supported case.
Related Articles
- Roof Inspection for Insurance Claim: A Guide
- Roof Failure Analysis 101: A Complete Guide
- Free Roof Inspection Report for Insurance PDF Template
- Hail Damage Roof Inspection for Insurance: A Guide
Frequently Asked Questions
What if the damage seems minor? Is it still worth getting a professional inspection? Yes, absolutely. Some of the most significant types of roof damage, like hail bruises or wind-lifted shingles, are nearly impossible to spot from the ground and can lead to slow leaks over time. A professional inspector can identify these hidden issues before they become major problems. Getting an expert opinion ensures you have a complete picture of the storm’s impact, which is crucial for deciding whether to file a claim and for ensuring your home is truly secure.
Is it okay to make temporary repairs before the insurance adjuster arrives? You should definitely take reasonable steps to prevent further damage to your home, such as placing a tarp over a hole in the roof. In fact, most insurance policies require it. The key is to document everything thoroughly first. Take clear photos and videos of the original damage before you cover it up. Also, be sure to keep all receipts for any materials you buy for these temporary fixes, as these costs are often reimbursable under your claim.
My insurance company is sending their own adjuster. Why would I need a separate report from an inspector? The adjuster sent by your insurance company works for them, and their job is to assess the damage from the insurer’s perspective. Hiring your own NRCIA certified inspector means you have an independent expert working for you. They provide an unbiased and highly detailed assessment to ensure nothing is overlooked. This report serves as your own powerful evidence, helping to level the playing field and ensure your interests are fully represented throughout the claims process.
How is a detailed roof damage report different from a simple repair estimate from a contractor? A repair estimate typically just lists the services needed and their costs. A comprehensive roof damage report does much more. It tells the complete story of what happened by including extensive photographic evidence, specific measurements, details about the weather event, and an analysis of both obvious and subtle damage. This thorough documentation is designed to serve as the foundation of your insurance claim, providing the proof needed to justify the full scope of repairs.
How long do I have to file a claim after a storm? The timeframe for filing a claim varies depending on your specific insurance policy and state laws, but the universal rule is to act as quickly as possible. Most policies require you to report damage “promptly” or within a “reasonable” time. Waiting too long can make it more difficult to prove that a specific storm caused the damage and could even jeopardize your claim if you miss the deadline outlined in your policy. It’s best to review your documents or call your agent right away to understand your specific obligations.