There are two ways to add observations and notes to inspection photos. Manage Gallery (multiple photos at once) & Observations (one photo at a time). In this guide, we will cover how to add observations to multiple photos at once using Manage Gallery.
Click here to view our guide to adding notes to one photo at a time using Observations.
Use the Manage Gallery section when you want to add a note to multiple photos at a time. This is helpful for generalized observations for a section of the inspection. Remember to group your photos by inspection zone (interior, attic, garage, perimeter, rooftop) to create a cohesive inspection report.
Select Photos
Attach Sections
Add Observations
Select Determination (roof Only)
Below are detailed steps to add observations to multiple photos at one time
Select “Manage Gallery”

Select photos for observation
Clicking the checkbox next to the photo will select/unselect the photo. There is no limit to the number of photos you can select at one time. Remember to only select photos that are within the same inspection zone (interior, attic, garage, perimeter, rooftop)
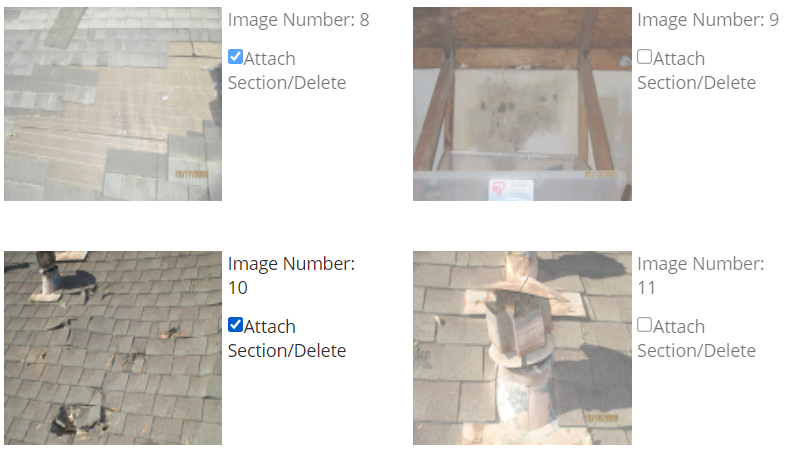
Attach photos together
Near the top of the inspection window, select the “Attach selected images to section”. This will create a pop-up window with your selected photos attached.

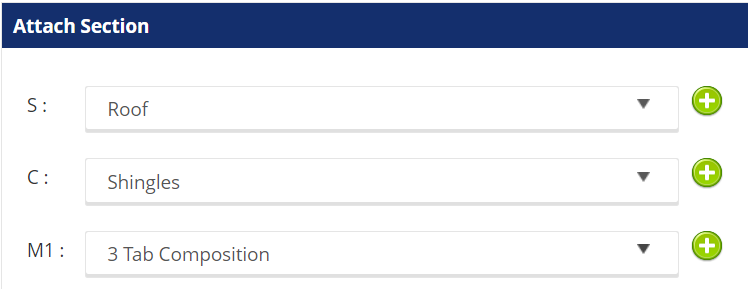
Attach sections
When adding in your section components and observation notes, remember that your wording will be applied to each photo. You can edit them individually later if you want to add more detail.
Tip: When starting an inspection, use this feature to quickly organize your photos by zone by completing the S, C, and M only. You do not need to add the observation notes right away.
Select the S, C, M
S = Section. What zone are we looking at?
C = Component. What roofing component are we looking at?
M = Material. What material is the roofing component made of?
We recommend that you do not add specific notes to the S, C, and M sections (example: setting M to “Damaged Composition Shingles”). Instead, add any specifics to the Observation Entry.
Adding new S, C, Ms
If you can’t find the proper S, C, or M for your photo, you can always create a new one using the green plus arrow to the right of the form.
Click the button and type in the description (make sure there are no spelling errors and we recommend capitalizing the first letter of each word). Click add to save it to the database and then go back to the menu to find the new item you created.
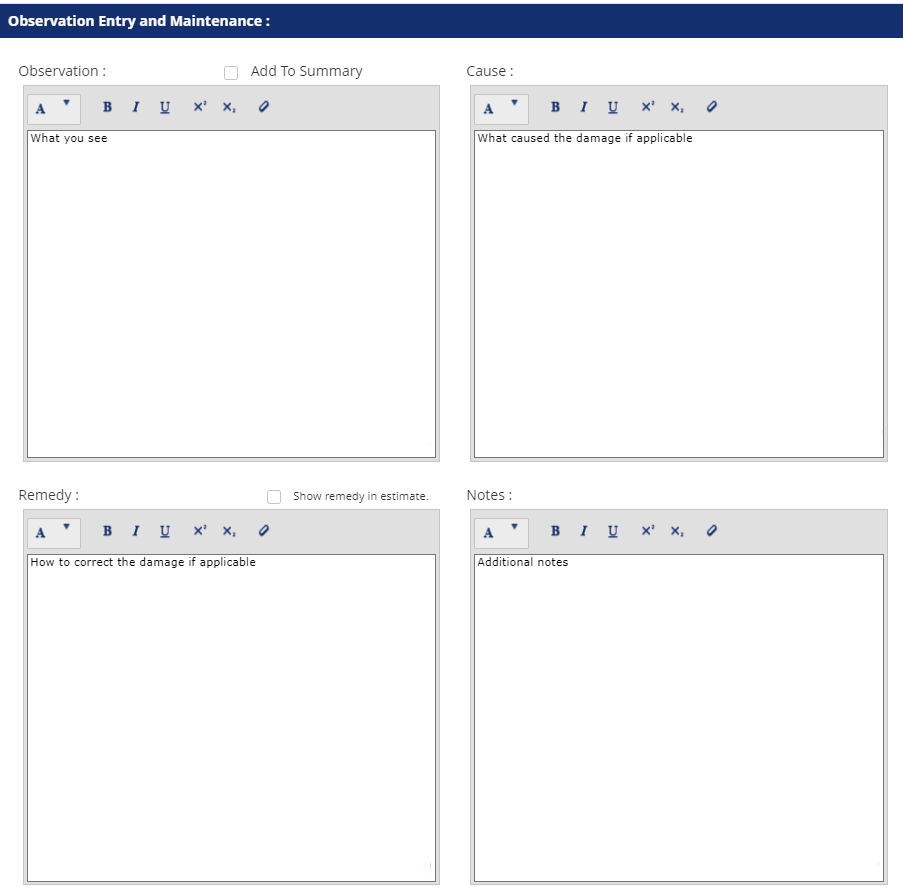
Add the observation notes
There are four sections for observation notes. You are not required to complete all 4.
Adding observations to summary
You can create a summary page for your clients so they easily understand the condition of their roof. You can do this for both individual and grouped observations.
To add to the summary, click the check box next to observation. A window will pop up asking you to summarize the condition or cause of the observations for the photo(s)
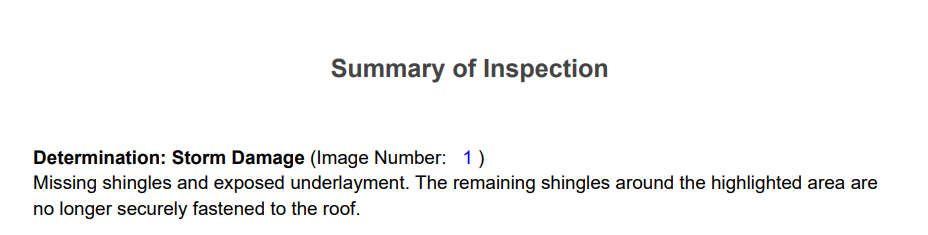
After adding the observation to the summary you can view what it looks like with the Preview Report feature. Here is an example:
Showing remedy in the estimate
You can quickly build proposals for clients by filling out the recommended repairs to remedy the damage. If you select the “show remedy in estimate” then it will create a line item in the Proposals tab.

To view the remedy and finalize the estimate, go to the Proposal tab located on the left-hand menu and then select the edit icon for the appropriate remedy.

After adjusting the details within the quote, click update and you can review the pricing changes on the menu.

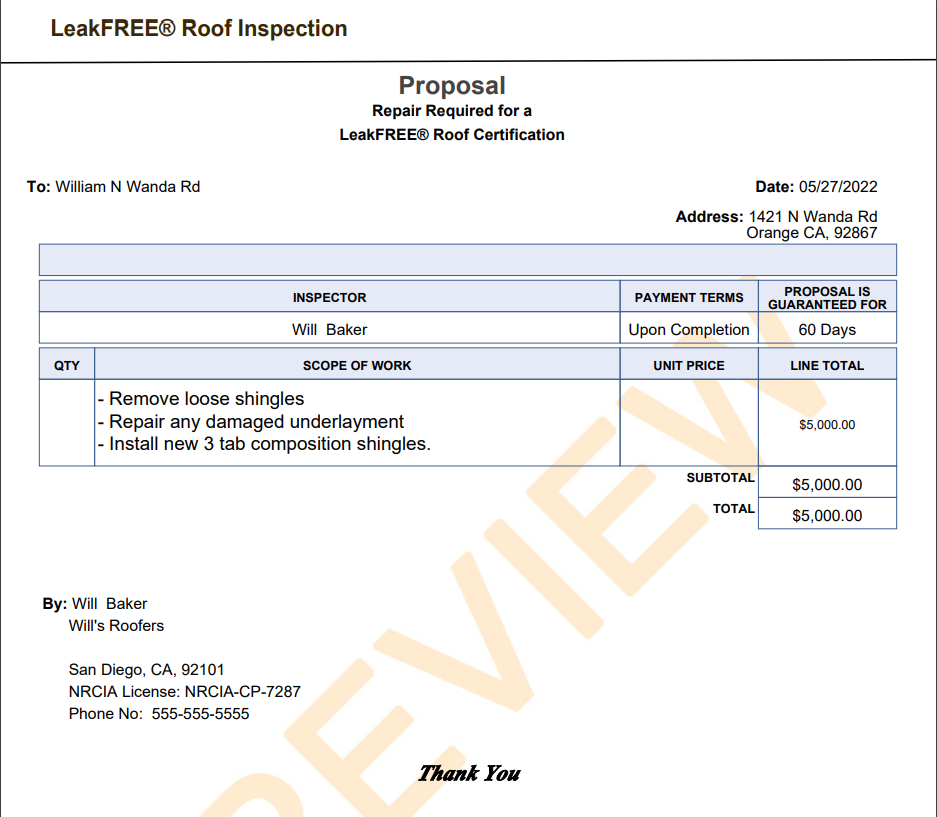
Quotes will generate a proposal which will be added to the inspection report by default (to hide click the green check under show report). Here is an example of what the end proposal will look like.
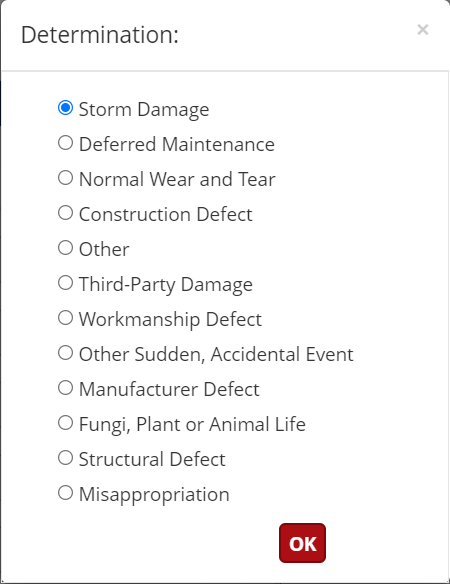
Selecting the Determination (Roof zone only)
The determination section will only appear if you are adding observations to photo(s) that were marked as roof in the Attach Section

There are 3 types of determinations
Roof Repair Required for Certification
Roof Replacement Required for Certification
Not Required
If the client is not requesting a LeakFREE® roof certification or if you are not interested in being liable for a LeakFREE® certification select “Not Required”
Select “Add” to save
Bonus: Saving observations to the library
The observation library is a tool to help you complete inspection reports faster over time. The NRCIA will update the standard library, but you are also able to create and save your own templates.
Note: the library saves and pulls up conditions based on how you set S, C, and M in the Attach Section
Using the library
To add in a saved condition, simply click the condition you want to use. You can adjust any of the notes after adding the condition without affecting the saved condition.
Saving conditions to the library
You can save new observations to the library using the “Save to Library” button. Remember that saved observation conditions are based on the S, C, and M. It is also recommended to save generalized notes that can apply to multiple situations
Feeling overwhelmed by the options and choices? Contact support@nrcia.org to set up a workshop for 1-to-1 help!